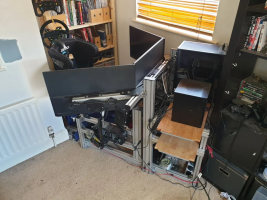
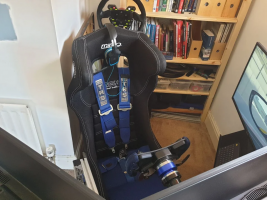
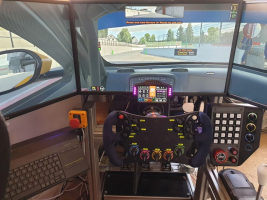
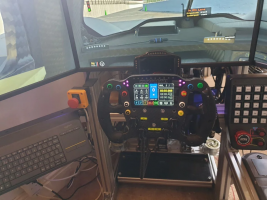
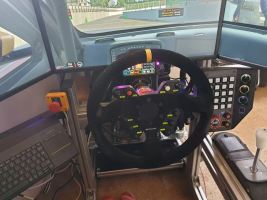
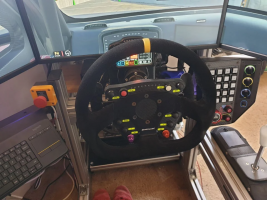
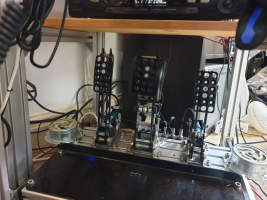
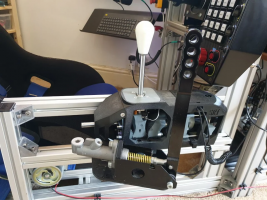
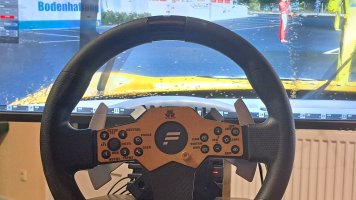
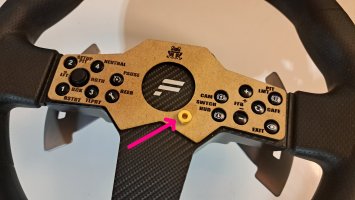
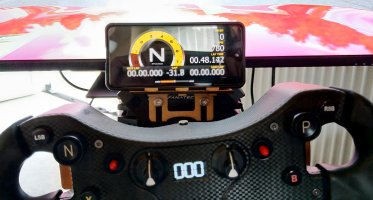
Show us your Rig / Cockpit

Wanted to share my rig here as I’d gotten it to a point that I’m particularly happy with it.
Partly because it’s 100% DIY hardware.

Rig: Custom design 8020. Uses a few brackets from Motedis, pedal side mount from ProSimRig and a handbrake mount from trackracer.
Seat is a Mirco RS2.

Wheelbase: 20Nm OSW (Project BruteForce2 Ioni based). The only bit of hardware I didn’t directly build, I was looking at an AASD system but this came up 2nd hand at a good price. Precursor to the simucube 1.

Pedals: Found on grabCAD and later modified with billet pedal faces and hall effect sensors for the throttle and clutch. Electronics are LeoBodnar in a custom designed enclosure.

Shifter: Lebois SRT V9 shifter with a small mod to prevent side movement in sequential mode.

Display: Velocitas Imperium C5-DDU. Built without the optional PCB to keep the cost low. Original mount didn’t quite work for my layout so I ended up designing my own.

Handbrake: Really basic, just a potentiometer and a spring in a cheap hydraulic. This was my first DIY project and one on the list for a rebuild.

Button Box: Pokornyi GTE Button Box. Built without modification. Simple enough build and my first time ordering carbon.

Bass Shakers: 4x Rockwood body shakers and a 2nd hand Sony Amp running through Simhub.

Wheels:
Pokornyi LMP Pro: Part finished but enough to function. Currently missing the clutch paddles and coverings for the grips.
Pokornyi WLS GT3: Slightly modified to use a LeoBodnar board and CTS288 encoders.
Am Studio AMG GT3: My first DIY build. Later modified with shifters similar to the Pokornyi ones.
320mm D: Custom design using a Symprojects ProRace Micro for LEDs and a LeoBodnar board. Less useful on a lot of modern cars but used with the 991 cup car a bit.
320mm Round: Simple custom design using a LeoBodnar board. Used mostly for rally and touring cars.
Assorted others: Couple of custom PCD adaptors and some simple wheels. used for stockcar, classics and entry level single seaters.
 

Attachments

  • 1689604684793.png
    1689604684793.png
    908.2 KB · Views: 438
  • 1689604692857.png
    1689604692857.png
    753.7 KB · Views: 445
  • 1689604704122.png
    1689604704122.png
    849.3 KB · Views: 394
  • 1689604716129.png
    1689604716129.png
    668 KB · Views: 390
  • 1689604724604.png
    1689604724604.png
    797.2 KB · Views: 387
  • 1689604732785.png
    1689604732785.png
    773.7 KB · Views: 388
  • 1689604743022.png
    1689604743022.png
    745.7 KB · Views: 381
  • 1689604752390.png
    1689604752390.png
    761.6 KB · Views: 401
  • 1689604761997.png
    1689604761997.png
    784.6 KB · Views: 388
  • 1689604820434.png
    1689604820434.png
    798.5 KB · Views: 451
wow. I have managed to get my own DIY 6030 rig in a very small space and I am pretty proud of what I have achieved but you man, its amazing.
now the silly question, how the hell do you get in there to actually drive:confused:
 
wow. I have managed to get my own DIY 6030 rig in a very small space and I am pretty proud of what I have achieved but you man, its amazing.
now the silly question, how the hell do you get in there to actually drive:confused:
Thanks
Also everyone asks that heh
The whole rig is at an angle so while it doesn't show well in these photos there's a larger than expected gap between the right screen and wall, can kind of see it in the 2nd photo.
To get in is still a little awkward though. I side step past the screen then step over the shifter mounting and into the seat.

I did for a while have it the other way around which was easier to get in but block off the gap at the end (which I couldn't get the rig in due to the width of the triples)
This layout allows me to have that bookshelf to store wheels, books and spares for the rig as I can step through the rig and stand on the other side of the seat

*EDIT*
Added a photo of the gap to get in which is about as wide as I am
 

Attachments

  • 1689716777302.png
    1689716777302.png
    833.8 KB · Views: 162
Last edited:
My rig is very much a work in progress but I thought it worthwhile to show what I have done for a racing wheel and shifter.

The PC racing wheel is a G920 with a Nardi "Personal" model DG-00 that I got some time ago with a car attached to it. The Nardi had black anodized spokes with a maple-colored (i.e. quite orange) rim that didn't match the black car interior. (What were they thinking?!?!)

I stripped the wood and painted the rim black. I also decided to add a sew-on leather rim cover before mounting to the G920. I designed my own adapter so I could keep the horn button, but eBay had one that has the same functionality. Aside from needing to maximize the force feedback settings because of the larger & heavier steering wheel it works quite well.

The shifter is a "generic" one, but modified to duplicate the "look and feel" of the car shifter shown in the photo below. A steel rod was cut & bent, the ends tapped M8, and it was joined to the shifter rod with suitable coupling nut, lock washers and standard-type nuts. Because the car shifter I am duplicating is a 5-speed with a specific pattern, an easily removable plastic washer was added to lock out 6th gear and was secured with a button-head screw & nut.

IMHO, the longer shift rod significantly improves the feel of this shifter.

I'll post more on the rig/cockpit as it takes shape. For now, I'm just using those items secured to modified commercial-type metal business desk equipped with (3) 22-inch monitors.

IMG_4597aa.jpg
IMG_4598aa.jpg
DSCN0706crop+edit-A.jpg
IMG_1477a.jpg
IMG_4595aa.jpg
IMG_4599aa.jpg
IMG_4601aa.jpg
IMG_4603aa.jpg
 
  • Deleted member 197115

Apparently the Q1R isn’t patented and Cube Controls copied the design 1/1 with no permission, I find out afterwards watching this video, even the 2 parts go together like Q1R base side fits Cube wheel side, awesome kit though it’s got 50/70mm offset both sides.
Just confirming that CubeControl wheel side is 100% compatible with Buchfink Q1R base side and available in Microcenter. It says base side but it's actually wheel side.
Much cheaper for US folks than ordering from some EU places like Ascher Racing
 
  • Like
Reactions: CC
Just confirming that CubeControl wheel side is 100% compatible with Buchfink Q1R base side and available in Microcenter. It says base side but it's actually wheel side.
Much cheaper for US folks than ordering from some EU places like Ascher Racing
Yeah I had loads in the end maybe like 12, they fit perfect, like 100% exact same thing, the Cube one colours I like so stuck to these but lost them all now these wheels was left in Ukraine sadly
 
This is my "qick'n dirty" keyboard holder. Made of 3mm plywood with a laser cutter. Mounted with office-clamps on my Fanatec CSL DD.
Today I made a template for one of my wheels. It's made of thicker paper and the laser cutter only needs a minute. It is fixed with a magnet on one of the wheels screws so the templates can be replaced easyly.
The idea was to write the key-bindings for several games on it. But it also looks pretty cool.
I also made one of wood, for the gentlemen drivers.
 

Attachments

  • 20230924_221506-1.jpg
    20230924_221506-1.jpg
    220.6 KB · Views: 73
  • 20230924_221601-1.jpg
    20230924_221601-1.jpg
    411.9 KB · Views: 71
  • 20230924_221417-1.jpg
    20230924_221417-1.jpg
    283.9 KB · Views: 78
  • template_mclgt3.pdf
    28.1 KB · Views: 35
  • template_mclgt3.png
    template_mclgt3.png
    158.7 KB · Views: 53
Today I made a template for one of my wheels. It's made of thicker paper and the laser cutter only needs a minute. It is fixed with a magnet on one of the wheels screws so the templates can be replaced easyly.
The idea was to write the key-bindings for several games on it. But it also looks pretty cool.
I also made one of wood, for the gentlemen drivers.
As threatened, I made a template for the Fanatec P1. It is made of wood with key bindings on it and fixed with a magnet. I use this bindings for the Asseto Corsa Club Races here on RD [1].

[1] https://www.racedepartment.com/news/clean-fair-and-fun-join-our-weekly-club-races.1378/
 

Attachments

  • p1-1.jpg
    p1-1.jpg
    375.8 KB · Views: 69
  • p1-2.jpg
    p1-2.jpg
    305.6 KB · Views: 65
Yesterday I made a phone holder for the CSL DD. It's useful and easy to use with the Simhub mobile dash.
As always: laser cutter, 3mm plywood, no glue.
 

Attachments

  • mph3.jpg
    mph3.jpg
    448.6 KB · Views: 53
  • mph1.jpg
    mph1.jpg
    544.7 KB · Views: 53
  • mph2.jpg
    mph2.jpg
    320.9 KB · Views: 61
  • template_phoneholder-csldd.pdf
    6.3 KB · Views: 46
  • template_phoneholder-csldd.png
    template_phoneholder-csldd.png
    34.6 KB · Views: 54
Last edited:
Today I made a template for one of my wheels. It's made of thicker paper and the laser cutter only needs a minute. It is fixed with a magnet on one of the wheels screws so the templates can be replaced easyly.
The idea was to write the key-bindings for several games on it. But it also looks pretty cool.
I also made one of wood, for the gentlemen drivers.
Very nice. How did you get the sizing for the template? Is there a guide available online that I can download and cut myself by hand?
 

Latest News

Are you buying car setups?

  • Yes

  • No


Results are only viewable after voting.
Back
Top