Le Mans
It is the site of the most famous 24-hour race in the world, one of the biggest events on the racing calendar every year, and the namesake of Le Mans Ultimate. The Circuit de La Sarthe, as it is known officially, has become iconic since it first opened in 1920. Measuring 13.629 kilometers (8.469 miles) in its current layout, the track is still a high-speed challenge despite multiple corners being inserted to slow cars down over the years.
Some of these corners are relatively straight-forward, but most are not. To make your life a bit easier, here is our LMU track guide for Le Mans. And as Porsche and Le Mans are almost synonymous, we simply had to base this one on the Porsche 963.
Approach this sequence with your car as far to the left as possible, take a bit of inside kerb through Courbe Dunlop with a slight lift, then stay to the right, hit the brakes and shift down to second. The uphill section aids you in slowing down. Tackle the kerb of the first part of the chicane and stay to the left to optimize your exit through the second part. Careful, though, as the acceleration zone runs over a crest, meaning the rear of the car might want to break loose as you pass under the famous Dunlop bridge.
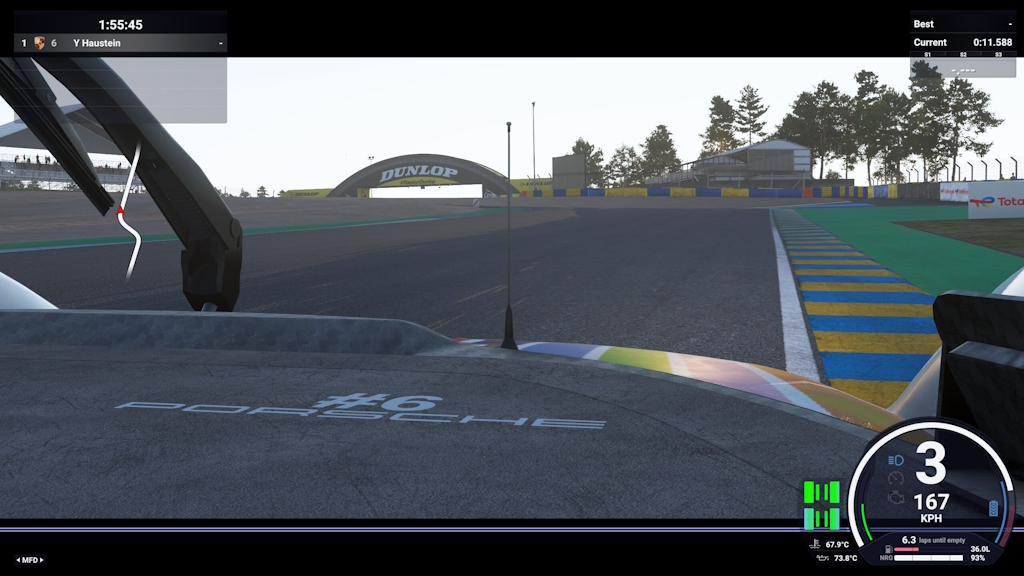
Tricky braking zone: The Dunlop chicane is easy to overshoot.
The proper Tetre Rouge corner now awaits. For Virage du Tertre Rouge, as it is officially called, approach with your left-side wheels on the outside kerb, and lift slightly before the turn as you approach a blue container behind the barrier to the left. Turn into the corner early, take a healthy chunk of inside kerb and make good use of the wide exit kerb. Markers tell you how wide you can go without a penalty. Nailing the run through Tertre Rouge is essential, as the first part of the Hunaudières Straight follows.
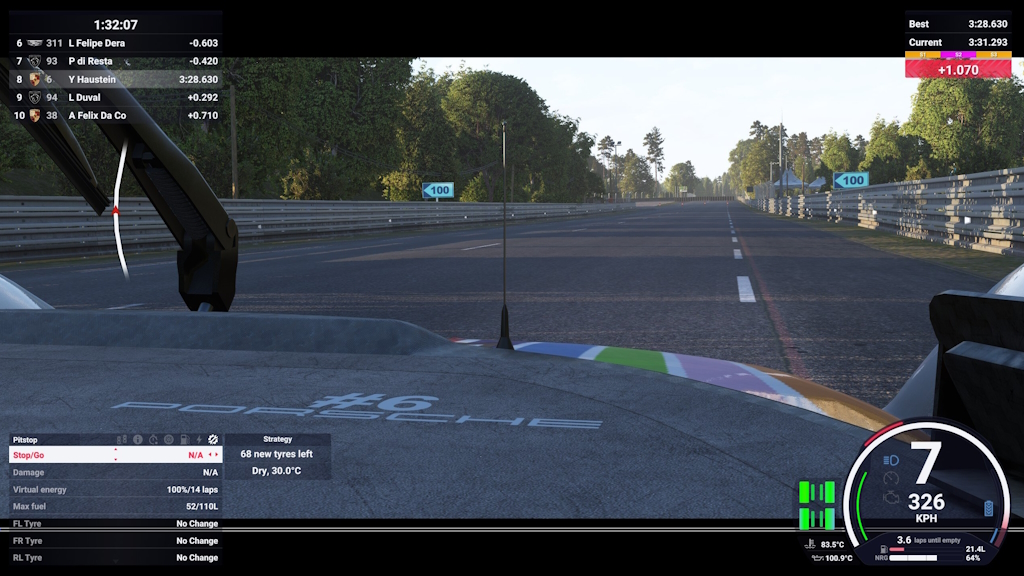
Spot the point where the right-hand armco barrier extends upwards for your braking point into the second chicane alongside the Hunaudières straight.
The first chicane is a right-left-right combination, so you want to approach it from the left side of the road. Spot the braking markers on the barriers, go slightly over the white line and throw the anchors at the 200 board. Shift down to second as you brake towards the first apex and make sure not to overshoot the second one, as you want to get back on the throttle as soon as possible for the straight after the chicane.
For the second chicane, it is vice versa, only that you can brake slightly later as the track points slightly uphill. Look for the point where a fourth guardrail starts atop the armco to the right – this is roughly where you want to brake.
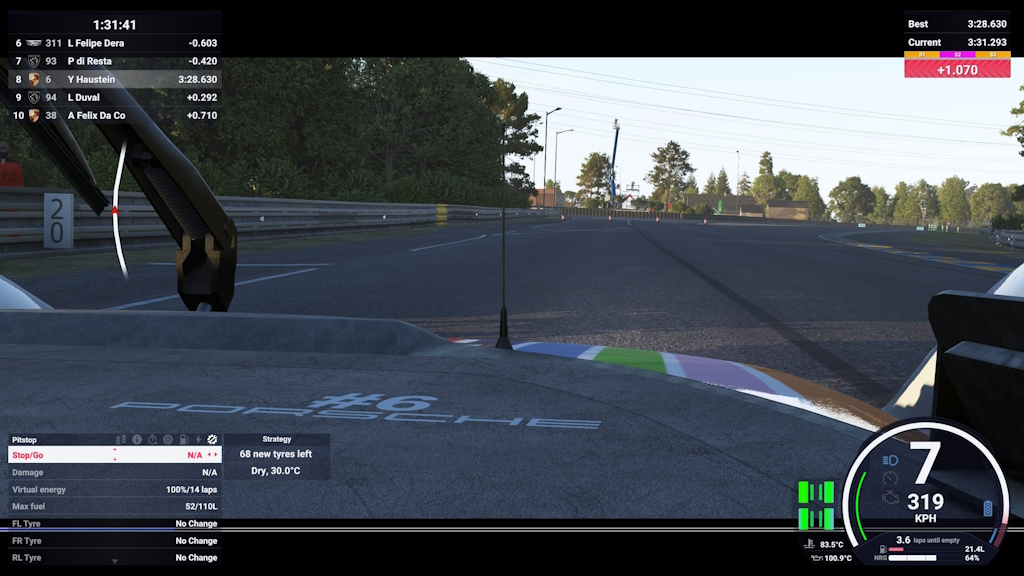
Another braking zone in the middle of a corner: The Virage de Mulsanne.
Spot the 100 board, then hit the brakes slightly past it and aim for the inside kerb, then drift to the outside and slightly over the white line to make your entry as wide as possible. Shift down to second or first, let the car coast over the inside kerb, and then go full throttle again as soon as the car feels stable. Another long full-throttle run lays ahead.
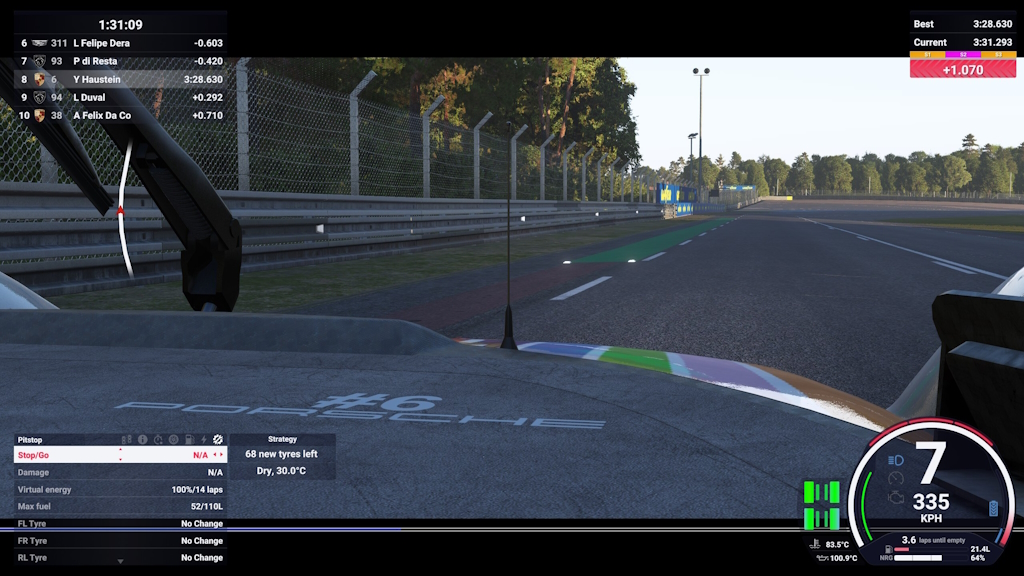
The teal patch of astroturf (or tarmac?) is a good indicator for when to tap the brakes going into Indianapolis.
On the short run to Arnage, you want to brake earlier than you might think at first, as Virage d’Arnage is tigher than it appears. Brake shortly before the 50 marker, shift down to first gear, aim for the inside kerb on the right and accelerate away hard as soon as the grip is there to blast towards the Porsche Curves.
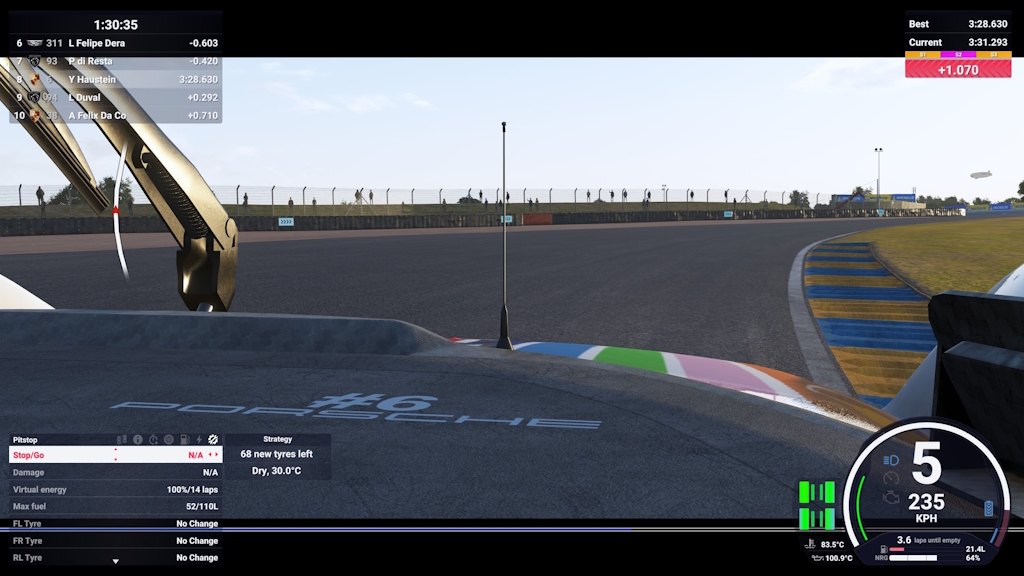
Threading the needle at ludicrous speeds: The Porsche Curvers are challenging, but extremely exciting.
To the left, you will see braking markers, but your actual braking marker is the DHL sign over the track after the 100 board. Brake to about 240 kph, turn in and stay to the inside kerb on the right while getting back on the power about halfway through the turn.
The left-hander of Virage du Pont is either full throttle or can be taken with a slight lift, depending on fuel and tires. You want to aim for the inside kerb, then use as much track as you can without drifting too far right on exit and into the SAFER barrier. Another slight lift takes you through the second part – also a left-hander – and sets you up for the “Esses du Karting”.
So-called due to the karting track next to the circuit, the Esses are tricky as well. The right hander flows downhill, and you want to stay as much to the right as possible in order to widen the entry into the final left hander. It is slightly off camber, and as a result, running wide on exit is easy to do. Careful not to get a track limits penalty here!
Additionally, be aware of your front tires overheating through the rapid turns. You may lose grip once they do, so taking it easy in race mode is recommended.
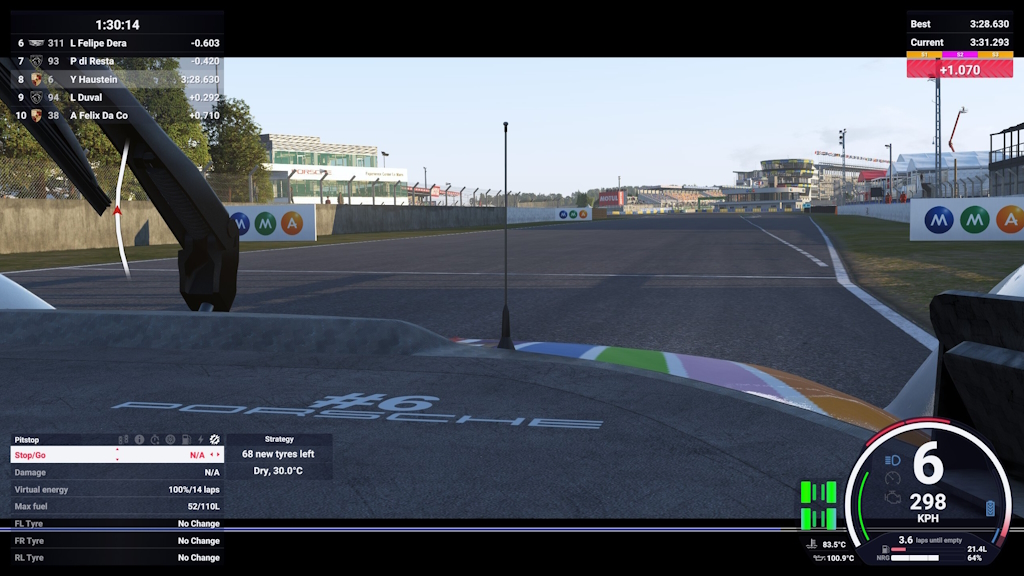
The start of the pit entry means it is time to hit the brakes for the final two chicanes to end your lap at Le Mans.
You can take a fair bit of kerb, but do not overdo it – it is easier to spin here than it looks like if you upset your car’s balance here. Stay right after the first chicane to tackle the second one in a similar manner, but mind the sausage kerb on the inside of the final turn.
And here you are again, roughly three and a half minutes later, starting another lap. Only about 23 hours and 57 minutes to go now…
Author: Yannik Haustein
Some of these corners are relatively straight-forward, but most are not. To make your life a bit easier, here is our LMU track guide for Le Mans. And as Porsche and Le Mans are almost synonymous, we simply had to base this one on the Porsche 963.
LMU Track Guide Le Mans: Dunlop To Tertre Rouge
Courbe & Ralentisseur Dunlop
Here you are at the most famous endurance circuit in the world, starting your lap on the start-finish straight. Immediately, the lap turns tricky throughout the first few corners. First up: The Courbe Dunlop, which would be flat out by itself. The only problem with that is that the braking zone for the Dunlop Chicane, which immediately follows, starts in this turn already.Approach this sequence with your car as far to the left as possible, take a bit of inside kerb through Courbe Dunlop with a slight lift, then stay to the right, hit the brakes and shift down to second. The uphill section aids you in slowing down. Tackle the kerb of the first part of the chicane and stay to the left to optimize your exit through the second part. Careful, though, as the acceleration zone runs over a crest, meaning the rear of the car might want to break loose as you pass under the famous Dunlop bridge.
Tricky braking zone: The Dunlop chicane is easy to overshoot.
Descente de La Chapelle & Tertre Rouge
Now, you are shooting downhill. Approach Descente de La Chapelle from the left and keep your foot on the throttle as you pass the junction where the Bugatti Circuit turns right. Brake and shift down to third, then aim for a late apex in the slightly banked first part of the “S” du Tertre Rouge in order to get a good line through the right-hand part of it. As the track rises slightly on exit, be careful not to drift too far to the left and over the kerb, and floor the throttle as soon as the car feels planted enough.The proper Tetre Rouge corner now awaits. For Virage du Tertre Rouge, as it is officially called, approach with your left-side wheels on the outside kerb, and lift slightly before the turn as you approach a blue container behind the barrier to the left. Turn into the corner early, take a healthy chunk of inside kerb and make good use of the wide exit kerb. Markers tell you how wide you can go without a penalty. Nailing the run through Tertre Rouge is essential, as the first part of the Hunaudières Straight follows.
Spot the point where the right-hand armco barrier extends upwards for your braking point into the second chicane alongside the Hunaudières straight.
Hunaudières & Chicanes
Having passed the first few corners, it is time to open up the throttle and really stretch the legs of your car. Until 1989, an uninterrupted full-throttle run all the way down to the Virage de Mulsanne lay ahead, but from 1990 onwards, two chicanes separate the daunting straight.The first chicane is a right-left-right combination, so you want to approach it from the left side of the road. Spot the braking markers on the barriers, go slightly over the white line and throw the anchors at the 200 board. Shift down to second as you brake towards the first apex and make sure not to overshoot the second one, as you want to get back on the throttle as soon as possible for the straight after the chicane.
For the second chicane, it is vice versa, only that you can brake slightly later as the track points slightly uphill. Look for the point where a fourth guardrail starts atop the armco to the right – this is roughly where you want to brake.
Another braking zone in the middle of a corner: The Virage de Mulsanne.
Virage de Mulsanne
Exiting the second chicane, you will run through a slight right kink, then uphill and into another tricky braking zone. Before the actual Mulsanne, the track makes a slight right turn to avoid the roundabout that would otherwise be in the way of the track.Spot the 100 board, then hit the brakes slightly past it and aim for the inside kerb, then drift to the outside and slightly over the white line to make your entry as wide as possible. Shift down to second or first, let the car coast over the inside kerb, and then go full throttle again as soon as the car feels stable. Another long full-throttle run lays ahead.
The teal patch of astroturf (or tarmac?) is a good indicator for when to tap the brakes going into Indianapolis.
LMU Track Guide Le Mans: Indianapolis & Arnage
Long time, no braking zone in a corner! Indianapolis is another one of those tricky sequences. As you shoot down the straight preceding it, spot the brake markers and look out for a bit of teal astro turf to the right. It has small lights on it to make it visible in the dark as well. Brake slightly here, shift down to sixth, and coast through the right-hand kink. Then slam the brakes. Third gear is recommended for the left-hander of Indianapolis, as the car will be more stable when accelerating out of this banked turn.On the short run to Arnage, you want to brake earlier than you might think at first, as Virage d’Arnage is tigher than it appears. Brake shortly before the 50 marker, shift down to first gear, aim for the inside kerb on the right and accelerate away hard as soon as the grip is there to blast towards the Porsche Curves.
Threading the needle at ludicrous speeds: The Porsche Curvers are challenging, but extremely exciting.
Virage Porsche To “Esses” du Karting
To be precise, only the first right-hander is called Virage Porsche, which is followed by Virage du Pont and “Esses” du Karting. Arguably the most intense sequence of the Circuit de La Sarthe is coming up now.To the left, you will see braking markers, but your actual braking marker is the DHL sign over the track after the 100 board. Brake to about 240 kph, turn in and stay to the inside kerb on the right while getting back on the power about halfway through the turn.
The left-hander of Virage du Pont is either full throttle or can be taken with a slight lift, depending on fuel and tires. You want to aim for the inside kerb, then use as much track as you can without drifting too far right on exit and into the SAFER barrier. Another slight lift takes you through the second part – also a left-hander – and sets you up for the “Esses du Karting”.
So-called due to the karting track next to the circuit, the Esses are tricky as well. The right hander flows downhill, and you want to stay as much to the right as possible in order to widen the entry into the final left hander. It is slightly off camber, and as a result, running wide on exit is easy to do. Careful not to get a track limits penalty here!
Additionally, be aware of your front tires overheating through the rapid turns. You may lose grip once they do, so taking it easy in race mode is recommended.
The start of the pit entry means it is time to hit the brakes for the final two chicanes to end your lap at Le Mans.
Virage Ford & Virage du Raccordement
Finally, after blasting through the slight right-left of Maison Blanche (a far cry from the fearsome original corner), only two chicanes remain to finish the lap. Keep an eye out for the pit entry on the right – as soon as it starts, brake and shift down to third gear for the first of the left-right chicanes.You can take a fair bit of kerb, but do not overdo it – it is easier to spin here than it looks like if you upset your car’s balance here. Stay right after the first chicane to tackle the second one in a similar manner, but mind the sausage kerb on the inside of the final turn.
And here you are again, roughly three and a half minutes later, starting another lap. Only about 23 hours and 57 minutes to go now…
Author: Yannik Haustein
