In our series of track guides for the newly released Le Mans Ultimate, we will be talking you through how to tackle all tracks - now featuring all seven circuits in LMU.
Image credit: Studio 397
Last updated: March 4, 2024, 18:20 CET
If you have found this article, chances are you might be having a tricky time with the tracks at LMU. Thankfully there are only seven tracks to get used to, and some may already be familiar to you if you played the F1 games.
Others, however, are not too frequently found in other sims bar iRacing, so pointers may be needed. And even the classics might not be too familiar to everyone, so we hope our guides help you navigate the circuits in LMU a bit better. Check the sidebar for the individual tracks - each one has its own page where we go into detail.
Were our Le Mans Ultimate track guides helpful for you? Let us know on Twitter @OverTake_gg or in the comments below!
Sebring
In the third instalment of our Le Mans Ultimate track guide series, we tackle the brutally bumpy Sebring in Florida, USA.
If you haven’t seen our other track guides, check out Portimão, Fuji International Speedway and Monza. Bahrain, Le Mans and Spa are in the pipeline!

Hairpin Turn, Sebring. Image Credit: Studio 397
Sebring International Raceway is America’s oldest remaining racetrack. With the legendary 12-hour race coupled with the 1000km feature the day after, the track was a real Mecca for sportscar fans in 2023.
Sebring is a track that does not appear a lot within simulators. iRacing is the most likely place you would have seen Sebring, but do not worry: This guide will get you up to speed around the Ex-US air base in no time at all.

#311 Action Express Racing, Cadillac V-Series.R. Image Credit: Studio 397
The 3.7-mile circuit demands precision and consistency. The bumps, especially through the first sector and last corner, are ruthless and will catch you out when you start to push the limit.
The journey to the first corner requires you to drift from left to right down the IMSA pit straight. Brake two car lengths before the pit wall on the left-hand side ends. Hit the middle apex of the corner and flow out to the right-hand side. Use all the available kerb to set up for turn two.


Stay to the right-hand side and brake just after the 300 board. Make sure you are patient with your turn-in, too early and you will hop the kerb, potentially damaging your car. Aim for a later apex and brush the kerb with your left front tyre to aid your turn-in.
Moving through to turn three, use the spot where the track begins to peel off to the left for your braking point. Make sure not to accelerate before you are past the apex, the bumps can cause unexpected oversteer, equalling a huge accident.
Gurney Bend requires you to stick as far to the right as you can. Begin to float out to the left once the corner straightens out. When you reach the hairpin, the slowest corner on the track, Brake hard at the 400 board.

The Fangio chicane is fairly straightforward. Stick to the right and then hit the second apex on the left, sticking to the left-hand side to set up for Cunningham Corner.
Brake just before the 300 board, allowing yourself plenty of time to get off the anchors and start trailing your way into the apex. Staying in second gear throughout the corner seems to be the most consistent way through this difficult right-hander.
Hitting your marks consistently is notoriously difficult at Sebring. Keep your concentration and do not get complacent.
.jpg")
Once you are back over to the left, you will be setting up for my least favourite corner on the track, Tower Bend. This corner is a lot tighter than it seems, so be careful with the speed you bring into it.
Brake as the kerb ends on the right-hand side. Hit the apex in second gear and carry your speed to the left-hand side kerb. Be careful of the inevitable bumps that can throw your car off in any direction they deem fit.
Once you have negotiated the flat-out double left-hander, brake just before the 300 board for Gendebien Bend. Make sure to drop your right-side front wheel over the inside kerb if you struggle to get the car to rotate appropriately.


Once you are through the Le Mans Curve, you are onto the Ulmann straight. Stick to the left and be aware of cars rejoining from the pitlane. Always assume the worst and give extra caution to cars rejoining.
Finally, you are at the most famous corner on the track, Sunset Bend. Unbelievably bumpy and unstable, this corner requires perfect momentum and patience to get the most out of it.
Brake just after the 200 board and keep as close to the inside wall as you dare. Do not get sucked out wide by the bumps. You will lose all your time and make your run onto the back straight slower.


Author: Connor Minniss
If you haven’t seen our other track guides, check out Portimão, Fuji International Speedway and Monza. Bahrain, Le Mans and Spa are in the pipeline!
Hairpin Turn, Sebring. Image Credit: Studio 397
Sebring International Raceway is America’s oldest remaining racetrack. With the legendary 12-hour race coupled with the 1000km feature the day after, the track was a real Mecca for sportscar fans in 2023.
Sebring is a track that does not appear a lot within simulators. iRacing is the most likely place you would have seen Sebring, but do not worry: This guide will get you up to speed around the Ex-US air base in no time at all.
Le Mans Ultimate Track Guide: Sebring
This guide is based on the Cadillac V-Series. R Hypercar. Other classes will vary greatly. I advise using this guide and adjusting it to the car and class you are using.#311 Action Express Racing, Cadillac V-Series.R. Image Credit: Studio 397
The 3.7-mile circuit demands precision and consistency. The bumps, especially through the first sector and last corner, are ruthless and will catch you out when you start to push the limit.
The journey to the first corner requires you to drift from left to right down the IMSA pit straight. Brake two car lengths before the pit wall on the left-hand side ends. Hit the middle apex of the corner and flow out to the right-hand side. Use all the available kerb to set up for turn two.
Stay to the right-hand side and brake just after the 300 board. Make sure you are patient with your turn-in, too early and you will hop the kerb, potentially damaging your car. Aim for a later apex and brush the kerb with your left front tyre to aid your turn-in.
Moving through to turn three, use the spot where the track begins to peel off to the left for your braking point. Make sure not to accelerate before you are past the apex, the bumps can cause unexpected oversteer, equalling a huge accident.
Gurney Bend requires you to stick as far to the right as you can. Begin to float out to the left once the corner straightens out. When you reach the hairpin, the slowest corner on the track, Brake hard at the 400 board.
Concentration Is Key
Moving into the second sector, Be careful of locking up over the bumps. Trail braking in the second part of the braking phase is essential for consistent corner speed. You can cut across the kerb of the small chicane directly after the hairpin. Do not touch the grass or the lap will be invalidated.The Fangio chicane is fairly straightforward. Stick to the right and then hit the second apex on the left, sticking to the left-hand side to set up for Cunningham Corner.
Brake just before the 300 board, allowing yourself plenty of time to get off the anchors and start trailing your way into the apex. Staying in second gear throughout the corner seems to be the most consistent way through this difficult right-hander.
Hitting your marks consistently is notoriously difficult at Sebring. Keep your concentration and do not get complacent.
Don’t Get Lost
Avoid the inside kerbs at Collier Corner and wait to swing out to the right once you’re through BOTH left-hand bends.Once you are back over to the left, you will be setting up for my least favourite corner on the track, Tower Bend. This corner is a lot tighter than it seems, so be careful with the speed you bring into it.
Brake as the kerb ends on the right-hand side. Hit the apex in second gear and carry your speed to the left-hand side kerb. Be careful of the inevitable bumps that can throw your car off in any direction they deem fit.
Once you have negotiated the flat-out double left-hander, brake just before the 300 board for Gendebien Bend. Make sure to drop your right-side front wheel over the inside kerb if you struggle to get the car to rotate appropriately.
Driving Into The Sunset
Braking for the Le Mans kerb is the most difficult to spot on the track. There are no obvious boards or markings so test it out and see what you can find as a consistent marker. For me, I used where the tyre stack on the very far right ends. Make sure you do not bring all of your wheels over the white line on the left side. You will invalidate your lap instantly.Once you are through the Le Mans Curve, you are onto the Ulmann straight. Stick to the left and be aware of cars rejoining from the pitlane. Always assume the worst and give extra caution to cars rejoining.
Finally, you are at the most famous corner on the track, Sunset Bend. Unbelievably bumpy and unstable, this corner requires perfect momentum and patience to get the most out of it.
Brake just after the 200 board and keep as close to the inside wall as you dare. Do not get sucked out wide by the bumps. You will lose all your time and make your run onto the back straight slower.
Author: Connor Minniss
Portimao
One of those tracks that have featured in the games since F1 2021 is the former Portuguese Grand Prix venue Portimão (also called Algarve). Since last hosting the GP, the track has soared in popularity and is even coming to iRacing in a couple of weeks.
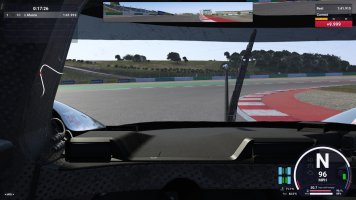
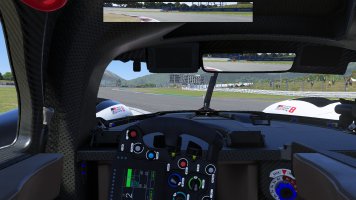
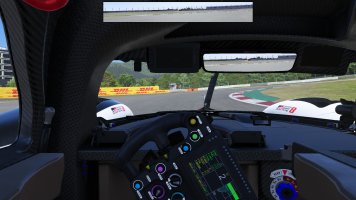
The track’s immense undulation can be quite daunting at first. But we intend to help you out with how best to tackle the Portimão circuit! This lap was done with the Peugeot 9X8.
You arrive at the first corner called Primeira, and the dip can catch you out. It can be tricky to spot your braking zone, but once it starts levelling out, you want to get on the brakes. By the time you are braking, you want to start committing to the first corner and throw your car in with a quick flick.
Start opening the wheel out but be careful to not stray too far off the track, it is quite easily done in any car. By the time you have processed if you kept the car on the track, you now have to turn sharply for the next flick before immediately braking for the Lagos hairpin.

Hold your car as far to the right side of the track to get a good exit from this uphill left-hander. Image credit: Studio 397
It would be quite easy to just let the car run to the left after the hairpin, but you want to keep the car to the right to set up for the next corner. So sacrificing the exit out of the hairpin is the way to go here.
Then start pointing your car towards the apex with as much momentum as you can, and the uphill camber will help shoot your car out of the corner. Now follows a bit of a breather as you head down the next straight towards another hairpin.
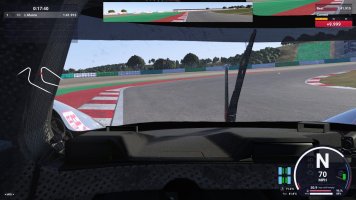
After navigating that, it is now a small meander to the left – then, you will want to be ready to straight-line the braking zone for the next corner as much as possible. You go as far to the left as you can, then carry the speed into the right-hander before you brake for the tighter uphill right corner called Samsung.

Be careful on throttle application as it is quite easy to spin your wheels exiting this corner. Image credit: Studio 397
Be careful on throttle application as the track will start to dip down like a rollercoaster. Try gently opening up the steering as you reach the crest and get most of your turning done upon entry before hitting the apex, maybe even short-shift on exit.
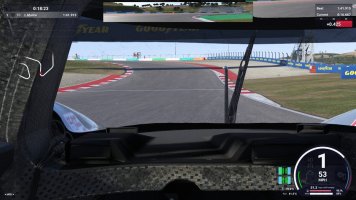
Go to the left of the track and point towards the outside kerb on the initial turn-in. Then half commit to the apex, but open up your steering to hit the kerb on the left side of the track as you brake. Squaring off the corner may seem like a suboptimal line, but if you turn for the corner (simply named Portimão) too early, you will be caught out by how much it tightens.

Once you have slowed down sufficiently, you can turn towards the apex.
The penultimate Sagres corner is a long right-hander and a bit slower than it might appear. Now, only the also long, but much faster Galp corner remains. Depending on your car, lines might differ- a GTE will benefit from a late apex in order not to be carried to the outside too much.
On the other hand, the prototypes can even take the turn full-throttle on low fuel and with the right approach over its deceptive crest. Just carry as much momentum as you can into this corner – the earlier you can get on the power, the better. After the crest, it is a simple run up to the line, with a mostly easy flat-out downhill sweeper.
Another ramp leads up to the start/finish line – and that is your lap of Portimão completed. Now, onto another rollercoaster ride!
Author: Luca Munro
The track’s immense undulation can be quite daunting at first. But we intend to help you out with how best to tackle the Portimão circuit! This lap was done with the Peugeot 9X8.
You arrive at the first corner called Primeira, and the dip can catch you out. It can be tricky to spot your braking zone, but once it starts levelling out, you want to get on the brakes. By the time you are braking, you want to start committing to the first corner and throw your car in with a quick flick.
Start opening the wheel out but be careful to not stray too far off the track, it is quite easily done in any car. By the time you have processed if you kept the car on the track, you now have to turn sharply for the next flick before immediately braking for the Lagos hairpin.
Hold your car as far to the right side of the track to get a good exit from this uphill left-hander. Image credit: Studio 397
It would be quite easy to just let the car run to the left after the hairpin, but you want to keep the car to the right to set up for the next corner. So sacrificing the exit out of the hairpin is the way to go here.
Then start pointing your car towards the apex with as much momentum as you can, and the uphill camber will help shoot your car out of the corner. Now follows a bit of a breather as you head down the next straight towards another hairpin.
Massive Undulation, Unusual Lines
Once again, the braking zone for the corner may be a bit unsighted but we suggest try using the alternate left-hander as your reference. The layout that the MotoGP riders use is a more flowing and open corner starting before the Torre VIP corner, and you can look for the start of this and see if it works as a braking point.After navigating that, it is now a small meander to the left – then, you will want to be ready to straight-line the braking zone for the next corner as much as possible. You go as far to the left as you can, then carry the speed into the right-hander before you brake for the tighter uphill right corner called Samsung.
Be careful on throttle application as it is quite easy to spin your wheels exiting this corner. Image credit: Studio 397
Be careful on throttle application as the track will start to dip down like a rollercoaster. Try gently opening up the steering as you reach the crest and get most of your turning done upon entry before hitting the apex, maybe even short-shift on exit.
Tricky Blind Corners
Now you are dropping down a crest and immediately see the Craig Jones uphill left-hander ahead. This corner can be done flat in pretty much any car, but the next blind corner will catch anyone out if they have not put their car in the right place.Go to the left of the track and point towards the outside kerb on the initial turn-in. Then half commit to the apex, but open up your steering to hit the kerb on the left side of the track as you brake. Squaring off the corner may seem like a suboptimal line, but if you turn for the corner (simply named Portimão) too early, you will be caught out by how much it tightens.
Once you have slowed down sufficiently, you can turn towards the apex.
Carry the Momentum
Now you are in the last portion of the lap, and most of the corners ahead are relatively simple compared to the rest of the lap. A minor flick to the left after dropping downhill and you are back on the brakes for another hairpin, which still requires a lot of momentum and a relatively late apex.The penultimate Sagres corner is a long right-hander and a bit slower than it might appear. Now, only the also long, but much faster Galp corner remains. Depending on your car, lines might differ- a GTE will benefit from a late apex in order not to be carried to the outside too much.
On the other hand, the prototypes can even take the turn full-throttle on low fuel and with the right approach over its deceptive crest. Just carry as much momentum as you can into this corner – the earlier you can get on the power, the better. After the crest, it is a simple run up to the line, with a mostly easy flat-out downhill sweeper.
Another ramp leads up to the start/finish line – and that is your lap of Portimão completed. Now, onto another rollercoaster ride!
Author: Luca Munro
Spa-Francorchamps
One of the “standard” sim racing circuits in addition to Monza, Spa-Francorchamps presents a unique and challenging layout including arguably the most iconic sequence of corners anywhere in the world. As it was part of the 2023 WEC calendar, its official game sees the Ardennes rollercoaster represented as well – here is our Le Mans Ultimate Track guide for Spa-Francorchamps, based on the Glickenhaus SCG 007 LMH.

This tight turn is crucial for the rest of the sector, as the run all the way up to Les Combes will be flat or mostly flat in the cars featured in LMU. Approaching the turn, the track will go through a slight dip as it changes from going downhill to slightly uphill. This is a good orientation for your first braking marker.
Throw the anchors right at this dip and stay to the left as long as possible, shift all the way down to first, then turn in and try to get as close to the inside kerb as you can without actually touching it, however. Be patient when applying the throttle – once you hit the accelerator, you ideally do not come off it again as you get carried towards the outside kerb on the exit. Beware of the sausage right behind the kerb, however – touching that will cost lap time!

Once the track turns slightly left and into the compression at the bottom of the hill, run over the kerb on the left as much as you dare to create a good line for the right turn up the hill. Go as close to the kerb on the right as possible without touching it, and once you reach the top, you can cut the kerb on the left a bit to get a good exit onto the Kemmel straight. Time to breathe for a bit on the run to Les Combes.
For this right-hander, position your car as far to the left as you can. Ideally, you will not have to brake, lifting the throttle will be enough. Once you hit the inside kerb, you can apply the throttle again and drift out to the exit kerb. Avoid touching the gravel, though!

Bruxelles seemingly never ends - getting in a position to open up the throttle early is important here.
Now, the long downhill right of Bruxelles awaits. There are multiple lines through this second-gear corner: You can either take a double apex, so an early and a late one, or stay to the outside for longer, then take a late apex. Getting onto the throttle as early as possible should be your aim.
After exiting Bruxelles, getting back to the right edge of the track as quickly is possible is important to get a good line through Speaker’s Corner. In third gear, some patience with the throttle pedal is needed, as you want to go full throttle as soon as you can for a good run towards Doubel Gauche, or Pouhon, as it was known for the longes time.
Touch the kerb on the inside, then get back on the accelerator as soon as you can, drifting all the way onto the right-hand kerb. Then, you can take the second left of the complex at full throttle and head towards Les Fagnes.

Slight deviations from the racing line at Double Gauche can cost good chunks of time.
This flowing right-left chicane requires you to keep your momentum up. Brake just before the Bosch bridge, then shift down to third and take a small amount of inside kerb. For the second part of the chicane, you want to be as far to the right as possible to take a wide entry. Nibble the kerb on the inside, then make generous use of the exit kerb – but not too much, as you can easily bottom out or snatch the gravel and go straight on.
Campus requires some patience – brake while on the left edge of the track, then turn in and let the car roll through until you can nail the throttle again. The exit kerb to the left is important not just for Campus, but also for Stavelot. It extends all the way to the second turn of this complex, allowing you to take a wider entry.

Taking a wide entry line for Stavelot is important for the long flat-out section that follows.
A touch of the brakes and a well-timed turn-in are crucial for Stavelot. The latter is relatively early, as you face the same problem as in the first Double Gauche. Be careful to only slightly touch the inside kerb, as it will spit you out towards the wall otherwise.
Depending on your fuel load, a slight lift might be required through Stavelot, but with a bit of practice, taking it flat is also possible. Running wide on exit is not recommended, however, as this may net you a track limits penatly pretty quickly. After navigating Stavelot, only one more braking zone remains.
Do not be afraid to put the right side of the car slightly over the white line to widen your entry into Blanchimont. Then aim for the inside kerb, but avoid touching it – you might run wide on the exit and get a penalty. If you thread the high-speed needle correctly, you can blast through here without lifting, even on a full tank of fuel.

The white timing line ahead of the Chicane serves as a good reference point for when to brake.
Now, get ready to stomp on the brakes as hard as nowhere else on the lap. A slight right kink leads to the final Chicane, which used to be the iconic Bus Stop. Formerly a left-right and right-left series of flicks, it now consists of a very slow right followed by an equally slow left.
Spot the white timing line right after the advertising board overhead and let the brake discs glow just ahead of it, shfiting all the way down to first gear. Turn in and hug the apex tightly without getting on the sausage kerb right behind the actual kerb, and keep turning just a bit longer than you might feel is right. You want to make the final turn as wide as possible, stay just as close to the left-hand apex, and accelerate hard as soon as the car grips again.
Take a bit of exit kerb if needed, and off you go for another lap on the iconic Circuit de Spa-Francorchamps.
Author: Yannik Haustein
Le Mans Ultimate Track Guide: Spa: First Sector
La Source
Your journey around the Circuit de Spa-Francorchamps starts at the start-finish straight. Sounds logical, but it is not quite as straight-forward at this track – there are two pit lanes, and WEC used the same one that F1 occupies for the Belgian Grand Prix. This means that to start a lap, you will have to master the right-hand hairpin La Source first.This tight turn is crucial for the rest of the sector, as the run all the way up to Les Combes will be flat or mostly flat in the cars featured in LMU. Approaching the turn, the track will go through a slight dip as it changes from going downhill to slightly uphill. This is a good orientation for your first braking marker.
Throw the anchors right at this dip and stay to the left as long as possible, shift all the way down to first, then turn in and try to get as close to the inside kerb as you can without actually touching it, however. Be patient when applying the throttle – once you hit the accelerator, you ideally do not come off it again as you get carried towards the outside kerb on the exit. Beware of the sausage right behind the kerb, however – touching that will cost lap time!
Eau Rouge, Raidillon & Kemmel Straight
Following La Source, you will go downhill past the older pit lane. Run close to the right-hand wall in order to set up your run through the fearsome, but legendary combination of Eau Rouge and Raidillon, which will lead you up the hill in either sixth or seventh gear, depending on your exit from La Source.Once the track turns slightly left and into the compression at the bottom of the hill, run over the kerb on the left as much as you dare to create a good line for the right turn up the hill. Go as close to the kerb on the right as possible without touching it, and once you reach the top, you can cut the kerb on the left a bit to get a good exit onto the Kemmel straight. Time to breathe for a bit on the run to Les Combes.
Le Mans Ultimate Track Guide Spa: Second Sector
Les Combes To Speaker’s Corner
The braking spot for Les Combes is actually further towards the corner than you might expect, as the Kemmel Straight goes slightly uphill. Spot a red marker on the armco to your left right before the 100-meter board and brake slightly before it, then start turning in. Take a decent amount of inside kerb for the first part, but only a bit for the left-hand part of Les Combes. You do not want to run all the way to the right on exit in order to set up your run through Malmedy. Just like Les Combes, it can be taken in third gear.For this right-hander, position your car as far to the left as you can. Ideally, you will not have to brake, lifting the throttle will be enough. Once you hit the inside kerb, you can apply the throttle again and drift out to the exit kerb. Avoid touching the gravel, though!
Bruxelles seemingly never ends - getting in a position to open up the throttle early is important here.
Now, the long downhill right of Bruxelles awaits. There are multiple lines through this second-gear corner: You can either take a double apex, so an early and a late one, or stay to the outside for longer, then take a late apex. Getting onto the throttle as early as possible should be your aim.
After exiting Bruxelles, getting back to the right edge of the track as quickly is possible is important to get a good line through Speaker’s Corner. In third gear, some patience with the throttle pedal is needed, as you want to go full throttle as soon as you can for a good run towards Doubel Gauche, or Pouhon, as it was known for the longes time.
Double Gauche & Les Fagnes
A tricky corner to get right, Double Gauche is – as the name implies – a double-left. Arriving at the first, brake slightly about 60 meters before the corner and shift down a gear, then turn in towards the inside kerb. This is the tough part – turning in too early ruins your line, too late and you will run hopelessly wide. It will likely take a few more laps than usual to get a good feel for the first turn of Double Gauche.Touch the kerb on the inside, then get back on the accelerator as soon as you can, drifting all the way onto the right-hand kerb. Then, you can take the second left of the complex at full throttle and head towards Les Fagnes.
Slight deviations from the racing line at Double Gauche can cost good chunks of time.
This flowing right-left chicane requires you to keep your momentum up. Brake just before the Bosch bridge, then shift down to third and take a small amount of inside kerb. For the second part of the chicane, you want to be as far to the right as possible to take a wide entry. Nibble the kerb on the inside, then make generous use of the exit kerb – but not too much, as you can easily bottom out or snatch the gravel and go straight on.
Le Mans Ultimate Track Guide Spa: Final Sector
Campus & Stavelot
We are approaching the end of the lap with the right-handers of Campus and Stavelot coming up. The timing line is actually between the two corner, so technically, Campus is still part of the second sector. As both turns are are in rapid succession, we put them into one paragraph, however.Campus requires some patience – brake while on the left edge of the track, then turn in and let the car roll through until you can nail the throttle again. The exit kerb to the left is important not just for Campus, but also for Stavelot. It extends all the way to the second turn of this complex, allowing you to take a wider entry.
Taking a wide entry line for Stavelot is important for the long flat-out section that follows.
A touch of the brakes and a well-timed turn-in are crucial for Stavelot. The latter is relatively early, as you face the same problem as in the first Double Gauche. Be careful to only slightly touch the inside kerb, as it will spit you out towards the wall otherwise.
Depending on your fuel load, a slight lift might be required through Stavelot, but with a bit of practice, taking it flat is also possible. Running wide on exit is not recommended, however, as this may net you a track limits penatly pretty quickly. After navigating Stavelot, only one more braking zone remains.
Blanchimont & (Formerly Bus Stop) Chicane
Now you are blasting through the final part of the lap. Courbe Paul Frère and the left kink ahead of Blanchimont are no problem for any car, but the ultra-fast left-hander that is Blanchimont itself is a thrilling experience.Do not be afraid to put the right side of the car slightly over the white line to widen your entry into Blanchimont. Then aim for the inside kerb, but avoid touching it – you might run wide on the exit and get a penalty. If you thread the high-speed needle correctly, you can blast through here without lifting, even on a full tank of fuel.
The white timing line ahead of the Chicane serves as a good reference point for when to brake.
Now, get ready to stomp on the brakes as hard as nowhere else on the lap. A slight right kink leads to the final Chicane, which used to be the iconic Bus Stop. Formerly a left-right and right-left series of flicks, it now consists of a very slow right followed by an equally slow left.
Spot the white timing line right after the advertising board overhead and let the brake discs glow just ahead of it, shfiting all the way down to first gear. Turn in and hug the apex tightly without getting on the sausage kerb right behind the actual kerb, and keep turning just a bit longer than you might feel is right. You want to make the final turn as wide as possible, stay just as close to the left-hand apex, and accelerate hard as soon as the car grips again.
Take a bit of exit kerb if needed, and off you go for another lap on the iconic Circuit de Spa-Francorchamps.
Author: Yannik Haustein
Le Mans
It is the site of the most famous 24-hour race in the world, one of the biggest events on the racing calendar every year, and the namesake of Le Mans Ultimate. The Circuit de La Sarthe, as it is known officially, has become iconic since it first opened in 1920. Measuring 13.629 kilometers (8.469 miles) in its current layout, the track is still a high-speed challenge despite multiple corners being inserted to slow cars down over the years.
Some of these corners are relatively straight-forward, but most are not. To make your life a bit easier, here is our LMU track guide for Le Mans. And as Porsche and Le Mans are almost synonymous, we simply had to base this one on the Porsche 963.
Approach this sequence with your car as far to the left as possible, take a bit of inside kerb through Courbe Dunlop with a slight lift, then stay to the right, hit the brakes and shift down to second. The uphill section aids you in slowing down. Tackle the kerb of the first part of the chicane and stay to the left to optimize your exit through the second part. Careful, though, as the acceleration zone runs over a crest, meaning the rear of the car might want to break loose as you pass under the famous Dunlop bridge.

Tricky braking zone: The Dunlop chicane is easy to overshoot.
The proper Tetre Rouge corner now awaits. For Virage du Tertre Rouge, as it is officially called, approach with your left-side wheels on the outside kerb, and lift slightly before the turn as you approach a blue container behind the barrier to the left. Turn into the corner early, take a healthy chunk of inside kerb and make good use of the wide exit kerb. Markers tell you how wide you can go without a penalty. Nailing the run through Tertre Rouge is essential, as the first part of the Hunaudières Straight follows.

Spot the point where the right-hand armco barrier extends upwards for your braking point into the second chicane alongside the Hunaudières straight.
The first chicane is a right-left-right combination, so you want to approach it from the left side of the road. Spot the braking markers on the barriers, go slightly over the white line and throw the anchors at the 200 board. Shift down to second as you brake towards the first apex and make sure not to overshoot the second one, as you want to get back on the throttle as soon as possible for the straight after the chicane.
For the second chicane, it is vice versa, only that you can brake slightly later as the track points slightly uphill. Look for the point where a fourth guardrail starts atop the armco to the right – this is roughly where you want to brake.

Another braking zone in the middle of a corner: The Virage de Mulsanne.
Spot the 100 board, then hit the brakes slightly past it and aim for the inside kerb, then drift to the outside and slightly over the white line to make your entry as wide as possible. Shift down to second or first, let the car coast over the inside kerb, and then go full throttle again as soon as the car feels stable. Another long full-throttle run lays ahead.

The teal patch of astroturf (or tarmac?) is a good indicator for when to tap the brakes going into Indianapolis.
On the short run to Arnage, you want to brake earlier than you might think at first, as Virage d’Arnage is tigher than it appears. Brake shortly before the 50 marker, shift down to first gear, aim for the inside kerb on the right and accelerate away hard as soon as the grip is there to blast towards the Porsche Curves.

Threading the needle at ludicrous speeds: The Porsche Curvers are challenging, but extremely exciting.
To the left, you will see braking markers, but your actual braking marker is the DHL sign over the track after the 100 board. Brake to about 240 kph, turn in and stay to the inside kerb on the right while getting back on the power about halfway through the turn.
The left-hander of Virage du Pont is either full throttle or can be taken with a slight lift, depending on fuel and tires. You want to aim for the inside kerb, then use as much track as you can without drifting too far right on exit and into the SAFER barrier. Another slight lift takes you through the second part – also a left-hander – and sets you up for the “Esses du Karting”.
So-called due to the karting track next to the circuit, the Esses are tricky as well. The right hander flows downhill, and you want to stay as much to the right as possible in order to widen the entry into the final left hander. It is slightly off camber, and as a result, running wide on exit is easy to do. Careful not to get a track limits penalty here!
Additionally, be aware of your front tires overheating through the rapid turns. You may lose grip once they do, so taking it easy in race mode is recommended.

The start of the pit entry means it is time to hit the brakes for the final two chicanes to end your lap at Le Mans.
You can take a fair bit of kerb, but do not overdo it – it is easier to spin here than it looks like if you upset your car’s balance here. Stay right after the first chicane to tackle the second one in a similar manner, but mind the sausage kerb on the inside of the final turn.
And here you are again, roughly three and a half minutes later, starting another lap. Only about 23 hours and 57 minutes to go now…
Author: Yannik Haustein
Some of these corners are relatively straight-forward, but most are not. To make your life a bit easier, here is our LMU track guide for Le Mans. And as Porsche and Le Mans are almost synonymous, we simply had to base this one on the Porsche 963.
LMU Track Guide Le Mans: Dunlop To Tertre Rouge
Courbe & Ralentisseur Dunlop
Here you are at the most famous endurance circuit in the world, starting your lap on the start-finish straight. Immediately, the lap turns tricky throughout the first few corners. First up: The Courbe Dunlop, which would be flat out by itself. The only problem with that is that the braking zone for the Dunlop Chicane, which immediately follows, starts in this turn already.Approach this sequence with your car as far to the left as possible, take a bit of inside kerb through Courbe Dunlop with a slight lift, then stay to the right, hit the brakes and shift down to second. The uphill section aids you in slowing down. Tackle the kerb of the first part of the chicane and stay to the left to optimize your exit through the second part. Careful, though, as the acceleration zone runs over a crest, meaning the rear of the car might want to break loose as you pass under the famous Dunlop bridge.
Tricky braking zone: The Dunlop chicane is easy to overshoot.
Descente de La Chapelle & Tertre Rouge
Now, you are shooting downhill. Approach Descente de La Chapelle from the left and keep your foot on the throttle as you pass the junction where the Bugatti Circuit turns right. Brake and shift down to third, then aim for a late apex in the slightly banked first part of the “S” du Tertre Rouge in order to get a good line through the right-hand part of it. As the track rises slightly on exit, be careful not to drift too far to the left and over the kerb, and floor the throttle as soon as the car feels planted enough.The proper Tetre Rouge corner now awaits. For Virage du Tertre Rouge, as it is officially called, approach with your left-side wheels on the outside kerb, and lift slightly before the turn as you approach a blue container behind the barrier to the left. Turn into the corner early, take a healthy chunk of inside kerb and make good use of the wide exit kerb. Markers tell you how wide you can go without a penalty. Nailing the run through Tertre Rouge is essential, as the first part of the Hunaudières Straight follows.
Spot the point where the right-hand armco barrier extends upwards for your braking point into the second chicane alongside the Hunaudières straight.
Hunaudières & Chicanes
Having passed the first few corners, it is time to open up the throttle and really stretch the legs of your car. Until 1989, an uninterrupted full-throttle run all the way down to the Virage de Mulsanne lay ahead, but from 1990 onwards, two chicanes separate the daunting straight.The first chicane is a right-left-right combination, so you want to approach it from the left side of the road. Spot the braking markers on the barriers, go slightly over the white line and throw the anchors at the 200 board. Shift down to second as you brake towards the first apex and make sure not to overshoot the second one, as you want to get back on the throttle as soon as possible for the straight after the chicane.
For the second chicane, it is vice versa, only that you can brake slightly later as the track points slightly uphill. Look for the point where a fourth guardrail starts atop the armco to the right – this is roughly where you want to brake.
Another braking zone in the middle of a corner: The Virage de Mulsanne.
Virage de Mulsanne
Exiting the second chicane, you will run through a slight right kink, then uphill and into another tricky braking zone. Before the actual Mulsanne, the track makes a slight right turn to avoid the roundabout that would otherwise be in the way of the track.Spot the 100 board, then hit the brakes slightly past it and aim for the inside kerb, then drift to the outside and slightly over the white line to make your entry as wide as possible. Shift down to second or first, let the car coast over the inside kerb, and then go full throttle again as soon as the car feels stable. Another long full-throttle run lays ahead.
The teal patch of astroturf (or tarmac?) is a good indicator for when to tap the brakes going into Indianapolis.
LMU Track Guide Le Mans: Indianapolis & Arnage
Long time, no braking zone in a corner! Indianapolis is another one of those tricky sequences. As you shoot down the straight preceding it, spot the brake markers and look out for a bit of teal astro turf to the right. It has small lights on it to make it visible in the dark as well. Brake slightly here, shift down to sixth, and coast through the right-hand kink. Then slam the brakes. Third gear is recommended for the left-hander of Indianapolis, as the car will be more stable when accelerating out of this banked turn.On the short run to Arnage, you want to brake earlier than you might think at first, as Virage d’Arnage is tigher than it appears. Brake shortly before the 50 marker, shift down to first gear, aim for the inside kerb on the right and accelerate away hard as soon as the grip is there to blast towards the Porsche Curves.
Threading the needle at ludicrous speeds: The Porsche Curvers are challenging, but extremely exciting.
Virage Porsche To “Esses” du Karting
To be precise, only the first right-hander is called Virage Porsche, which is followed by Virage du Pont and “Esses” du Karting. Arguably the most intense sequence of the Circuit de La Sarthe is coming up now.To the left, you will see braking markers, but your actual braking marker is the DHL sign over the track after the 100 board. Brake to about 240 kph, turn in and stay to the inside kerb on the right while getting back on the power about halfway through the turn.
The left-hander of Virage du Pont is either full throttle or can be taken with a slight lift, depending on fuel and tires. You want to aim for the inside kerb, then use as much track as you can without drifting too far right on exit and into the SAFER barrier. Another slight lift takes you through the second part – also a left-hander – and sets you up for the “Esses du Karting”.
So-called due to the karting track next to the circuit, the Esses are tricky as well. The right hander flows downhill, and you want to stay as much to the right as possible in order to widen the entry into the final left hander. It is slightly off camber, and as a result, running wide on exit is easy to do. Careful not to get a track limits penalty here!
Additionally, be aware of your front tires overheating through the rapid turns. You may lose grip once they do, so taking it easy in race mode is recommended.
The start of the pit entry means it is time to hit the brakes for the final two chicanes to end your lap at Le Mans.
Virage Ford & Virage du Raccordement
Finally, after blasting through the slight right-left of Maison Blanche (a far cry from the fearsome original corner), only two chicanes remain to finish the lap. Keep an eye out for the pit entry on the right – as soon as it starts, brake and shift down to third gear for the first of the left-right chicanes.You can take a fair bit of kerb, but do not overdo it – it is easier to spin here than it looks like if you upset your car’s balance here. Stay right after the first chicane to tackle the second one in a similar manner, but mind the sausage kerb on the inside of the final turn.
And here you are again, roughly three and a half minutes later, starting another lap. Only about 23 hours and 57 minutes to go now…
Author: Yannik Haustein
Monza
If you are going to do a lap of Monza, there is no more fitting of a choice than the 499P, Ferrari's Le Mans overall winning car from 2023.
You start where else but the start finish straight. Thankfully you have plenty of time to spot your braking zone, which can differ greatly depending on the car you use. Begin braking and get as much of the deceleration done before trailing off as you aim for the apex.
In the hypercars, doing that may actually help to slow the cars down even more. Once you have navigated the initial 90 degree corner of Prima Variante, keep as far to the right as possible. This is so you can open up the even tighter next part. On the exit, gradually apply the power and unwind the steering. Now you are free to blast down towards the next corner.

This corner is a real balancing act in any car.
The flat out Curva Biassono presents no challenge for any car since Prima Variante has slowed you down sufficiently. Plenty of time to go to the right hand side and look for your braking zone into another chicane. The difference this time is that you will want to carry as much momentum as you can.
Throw the car into the first part of Seconda Variante but open it up for the second part of the corner. Try to straightline the kerb as much as you can without accidentally loading up Flight Simulator, and now every corner gets faster and faster.
Whilst the previous Lesmo required gradually slowing, the next one is just a quick flick. Brake and turn quickly towards the corner and carry as much momentum as you can for the next flat out section. Then you are heading towards the famous Ascari corner.
As you shoot below the banking of the old track, it is time to look for the braking point. When you begin turning, you want to not attack the second part of Ascari too much. The corner tightens throughout and going through it too fast will unsettle the car and compromise the exit onto the next straight.

It is easy to accidentally cut the first part of Ascari. So do not make the same mistake we did!
Short shift if you have to if the car is twitchy here. You want to run a low-downforce setup for maximum top speed so if it is nervous, then you are doing it right. Hug the right hand side to open up the next corner, quickly negotiate that with a bit of inside kerb and you are now heading towards the final corner.
For the commonly named Parabolica (recently renamed Curva Michele Alboreto), brake and commit to the apex at the same time. Then start deviating towards the outside and keep the wheel inputs to a minimum in order to avoid spinning your wheels on acceleration. Do that and you should nail the entry onto the next lap.
Onto another lap of the historic Monza circuit.
Author: Luca Munro
You start where else but the start finish straight. Thankfully you have plenty of time to spot your braking zone, which can differ greatly depending on the car you use. Begin braking and get as much of the deceleration done before trailing off as you aim for the apex.
In the hypercars, doing that may actually help to slow the cars down even more. Once you have navigated the initial 90 degree corner of Prima Variante, keep as far to the right as possible. This is so you can open up the even tighter next part. On the exit, gradually apply the power and unwind the steering. Now you are free to blast down towards the next corner.
This corner is a real balancing act in any car.
The flat out Curva Biassono presents no challenge for any car since Prima Variante has slowed you down sufficiently. Plenty of time to go to the right hand side and look for your braking zone into another chicane. The difference this time is that you will want to carry as much momentum as you can.
Throw the car into the first part of Seconda Variante but open it up for the second part of the corner. Try to straightline the kerb as much as you can without accidentally loading up Flight Simulator, and now every corner gets faster and faster.
Gradually Faster Corners
Next up are the Lesmos. For the first, quickly brake and drop down a gear, trail off the brakes as you head towards the apex. Then you can ease your way onto the throttle and use the exit kerb to slingshot you towards the second Lesmo.Whilst the previous Lesmo required gradually slowing, the next one is just a quick flick. Brake and turn quickly towards the corner and carry as much momentum as you can for the next flat out section. Then you are heading towards the famous Ascari corner.
As you shoot below the banking of the old track, it is time to look for the braking point. When you begin turning, you want to not attack the second part of Ascari too much. The corner tightens throughout and going through it too fast will unsettle the car and compromise the exit onto the next straight.
It is easy to accidentally cut the first part of Ascari. So do not make the same mistake we did!
Short shift if you have to if the car is twitchy here. You want to run a low-downforce setup for maximum top speed so if it is nervous, then you are doing it right. Hug the right hand side to open up the next corner, quickly negotiate that with a bit of inside kerb and you are now heading towards the final corner.
For the commonly named Parabolica (recently renamed Curva Michele Alboreto), brake and commit to the apex at the same time. Then start deviating towards the outside and keep the wheel inputs to a minimum in order to avoid spinning your wheels on acceleration. Do that and you should nail the entry onto the next lap.
Onto another lap of the historic Monza circuit.
Author: Luca Munro
Fuji
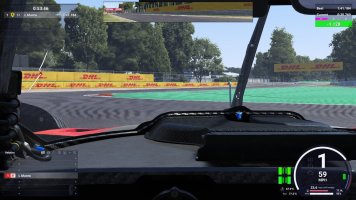
This guide is based on the Toyota GR010-Hybrid Hypercar, other classes will vary greatly. My advice would be to run with this guide and adjust accordingly to the car you’re using.

After you blast down the 0.9-mile home straight, you arrive at the first corner, Daiichi. Be mindful of cars exiting the pits, the pitlane exit is notoriously short. I have had great race results ruined by cars rejoining from the pitlane, be aware!
Brake just after the 150 board and the start of the left-hand side kerb. Remember, the key to race pace is consistency and this first big braking point is where many mistakes are made, especially under pressure.
Once you hit the middle apex of the first hairpin, start opening your wheel out to run out over the kerb to get the best exit through the second corner. Keep your right side wheels solidly on the kerb so as not to invalidate your lap.

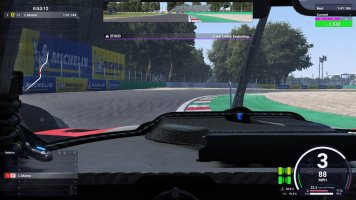
The short run down to the third turn, Coca-Cola Corner, should involve you drifting slowly from the middle of the straight to the right before you tap the brakes at the 50 board and drop down from 5th gear to 4th. Make sure you use all the kerb on the inside, but avoid the grass.

Look for the 50 board on your right-hand side at the top of the fence. Stand on your brakes in between that and the Michelin advertising board above you. As you turn in, slowly let off the brakes.
Allow the car to cut the kerb on the inside of the hairpin. Do not run over the large sloping red area, however, as this will push your car too wide on the exit and scrub any speed you have managed to carry.
Coming out of turn 11 and into 12, you can cut the entirety of the green kerb. This allows you to straight line for the difficult turn 13. Look for a white indicating line on the left-hand side, past the kerb, for your braking reference.

Oversteering at the apex of 13 could be quite a problem depending on how you have set up your car. Make sure you angle your car as far to the right as possible. This eliminates the need to work the wheel and correct the car as much.
Following through turn 13, make sure you are parallel to the kerb on your left-hand side. When that kerb drops off, brake for turn 15. Let the car flow out to the right.
Make sure you are trail braking to allow greater control over your Hypercar of choice. Cutting the kerb on the inside of 15 will invalidate your lap, so be careful with those left-hand side wheels!
Moving into the most important corner on the whole track, turn 16, Panasonic corner. Just beyond the end of the maintenance road on the right should be your braking point. Make sure the car flows out to the left as far as you dare.

Cut back into the corner for a late apex to give you the best exit possible for the 0.9 mile straight ahead of you. Do not use too much of the inside kerb, it will unsettle the car and ruin your momentum.
Author: Connor Minniss
After you blast down the 0.9-mile home straight, you arrive at the first corner, Daiichi. Be mindful of cars exiting the pits, the pitlane exit is notoriously short. I have had great race results ruined by cars rejoining from the pitlane, be aware!
Brake just after the 150 board and the start of the left-hand side kerb. Remember, the key to race pace is consistency and this first big braking point is where many mistakes are made, especially under pressure.
Once you hit the middle apex of the first hairpin, start opening your wheel out to run out over the kerb to get the best exit through the second corner. Keep your right side wheels solidly on the kerb so as not to invalidate your lap.
The short run down to the third turn, Coca-Cola Corner, should involve you drifting slowly from the middle of the straight to the right before you tap the brakes at the 50 board and drop down from 5th gear to 4th. Make sure you use all the kerb on the inside, but avoid the grass.
Patience Equals Pace
100R is one of the most difficult corners to get consistently correct, move slightly to the middle to open the corner entry up, slowly drift back to the right and lift just before the turn tightens. Wait for your front wheels to bite and you can power through the second phase of Fuji’s 100R.Look for the 50 board on your right-hand side at the top of the fence. Stand on your brakes in between that and the Michelin advertising board above you. As you turn in, slowly let off the brakes.
Allow the car to cut the kerb on the inside of the hairpin. Do not run over the large sloping red area, however, as this will push your car too wide on the exit and scrub any speed you have managed to carry.
Slow And Technical
Moving down towards the third heavy braking point on the track, Dunlop corner. Brake as you come alongside the orange end of the armco barrier and drop to first gear. This allows your car to cut a good portion of the red material on the inside of the corner. Keep the car as far to the right as you can.Coming out of turn 11 and into 12, you can cut the entirety of the green kerb. This allows you to straight line for the difficult turn 13. Look for a white indicating line on the left-hand side, past the kerb, for your braking reference.
Oversteering at the apex of 13 could be quite a problem depending on how you have set up your car. Make sure you angle your car as far to the right as possible. This eliminates the need to work the wheel and correct the car as much.
Following through turn 13, make sure you are parallel to the kerb on your left-hand side. When that kerb drops off, brake for turn 15. Let the car flow out to the right.
Make sure you are trail braking to allow greater control over your Hypercar of choice. Cutting the kerb on the inside of 15 will invalidate your lap, so be careful with those left-hand side wheels!
Moving into the most important corner on the whole track, turn 16, Panasonic corner. Just beyond the end of the maintenance road on the right should be your braking point. Make sure the car flows out to the left as far as you dare.
Cut back into the corner for a late apex to give you the best exit possible for the 0.9 mile straight ahead of you. Do not use too much of the inside kerb, it will unsettle the car and ruin your momentum.
Author: Connor Minniss
Bahrain
Mainly known for hosting the F1 Bahrain Grand Prix, the Bahrain International Circuit has become a mainstay on the WEC calendar since its first appearance in 2012 as well. The desert track is quite technical, including some tricky elevation changes – never mind the sweltering heat that can engulf the track.
It is hardly a surprise that races there are held either early or late in the year. For WEC, the latter is the case, with the 2023 8 Hours of Bahrain marking the season finale. Starting in daylight but running into the darkness makes temperatures a bit more bearable, and it creates interesting visuals with the countless floodlights cutting through the darkness of the night.
With treacherous crests, late apexes and low-grip parts, the track is not exactly straight forward. So let us dive right into the Bahrain International Circuit, this time in the Vanwall Vandervell 680!

Blasting down the long start-finish straight, a hard braking zone awaits ahead of the Turn 1-2-3 complex. Spot the orange marking on the armco, right alongside the 150 board and an LED flag panel as you are running as close to the left-side edge of the track as possible, then hit the brakes heavily. You want to slow down slightly more than you would think at first, navigate the apex and not drift to the outside.
Turn 2 might not look like much, but the low-grip acceleration zone it is in the middle of is the tricky part. Short shift from first to second gear, take a little bit of kerb on the left side, and straight-line the turn as much as possible. Afterwards, it is full throttle through Turn 3 to end the sequence.
Slowly start progressively applying the power again after this point, but be careful. As the turn runs right over a crest, the car might want to swap ends despite its Traction Control at this point. You will feel when it is safe to full hit the loud pedal again, let your car drift to the left-hand exit kerb, and you have completed the first sector.


Continuing further downhill, the toughest section of the track lays ahead. Turn 9 itself is not too abrupt, but the very tight Turn 10 follows almost immediately. This makes T9 a left-turning braking zone – it is easy to run wide here or just flat-out lose the car.
Approach Turn 9 from the right, aim for the inside kerb and brake. Immediately shift your focus to the outside kerb as you aim for that and slow down to first gear. Then, turn in tighter than you may think. Unless you are running triple screens or an ultrawide monitor, you will likely not be able to see the apex, so nailing the turn-in point will take some laps of practice to get right. Accelerate away through a slight left and onto the straight leading to Turn 11.

Time to head back up the hill again. As you approach Turn 11, brake just where the right-hand kerb starts. Hit the inside kerb either in second or third gear, then start accelerating again let the momentum carry the car wide to get a good angle for the second apex of the turn. Short shift if needed.
Depending on the angle you were able to create exiting Turn 11, Turn 12 can be taken with just a lift. Wait until you hit the inside kerb to the right, then floor the throttle and use the exit kerb – but not too much, otherwise it will pull you into the run-off.
Prepare to brake almost immediately, as Turn 13 awaits. It features a very late apex, again marked by kerbs. Even though the outside of the track looks like it is already turning right, you will want to wait with properly turning in for the corner. It is easy to miss the apex, however, as I did in the clip. Again, practice is important for this corner.

Turn 13 is already part of the final sector, but due to its connection to Turn 12, we decided to leave it in the preceding segment. Exiting T13, you accelerate down the back straight, where your car is going to reach almost the same top speed as on the main straight as the track still goes downhill.
Approaching Turn 14, spot the 150 board or, alternativel, the orange marking on the armco just before the red-and-white barrier to the left. Your braking point is in between those two spots. Shift down to second gear and turn towards the apex, which is slightly off camber.
Take a bit of kerb and accelerate again. Careful, though, as the acceleration zone does not offer too much grip and also features the slight right-hander that is Turn 15. Once you feel the car grip up properly, floor the throttle again and head past the massive main grandstand. And off you go again to disappear into the desert for another lap.
Author: Yannik Haustein
It is hardly a surprise that races there are held either early or late in the year. For WEC, the latter is the case, with the 2023 8 Hours of Bahrain marking the season finale. Starting in daylight but running into the darkness makes temperatures a bit more bearable, and it creates interesting visuals with the countless floodlights cutting through the darkness of the night.
With treacherous crests, late apexes and low-grip parts, the track is not exactly straight forward. So let us dive right into the Bahrain International Circuit, this time in the Vanwall Vandervell 680!
Le Mans Ultimate Track Guide Bahrain: First Sector
Turns 1-2-3
Blasting down the long start-finish straight, a hard braking zone awaits ahead of the Turn 1-2-3 complex. Spot the orange marking on the armco, right alongside the 150 board and an LED flag panel as you are running as close to the left-side edge of the track as possible, then hit the brakes heavily. You want to slow down slightly more than you would think at first, navigate the apex and not drift to the outside.
Turn 2 might not look like much, but the low-grip acceleration zone it is in the middle of is the tricky part. Short shift from first to second gear, take a little bit of kerb on the left side, and straight-line the turn as much as possible. Afterwards, it is full throttle through Turn 3 to end the sequence.
Turn 4
Heading up the hill, look for the 150 board – or, if it has been demolished already, the orange marker on the armco right by the trackside vehicle. Brake, shift down to second gear and start turning towards the apex, which is also marked by a bollard right behind the kerb.Slowly start progressively applying the power again after this point, but be careful. As the turn runs right over a crest, the car might want to swap ends despite its Traction Control at this point. You will feel when it is safe to full hit the loud pedal again, let your car drift to the left-hand exit kerb, and you have completed the first sector.
Le Mans Ultimate Track Guide Bahrain: Sector 2
Turns 5-6-7
Now continuing downhill, Turn 5 is a slight left-hander that also doubles as the braking zone for Turn 6. Hit the brakes at the point where the kerb of the alternate layout joins the track to the left, shift to third and take some kerb on the right on your way through Turn 6. Do not get too eager with the throttle, as you will want to create a good angle for Turn 7 to then floor it through there with the help of some inside kerb to the left.Turn 8
Almost immediately, the first-gear right-hander of Turn 8 follows. Brake just as you pass the Goodyear board to the right (or slightly after the kerb ends) as you move to the left as much as possible. Again, a bollard marks the apex, which is what you want to aim for. Careful on exit, though: The wide kerb might look inviting to extend the track a bit, but its bumpiness will cost you time.Turns 9 & 10
Continuing further downhill, the toughest section of the track lays ahead. Turn 9 itself is not too abrupt, but the very tight Turn 10 follows almost immediately. This makes T9 a left-turning braking zone – it is easy to run wide here or just flat-out lose the car.
Approach Turn 9 from the right, aim for the inside kerb and brake. Immediately shift your focus to the outside kerb as you aim for that and slow down to first gear. Then, turn in tighter than you may think. Unless you are running triple screens or an ultrawide monitor, you will likely not be able to see the apex, so nailing the turn-in point will take some laps of practice to get right. Accelerate away through a slight left and onto the straight leading to Turn 11.
Turns 11-12-13
Time to head back up the hill again. As you approach Turn 11, brake just where the right-hand kerb starts. Hit the inside kerb either in second or third gear, then start accelerating again let the momentum carry the car wide to get a good angle for the second apex of the turn. Short shift if needed.
Depending on the angle you were able to create exiting Turn 11, Turn 12 can be taken with just a lift. Wait until you hit the inside kerb to the right, then floor the throttle and use the exit kerb – but not too much, otherwise it will pull you into the run-off.
Prepare to brake almost immediately, as Turn 13 awaits. It features a very late apex, again marked by kerbs. Even though the outside of the track looks like it is already turning right, you will want to wait with properly turning in for the corner. It is easy to miss the apex, however, as I did in the clip. Again, practice is important for this corner.
Le Mans Ultimate Track Guide Bahrain: Final Sector
Turns 14 & 15
Turn 13 is already part of the final sector, but due to its connection to Turn 12, we decided to leave it in the preceding segment. Exiting T13, you accelerate down the back straight, where your car is going to reach almost the same top speed as on the main straight as the track still goes downhill.
Approaching Turn 14, spot the 150 board or, alternativel, the orange marking on the armco just before the red-and-white barrier to the left. Your braking point is in between those two spots. Shift down to second gear and turn towards the apex, which is slightly off camber.
Take a bit of kerb and accelerate again. Careful, though, as the acceleration zone does not offer too much grip and also features the slight right-hander that is Turn 15. Once you feel the car grip up properly, floor the throttle again and head past the massive main grandstand. And off you go again to disappear into the desert for another lap.
Author: Yannik Haustein