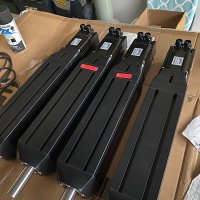
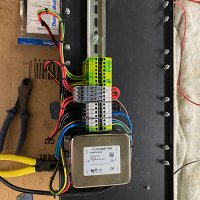
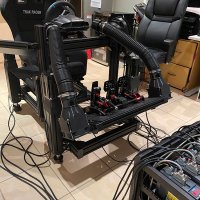
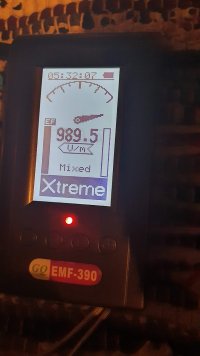
Hey guys. Thought I’d create a thread for those taking the plunge into this brilliant DIY project..
I will be starting mine soon and I know there are others thinking about it.. so feel free to share your knowledge and experiences so we can all enjoy this platform to its full potential. A huge thanks to the developers who have really knocked this one out of the park!
Website: https://opensfx.com/2019/02/20/welcome-to-our-new-site/
Github: https://github.com/SimFeedback/SimFeedback-AC-Servo/wiki
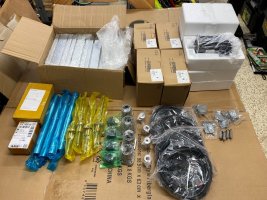
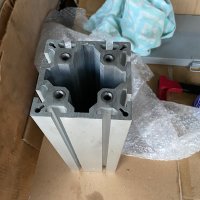
For all the internals for the actuator contact Amy - skye@ntl-bearing.com
She can supply everything you need. Just remind her you want the ends of the shafts chamfered and make sure she sends the right sized ball screw - we have had a couple of issues reported. She is very helpful though and the cost is pretty good.
Huge thanks to @RowanH for writing a comprehensive user guide which can be accessed here - https://www.rowanhick.com/sfx-100-build-and-running-guide
In addition, @anton_Chez has contributed a list of post numbers for some of the important settings etc..
Post #320 SFX-100 thread
Post #327 SFX-100 thread for Discord correlation
Post #339 SFX-100 thread
Post #418 SFX-100 thread
Post #424 SFX-100 thread
Post #439 SFX-100 thread
Post #449 SFX-100 thread
Post #517 SFX-100 thread
Post #554 SFX-100 thread
Post #580 SFX-100 thread
Post #826 SFX-100 thread
Post #837 SFX-100 thread
Post #864,866,867,868,870,887,889,897 SFX-100 thread
Post #911,914 SFX-100 thread
Post #988,992,998 SFX-100 thread
Post #1147 SFX-100 thread
Post #1492 SFX-100 thread
Post #1511,1517 SFX-100 thread
I will try to keep this page updated with links to source the parts in other parts of the world. Just post whatever links you have and i'll add them here.
Please note: Not all the parts listed below are essential for the project. For the essential parts refer to the original shopping list.
Australia:
Thanks to @AussieSim for the following links:
10A power lead(s) * 4
https://www.jaycar.com.au/2m-black-mains-extension-lead/p/PS4152
Top quality wire stripper
https://sydneytools.com.au/product/boxo-cutws205-multifunction-wire-stripper
RCD/safety switch power block
https://www.bunnings.com.au/arlec-4-outlet-heavy-duty-portable-safety-switch_p4420028
WD-40 lithium grease for the ball screws
https://www.bunnings.com.au/wd-40-specialist-300g-high-performance-white-lithium-grease_p6100408
Vibration pads
https://www.bunnings.com.au/whites-on-site-100-x-12-5mm-rubber-anti-vibration-mat-4-pack_p3961547
WD-40 Dry PTFE spray for the slider (free shipping)
https://au.rs-online.com/mobile/p/lubricants/7577134/
Arduino Leonardo (free shipping + frequent 10-15% off discount)
https://www.arrow.com/en/products/a000057/arduino-corporation
DB25 cables * 4 (free shipping)
https://www.arrow.com/en/products/ak401-2/assmann-wsw-components-inc
PETG * 3 (free shipping)
https://www.arrow.com/en/products/petg17bk1/mg-chemicals
WAGO-like connectors to avoid a breadboard (perhaps use genuine ones if you are doing 240V AC)
https://www.aliexpress.com/item/32906719488.html
D-Sub breakout boards * 4
https://www.aliexpress.com/item/32297675967.html
3D printer Creality Ender-3 Pro
https://www.aliexpress.com/item/32918302452.html
Wires from Arduino to D-Sub breakout (remove black plastic from the WAGO end)
https://www.aliexpress.com/item/32887680826.html
Crimp connectors for AC wire leads
https://www.aliexpress.com/item/32813550981.html
I will be starting mine soon and I know there are others thinking about it.. so feel free to share your knowledge and experiences so we can all enjoy this platform to its full potential. A huge thanks to the developers who have really knocked this one out of the park!
Website: https://opensfx.com/2019/02/20/welcome-to-our-new-site/
Github: https://github.com/SimFeedback/SimFeedback-AC-Servo/wiki
For all the internals for the actuator contact Amy - skye@ntl-bearing.com
She can supply everything you need. Just remind her you want the ends of the shafts chamfered and make sure she sends the right sized ball screw - we have had a couple of issues reported. She is very helpful though and the cost is pretty good.
Huge thanks to @RowanH for writing a comprehensive user guide which can be accessed here - https://www.rowanhick.com/sfx-100-build-and-running-guide
In addition, @anton_Chez has contributed a list of post numbers for some of the important settings etc..
Post #320 SFX-100 thread
Post #327 SFX-100 thread for Discord correlation
Post #339 SFX-100 thread
Post #418 SFX-100 thread
Post #424 SFX-100 thread
Post #439 SFX-100 thread
Post #449 SFX-100 thread
Post #517 SFX-100 thread
Post #554 SFX-100 thread
Post #580 SFX-100 thread
Post #826 SFX-100 thread
Post #837 SFX-100 thread
Post #864,866,867,868,870,887,889,897 SFX-100 thread
Post #911,914 SFX-100 thread
Post #988,992,998 SFX-100 thread
Post #1147 SFX-100 thread
Post #1492 SFX-100 thread
Post #1511,1517 SFX-100 thread
I will try to keep this page updated with links to source the parts in other parts of the world. Just post whatever links you have and i'll add them here.
Please note: Not all the parts listed below are essential for the project. For the essential parts refer to the original shopping list.
Australia:
- O-Ring - https://www.ebay.com.au/itm/Kit-419Pcs-O-Ring-O-Ring-Black-Rubber-32-Sizes-With-Case-3-50mm-W8D7/223152697816?ssPageName=STRK:MEBIDX:IT&_trksid=p2057872.m2749.l2649
- D-Sub breakout board - DB25 25pin Female Adapter RS-232 Serial Terminal Module Breakout Board Connector
- Emergency Stop - https://www.ebay.com.au/itm/Reliable-Emergency-Stop-Push-Button-Box-600V-Switch-for-Elevator/192115082001?ssPageName=STRK:MEBIDX:IT&_trksid=p2057872.m2749.l2649
- Arduino Wiring - https://www.ebay.com.au/itm/40-pcs-Dupont-Cable-20cm-Jumper-Wire-for-Arduino-RPi-breadboard-AU-Stock/202436863098?ssPageName=STRK:MEBIDX:IT&var=502467628096&_trksid=p2057872.m2749.l2649
- Breadboard - https://www.ebay.com.au/itm/Mini-Solderless-Breadboard-400-Contacts-Tie-points-Universal-Available-New-lemon/123145741183?ssPageName=STRK:MEBIDX:IT&_trksid=p2057872.m2749.l2649
- D-Dub Cable - https://www.ebay.com.au/itm/Black-D...h=item3f6ace6403:g:038AAOSw9mpaSsU2:rk:1:pf:0
- Screw Shield for Arduino Leonardo - https://www.ebay.com.au/itm/New-Scr...h=item25a9d471a4:g:5BgAAOSwraJbc9rC:rk:1:pf:0
- Arduino Leonardo Replica - https://www.ebay.com.au/itm/DIY-Eduino-Leonardo-Module-with-USB-Cable-for-Arduino-ATMEGA32U4-Blue-Black/132719951279?epid=916281063&hash=item1ee6b9bdaf:g:2QUAAOSw5iNbWv6b:rk:123
f:
Thanks to @AussieSim for the following links:
10A power lead(s) * 4
https://www.jaycar.com.au/2m-black-mains-extension-lead/p/PS4152
Top quality wire stripper
https://sydneytools.com.au/product/boxo-cutws205-multifunction-wire-stripper
RCD/safety switch power block
https://www.bunnings.com.au/arlec-4-outlet-heavy-duty-portable-safety-switch_p4420028
WD-40 lithium grease for the ball screws
https://www.bunnings.com.au/wd-40-specialist-300g-high-performance-white-lithium-grease_p6100408
Vibration pads
https://www.bunnings.com.au/whites-on-site-100-x-12-5mm-rubber-anti-vibration-mat-4-pack_p3961547
WD-40 Dry PTFE spray for the slider (free shipping)
https://au.rs-online.com/mobile/p/lubricants/7577134/
Arduino Leonardo (free shipping + frequent 10-15% off discount)
https://www.arrow.com/en/products/a000057/arduino-corporation
DB25 cables * 4 (free shipping)
https://www.arrow.com/en/products/ak401-2/assmann-wsw-components-inc
PETG * 3 (free shipping)
https://www.arrow.com/en/products/petg17bk1/mg-chemicals
WAGO-like connectors to avoid a breadboard (perhaps use genuine ones if you are doing 240V AC)
https://www.aliexpress.com/item/32906719488.html
D-Sub breakout boards * 4
https://www.aliexpress.com/item/32297675967.html
3D printer Creality Ender-3 Pro
https://www.aliexpress.com/item/32918302452.html
Wires from Arduino to D-Sub breakout (remove black plastic from the WAGO end)
https://www.aliexpress.com/item/32887680826.html
Crimp connectors for AC wire leads
https://www.aliexpress.com/item/32813550981.html
Last edited by a moderator:

