You are using an out of date browser. It may not display this or other websites correctly.
You should upgrade or use an alternative browser.
You should upgrade or use an alternative browser.
The "What Are You Working On?" Thread
- Thread starter garyjpaterson
- Start date
Does that mean the NSX is sorted? I just sent @Some1 the physics files last night.
Does that mean the NSX is sorted?

Just though i would say that im about ot start a full 3d sound for the porsche GT3
This engine sound is dope !
Point is that it fits the 911R the 991 cup and RSR (along with transmission differences) and the remaining GT3 RS
Good to see you back, was also considering making more streetcars, having fun with the TT actually. Looking forward to the 911, those 9k revs ain´t lying

This is the URD 2015 Aura (DTM Audi).
See all of the coloured lines I've drawn? Every one is mapped to a completely different part of the skin. Then there's the top, bottom, sides of each tiny wing... and then repeat on the other side of the car. It must be about 50 different parts in all. I've spent around 6 hours just identifying the tiniest pixels and I haven't finished one side yet.
Brownninja97
Premium
i cant see the image
Brownninja97
Premium
oh, its because malwarebytes doesnt trust it
I'm sorting out the final bits for the release
Are you gonna release it today?
Started working on two F1 Hybrid skins and one Porsche GT3 skin. I made them before, so it should be done relatively quick. Oh, and I need to sort out some small issues with the release skin, after the tips from @formulaHEINE .
With that said, if anyone has a fictional- skin wish for the F1 Hybrid I'm willing to take a look at it. Don't give me a deadline or anything but maybe I can create something out of your idea.
With that said, if anyone has a fictional- skin wish for the F1 Hybrid I'm willing to take a look at it. Don't give me a deadline or anything but maybe I can create something out of your idea.
AccAkut
Premium
I haven't actually managed to successful export boned meshes from Blender yet (animations yes but they went on existing meshes). It does something stupid to the object origins.
If you look at the F350 leaves it's just 2 halves of the leaf as solid objects pointing at the axle.
Have to find a way to mask it at that position, I planned on doing a C6 transverse setup (stumbled upon some ZF composite leaf spring study paper).
View attachment 214836
Have to find a way to mask it at that position, I planned on doing a C6 transverse setup (stumbled upon some ZF composite leaf spring study paper).
I have a similar setup on the rear here:
Have you managed to get both animated suspensions working as they should? either the animated front works and the REAR_AXLE is static, or the REAR_AXLE works but the front doesn't.
AccAkut
Premium
I haven't done anything with a solid axle before, thats why I started this project (no animation on it yet). Overall I remember Pankykapus stating that they almost exclusively use DIR animation on new cars (at around 787B release), so maybe it just doesn't work with keyframe animation anymore.I have a similar setup on the rear here:
View attachment 214837
Have you managed to get both animated suspensions working as they should? either the animated front works and the REAR_AXLE is static, or the REAR_AXLE works but the front doesn't.
Anyway, basic bone animation is:
- make an Armature (parent object for bones), probably want to be careful this and the object have the same origin at 0,0,0.
- add Armature modifier to the mesh, link that one
- make bones
- look at vertex groups (same tab as uvmap), make one for each bone (this bit's annoyingly not well connected, you have to manually type the name of the bone)
- ctrl+tab to go from object mode to weight paint mode (or in dropdown) and you'll be editing the highlighted vertex group
- easiest way imo is just use a gradient (alt+lmb) to set weights, just set "strength" to 100% and 'Add' to brush type on the tool ui first. You can tweak from there but gradient to me seems to be the only way to get all the vertices painted in the mesh (normal brushes have really awful ability to paint). Dark blue is 0 weight, red is 100% weight.
- select other vertex groups to do each bone
Armature editing just lets you start from the root bone and extrude (e) more bones, then you can go to pose mode (ctrl+tab from object mode) to see how the mesh follows it.
I believe you can also do armature animations aimed at Empties instead of Bones but no idea how to get that happening.
You could also leave the Armature modifier in "envelope" mode but that's meant for stuff with an actual skeleton, will automatically assign vertices to bones based on how close they are. I think for a leaf spring it'd be easier to just have 1 bone moving around and then a gradient of weights so it follows more closely towards each end.
Last edited:
Just a lil tease now,

Just a lil' tease now, Maebashi Rally

Just a lil' tease now, Maebashi Rally
Latest News
-
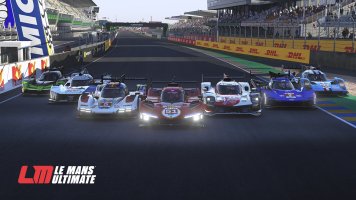
Rennsport Beta Update 1.8.5 Adds Surprise LMDh Car, Rolling StartsThe latest beta release is here: Rennsport update 1.8.5 adds two current endurance prototype...
- Yannik Haustein
- Updated:
- 2 min read
-
2024 Formula One Emilia Romagna Grand PrixAfter a somewhat surprisingly intense Miami Grand Prix, Formula One returns to Imola for the...
- Connor Minniss
- Updated:
- 3 min read
-
Vehicle Software Company Marble Labs Announces Potential FFB Replacement TechForce Feedback is essential to enjoying sim racing. US-based vehicle software company Marble...
- Yannik Haustein
- Updated:
- 3 min read
-
Corsair In Pole Position To Purchase Fanatec, Provide Interim Funding (Updated)The plot thickens, as Corsair signs an agreement to “negotiate exclusively” with the beleaguered...
- Thomas Harrison-Lord
- Updated:
- 4 min read
-
F1 Manager 2024 Create A Team & Mechanical Failures: Our First ImpressionsThis summer, F1 Manager 2024 sets out to expand upon the previous two games that allowed F1 fans...
- Yannik Haustein
- Updated:
- 6 min read
-
RaceRoom To Add BMW M2 CS Racing, Two More BMWsMore content is heading RaceRoom's way: Three BMWs are coming to the sim in May, the first one...
- Yannik Haustein
- Updated:
- 1 min read
-
Community Question: What Is Your Opinion On Hotlapping?Sim racing offers a plethora of ways to compete, and hotlapping is quite possibly the fastest...
- Yannik Haustein
- Updated:
- 3 min read


