SFX100 direct drive belt tensioner

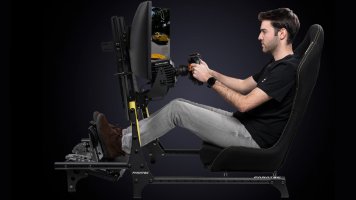
I’d like to show you a direct drive belt tensioner which can be mounted at the back of the SFX100 actuators. You can build this yourself, see the attached manual. Also attached is the STL which you can use to 3D print the tube bearing holders. I’m using Saxxon’s excellent SimFeedback software to control the tension of the belts, the same way as it controls the actuators. All information is in the manual.
Note 1: due to the size of the manual I had to split the PDF into three files - page 1 to 18, 19 to 25 and page 26 to 36.
Note 2: rename "Bearing holder.stl.txt" to "Bearing holder.stl".

20200414_101258.jpg
20200412_142546.jpg
20200424_142709.jpg
20200414_101346.jpg


Update: I have added the waist (hip) belts to the tube as well. This improves the feeling a lot! Highly recommended.

1.jpg


2.jpg


Rolled off:

4.jpg


Rolled up:

5.jpg


I have mounted a bigger plate:

6.jpg


The servo has a lot more work to do, so I had to increase the torque limit (P8 / P9) from 75 to 200.

Update 11/11/2020. Version 1.2 of the manual:
  • There was an error in the screenshot of the SimFeedback AC profile: “Type: Pitch Effect” should be “Type: Standalone Motor 1”. Thanks to Metalnwood for pointing that out to me. This also has the advantage of not having to wind the belts manually before starting SimFeedback.
  • Changed servo drive parameter P97 to 0 so it winds the tube as shown in the pictures.
  • Added a section about adding hip belts (highly recommended!).
  • Changed the servo drive configuration and safety warning.
  • Added a few lines on how to setup the belts for the first time.
 

Attachments

  • Bearing holder.stl.txt
    196.8 KB · Views: 454
  • Construction manual belt tensioner V1.2 page 1-18.pdf
    1.8 MB · Views: 604
  • Construction manual belt tensioner V1.2 page 19-25.pdf
    990.6 KB · Views: 377
  • Construction manual belt tensioner V1.2 page 26-36.pdf
    1.7 MB · Views: 519
Last edited:
It looks great!
Thank you for sharing the build manual. I have been playing with the idea of making a belt tensioner for my rig, but never got around to actually do it. With a manuaI to follow perhaps I finally will be able to do it.
 
Upvote 0
Thanks for posting the instructions! Rather than going through filing & drilling the hollow shaft to make it fit the spindle key, I was wondering if not it would be possible to use the same shaft coupling mechanism as for the original SFX-100 build?

E.g. get the same hollow shaft, but with a 16/20mm shaft coupling like this:

The SFX-100 build didn't use the spindle key at all, but with a bit of filing and some loctite, it doesn't seem to move even the slightest, so I'd guess that should work here too, and make the build slightly simpler.
 
Upvote 0
Nice build, good use of that spare servo ;)

‘’I am busy with something similar, but using 2 servos, one per side, for better directional effects/immersion.

Yours came out good though.

@mark: I would suggest using a flexible coupling between servo and shaft, whilst supporting both ends of the shaft with a Plummer-block with floating bearings, to negate misalignment and side-loads on the servo. Shouldn’t be an issue though, as these hardly rotate much in this application....

Cheers,
Beano
 
Upvote 0
Update: now the steel stube rolls 4 belts at the same time - shoulder and waist belts. This improves the feeling a lot! Barry Rowland wasn't joking when he said in his video about tensioning the waist belts too: "You're there!". See the pictures in the first post. The servo has a lot more work to do, so I had to increase the torque limit (P8 / P9) from 75 to 200.
 
Upvote 0
DO you have some more photos, or an exploded view of the rollers at the top for the shoulders?

I cant see how its support from the photos?
The STL files of the rollers can be found on the SimFeedback belt-tensioner Discord channel (see the top of that channel and the pinned messages).

Here are some more photos of the top rollers:

20200625_192348.jpg


20200625_192447.jpg


20200625_192437.jpg


20200625_192500.jpg


The middle part is glued into its base and also bolted to the base as you can see in the photo. The base itself is attached to the chair with 3M industrial velcro (you can see a bit of the velcro below the base), I did not drill into my chair. Tip for using 3M industrial velcro: stick it on the base and on the chair, manually press it and then leave it for 24 hours. Do not put pressure on it, just leave it to settle for 24 hours. Then attach it to the chair. It's very strong.
 
Upvote 0
I’m very surprised that isn’t anchored mechanically into the chair.

I’ll be honest I was hoping although slimly you would say you had hooked it through the belt holes or something and it was strong enough to withstand the pull down force, but I wasnt hopeful.

Thanks for clarifying, and making this a whole load easier to install, as I wasn’t looking forward to drilling my seat!
 
Upvote 0
I'm getting dangerously close to starting in on this :D I got a 4 point set of belts off iracing forum for a good price just recently. My sfx100 has been a very nice upgrade, but I definitely miss the motion cue from braking. When I hit the brakes, I get a weird feeling like something isn't right as the rest of the motion is pretty believable. This seems like it would be a nice touch, I don't feel like I miss the traction loss as much as I thought I might.

So, I guess one more motor, some more 3d printing and a few more brackets and shafts to order!
Go for the 4 belt version (see updated first post), it is so much better. Love it.
 
Upvote 0
Yes, I saw that I've been following this for a bit. I was wondering if it was possible to pull from the hips also after I saw Barry's review too :) glad to see it is possible.

I am not sure if my current seat will work though, it's a junkyard seat from a BMW, but the top part behind the shoulders is not plastic, but leather. I am not sure if the velcro will hold there. I am not worried about damaging the seat, however.. it was only $20 :)

Maybe I can somehow mount it around those metal poles for the headrest..

20200630_212551.jpg
 
Upvote 0
Update 11/11/2020. Version 1.2 of the manual:
  • There was an error in the screenshot of the SimFeedback AC profile: “Type: Pitch Effect” should be “Type: Standalone Motor 1”. Thanks to Metalnwood for pointing that out to me. This also has the advantage of not having to wind the belts manually before starting SimFeedback.
  • Changed servo drive parameter P97 to 0 so it winds the tube as shown in the pictures.
  • Added a section about adding hip belts (highly recommended!).
  • Changed the servo drive configuration and safety warning.
  • Added a few lines on how to setup the belts for the first time.
 
Upvote 0
Very interesting.
If I am right with the break of the SFX-100 project there is no Simfeedback license available right now.
Do you have experience with using those servos together with Sim Tools?
 
Upvote 0

Latest News

What's needed for simracing in 2024?

  • More games, period

  • Better graphics/visuals

  • Advanced physics and handling

  • More cars and tracks

  • AI improvements

  • AI engineering

  • Cross-platform play

  • New game Modes

  • Other, post your idea


Results are only viewable after voting.
Back
Top