Buying advice please - Next Level v3 Motion Platform

I'm looking for some advice and thoughts of other owners or people with good knowledge of the product, please.

I always said I'd buy myself a motion simulator if I could afford one and had the room available. Well, that day may have arrived. I'm impressed by what I've seen of the Next Level v3 Motion Platform

This seems to meet all my criteria:

+ Limited space requirements, I don't have room for a huge sim rig but this seems compact enough to work.
+ Works with Oculus Rift VR, that fixed head position setting solution is impressive
+ Great support and regular updates from the developers
+ Available in the UK
+ Works with my current Thrustmaster wheel and accessories.
+ Sub £3k for the full setup, I'm not a pro racer I'm not looking for a practice simulator this is just for fun so the cost/fun balance has to be right.

So help me do the man maths! Is it worth it?

Is there another similar product I should also look at? It would need to be reasonably compact, work with VR, available in the UK without too much hassle and in the same £3-5K price range.

Is there anywhere I can try one or even better several of the systems in the UK?
 
Yeah I'm not sure about the new traction loss kit. I'd be more inclined to sell the V3 on and go for a 4 actuator setup instead. It keeps the footprint the same as it is now and if I go the DIY route instead of full D-Box official, the cost is probably comparable to owning both the V3 and the traction loss module.

That Porsche is not a mock up. It's the real car without the engine and gearbox. Even the brakes had the calipers connected to the pedal. That thing basically goes back on track, apparently. You've probably seen it, but the motion comes from D-Box actuators mounted to the front two seats. That would have been breathtaking to try. The view from inside the cockpit looked awesome.
 
Upvote 0
Yeah I'm not sure about the new traction loss kit. I'd be more inclined to sell the V3 on and go for a 4 actuator setup instead. It keeps the footprint the same as it is now and if I go the DIY route instead of full D-Box official, the cost is probably comparable to owning both the V3 and the traction loss module.

That Porsche is not a mock up. It's the real car without the engine and gearbox. Even the brakes had the calipers connected to the pedal. That thing basically goes back on track, apparently. You've probably seen it, but the motion comes from D-Box actuators mounted to the front two seats. That would have been breathtaking to try. The view from inside the cockpit looked awesome.
Let’s not pretend if the official pricing is actually the same as the V3 you won’t be all over it :p.

If it is double the price then at that point it’s too close to D-Bix territory.
 
Upvote 0
Let’s not pretend if the official pricing is actually the same as the V3 you won’t be all over it :p

I'm not sure. I think the lack of width in my room vs what is around my cockpit and the way it's oriented it might be more of a hassle than anything else. Not looking forward to lifting what must be at least 50Kg up and onto it to mount it either.

I have concerns with the combination of the hardware. I feel that the less is more motto might well apply here. Of course you'd need to sit in it and drive it to get the full story, but that would be an expensive and time consuming test. I'd love to test a full chassis mover one day, but it needs to offer the same speed, intensity and response time as the V3 otherwise I'll end up sticking with what I have. Pretty happy with it.
 
Upvote 0
I I'd love to test a full chassis mover one day, but it needs to offer the same speed, intensity and response time as the V3 otherwise I'll end up sticking with what I have. Pretty happy with it.

I am again posting here as a "observer" and official as a "former NLMv3". The unit is packed and ready for shipment to the new owner.

I have always loved the NLMv3, but it's time to move on to the full chassis mover. Full chassis mover has always been my dream, even though i never ever even drove one.

I hope it's fast enough, quiet enough and reliable enough, anyway we will find out for sure.
 
Upvote 0
I am again posting here as a "observer" and official as a "former NLMv3". The unit is packed and ready for shipment to the new owner.

I have always loved the NLMv3, but it's time to move on to the full chassis mover. Full chassis mover has always been my dream, even though i never ever even drove one.

I hope it's fast enough, quiet enough and reliable enough, anyway we will find out for sure.
Keep us posted please. A blog about the progress of the build...? :geek:
 
Upvote 0
Several of the motion systems I tried at the SimExpo (which was a fascinating visit btw - you should ALL go) had harnesses which were attached to the static frame via a spring setup - which meant as the forward pitch happens under braking the harnesses also tighten. In VR it's absolutely convincing as an actual braking force pushing you forward. Clever stuff !
 
Upvote 0
You need a pretty heavy duty spring... otherwise it won’t pull the straps enough to feel it.. my harness is tethered directly to the static frame... it works great.. feels like natural g forces when the V3 dives under braking...
 
Upvote 0
Ah man i already miss my NLMv3 badly.

Got instant vertigo at first drive in VR.

To make things worse, this morning i made accidentially made a short circuit and blowing up both my windsimulator board and the controlboard of my GS-4 and a USB hub.

Tried racing motionless, without GS4 and wind, but the sense of speed and sitting in the car is totally gone.......

So, back to building the new motion rig full time. Will pick up racing again on a later moment.
 
Upvote 0
How the F did you manage that henk ?

It was a freak accident Nick. I had red ledstrip that fell of it's support, exact with it's exposed part on the aluminum ground plate of my rig. On that same plate there was still the unused USB cable lying around that i used for the NLMv3.

So it basically send 12v through the USB hub, killing the Arduino, Servocenter 4.1 board of the GS-4 and the USB hub it self.

Drama, but at least the HE-shifter, Handbrake and buttonbox on the same hub were un-affected.

Still the servocenter 4.1 board is 80usd + 40 usd shipping. I'm not sure if it has special software on it loaded for the GS-4, so i have to wait for an answer from simxperience
 
Upvote 0
Guys, need some help from you lovely people.

My Simlab TR1 arrived last week (https://sim-lab.eu/product/teamredline-tr1-chassis/), and spend Friday night and Saturday day starting to build it. Bit of a nightmare due to no instructions or guides that they could send me (a bill of materials was all I had) but made progress. Some bits were missing like my horizontal brace but spoke to Simlab on Friday who said they were aware and should be sending the bits out Monday.

When ordering I mentioned that I had a NLR v3 and they devised a way to mount it for me and included it free of charge which was great. However now its time to mount the platform I cannot for the life of me see how its meant to fit or how the brackets they sent me should work.

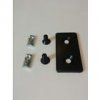
I've attached a photo of the kit they sent (I assume its for the V3 as it didn't state it anywhere but what else could it be for?) which includes 6 x corner brackets, some spacers (notice how one of them is larger than the rest?) and some nuts. I've tried every combination to see how it would fit but I just cannot make it out.

The issue is the rig is too narrow for the platform to sit in between the two sides as can be seen in the photos. So my question to you technically minded people is can anyone think of a clean, good looking way to mount this platform at the back of the rig without raising it up too high? Or extending the width of the rig too much as it needs to fit through a doorway when I move it out of storage.

The rig is 500mm wide (distance between the two insides of the side supports is 420mm) and the platform is 460mm wide if I recall correctly?

Really appreciate your help as I am dying to use the rig, emailed Simlab twice about my issues now across the last few days but they have yet to respond which is unlike them. Pictures attached, thanks in advance!
 

Attachments

  • MVIMG_20180925_194815.jpg
    MVIMG_20180925_194815.jpg
    520.1 KB · Views: 270
  • MVIMG_20180925_194820.jpg
    MVIMG_20180925_194820.jpg
    383.7 KB · Views: 288
  • IMG_20180925_194838.jpg
    IMG_20180925_194838.jpg
    383.4 KB · Views: 468
  • IMG_20180925_194843.jpg
    IMG_20180925_194843.jpg
    334 KB · Views: 408
  • IMG_20180925_194848.jpg
    IMG_20180925_194848.jpg
    354.1 KB · Views: 609
  • IMG_20180925_194925.jpg
    IMG_20180925_194925.jpg
    474 KB · Views: 460
  • MVIMG_20180925_194952.jpg
    MVIMG_20180925_194952.jpg
    495.9 KB · Views: 284
Upvote 0
Whoah, didn't realise the TR1 was that narrow..!
Looks like some aluminium angle would do the trick, an inverted version of the method a few of us used to mount our NLv3s into the Sim Lab P1 chassis, but with the long edge pointing upwards and on the outside of the TR1 frame. There are details, drawings etc in this thread. Your NLv3 would obviously have to sit above the chassis.
I don't *think* you can fit it using the bits they sent you. The angle brackets don't look big enough. Looks like you need 50x38mm angle at least, it's hard to tell.
The one different-sized spacer is obviously a mistake, they should all be the same size. Not that I think they'll be necessary anyway.
 
Last edited:
Upvote 0
Thanks Mascot, just dug out your posts from here about the bracket and it seems like it will work a treat. Just trying to find a seller on eBay that'll give the quickest delivery now :)

I hope it doesn't raise the seating position up too high. I didn't realise the TR1 was that narrow either (I don't think Simlabs do too as they have the dimensions as 520mm wide on their website). On the one hand that's great for me as the rig needs to be wheeled out of the second bedroom to the living room when I want to use it, on the other hand it causes issues when mounting the motion rig!

I'll report back here when the angles arrive and let you know how it works. Thanks again.
 
Upvote 0
I've measured them up, don't worry. Gone for slightly different sized ones but still very close to your P1 brackets. The tallness needs to be enough to raise the unit high enough so it does not hit the side plates. 100mm should do that fine!
 
Upvote 0
Just one point maybe no one else has thought of yet. We know that there are no guides or plans to follow with these cockpits. Just make sure through the photos on the site that you've actually put everything together the way it's meant to be. The chassis is SUPER narrow compared to our ones. I've used the seat mount railings to bridge the gap between the bottom long pieces and the mounting holes on the V3. Ours aren't that wide to begin with, either.

Hopefully you get it sorted.
 
Upvote 0
I've measured them up, don't worry. Gone for slightly different sized ones but still very close to your P1 brackets. The tallness needs to be enough to raise the unit high enough so it does not hit the side plates. 100mm should do that fine!

Hi Leeroy,

Based on the solution offered to mount your NLRv3, it's going to sit quite high whatever you do mate. However that's only really a potential issue when considered in relation to your pedals / pedal-deck position and you'll only be able to determine that and whether or not everything feels natural and comfortable, once seated and any final back / forth and incline adjustments have been made. You might be completely happy with things but, speaking from experience, you don't want to be uncomfortable or stretching or feeling you've had to make a compromise.

It looks as though the pedal deck is mounted internally to the profile. So if I were you I'd explain your potential issue to Sim Labs and ask Richard and Darko nicely if they would be willing to supply a couple of short lengths of profile, (looks like 4080), to mount on top of the existing sides. It might be overkill in terms of length but maybe those end / internal pieces would do trick, which would give you plenty of scope to make fore and aft adjustments to the pedal deck. You could always cut them down and it's better to start with more than you need after all. Also ask for some side-mount connecting brackets, (see pic below) to securely join the two pieces neatly on the outside. (4 should be sufficient but 6 would be better) Plus a couple of end caps would be good for a neat finish! :) Okay so this solution might detract from the clean lines of the TR1 but it'll at least give you an option to raise the pedal deck up a level should you feel the need to.

No harm in asking mate and of course this is always something you could consider later on, once you've used the rig in anger for a while. Once again though, you might be 'as happy as a pig in mud' with what you achieve in the first place.

Oh and one final thing. Whilst stability due to the narrower frame of the TR1 and the higher centre of gravity shouldn't be an issue, make sure you lock those wheels down all the same! Otherwise you might discover an additional range of motion you weren't expecting the V3 to give you and if you're immersed in VR by any chance, that could get interesting! :roflmao:

Good luck!

4040 connector.jpg
 

Attachments

  • 4040 connector.jpg
    4040 connector.jpg
    2.6 KB · Views: 146
Upvote 0

Latest News

What would make you race in our Club events

  • Special events

    Votes: 62 29.4%
  • More leagues

    Votes: 41 19.4%
  • Prizes

    Votes: 43 20.4%
  • Trophies

    Votes: 24 11.4%
  • Forum trophies

    Votes: 14 6.6%
  • Livestreams

    Votes: 32 15.2%
  • Easier access

    Votes: 116 55.0%
  • Other? post your reason

    Votes: 35 16.6%
Back
Top