Australia has been a longtime mainstay on the F1 calendar. By using our F1 23 Australia setup guide, you will be able to nail this classic circuit.
Image credit: Codemasters / EA
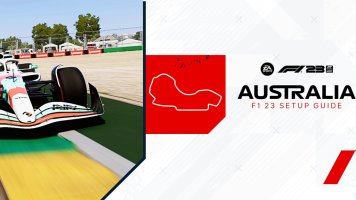
For many years, the Albert Park Circuit in Melbourne played host to the opening round of the Formula 1 season. Now, it is the third race of the season, but it remains a fan favourite.
Following the venue’s absence from the calendar during the pandemic years, it was altered significantly. The old turn 9-10 chicane has been removed, creating a long, flat-out section halfway around the lap. In order to get the most of out of the new Australian Grand Prix location, you will need a good setup. Here is our F1 23 Australia setup for beginners and experienced players alike.
I personally prefer to go with 26-31 wings in Australia in F1 23. This gives you all of the downforce you need for the fast chicane at the end of sector two, and for the tight and twisty final two corners of the lap.

However, this is a little on the high side. So you may want to lower the front wing setting a little for the race. This way, you can ensure that you have the chance to overtake your opponents down the straights.

I’ve gone back to basics here with a full unlocked setup of 50% for both the on and off throttle settings. This makes it easy to lay down the power in the traction zones. Furthermore, it limits tyre wear, particularly at the rear.
Specifically, I prefer running both camber settings all the way to the right of the scale. By opting for -2.50 at the front and -1.00 at the rear, you will aid your traction and limit tyre wear. However, if you find yourself struggling with understeer, consider moving these values a little to the left.

As for the toe settings, front toe remains a minor factor in your overall setup. I found that 0.02 worked just fine here. On the other hand, the rear toe has a bit more of an impact. For me, 0.30 rear toe lent me a lot of rear-end stability in the traction zones.
To get the most out of your F1 23 Australia setup, you will need a decently firm front suspension. This makes your car responsive to your inputs, and helps it to change direction sharply. For me, 24-10 for the front and rear respectively gave the best results. However, if you find your car a bit too twitchy, try softening your suspension a little.

For the anti-roll bars, 13-9 seems to be the sweet spot in Australia. Your car will be responsive and will maintain grip all the way through the longer corners, but it won’t stress its tyres too much in doing so.
Then there is the ride height. There are a few significant kerbs in Australia. If you feel comfortable dealing with them, then I would suggest 35-39 here. However, if you find yourself spinning out or losing stability over the kerbs, then raising your car higher of the ground is a good solution.

I prefer to run 100% brake pressure with 54% brake bias. This gives you the greatest overall stopping power without working either the front or rear brakes too hard. However, particularly at the start of the race, it can be difficult to avoid rear locking. If this is a challenge for you too, raise your brake bias to 56% or even higher. This will put less stress on the struggling rears.

I’ve found that 22.5psi on the fronts and 20.3psi on the rears strikes a perfect balance. If you start to struggle with tyre temperatures, the easiest fix is to lower these values even further.
Did you find our F1 23 Australia setup guide helpful? Tell us on Twitter at @OverTake_gg or in the comments down below!
Image credit: Codemasters / EA
For many years, the Albert Park Circuit in Melbourne played host to the opening round of the Formula 1 season. Now, it is the third race of the season, but it remains a fan favourite.
Following the venue’s absence from the calendar during the pandemic years, it was altered significantly. The old turn 9-10 chicane has been removed, creating a long, flat-out section halfway around the lap. In order to get the most of out of the new Australian Grand Prix location, you will need a good setup. Here is our F1 23 Australia setup for beginners and experienced players alike.
F1 23 Australia Setup: Aerodynamics
Given the changes to the Albert Park Circuit, it’s important to ensure that you don’t run your wing angles too high. If you do, you will find yourself lagging behind down the straights. However, there are plenty of low and high speed corners, for which a good deal of aerodynamic grip is required.I personally prefer to go with 26-31 wings in Australia in F1 23. This gives you all of the downforce you need for the fast chicane at the end of sector two, and for the tight and twisty final two corners of the lap.
However, this is a little on the high side. So you may want to lower the front wing setting a little for the race. This way, you can ensure that you have the chance to overtake your opponents down the straights.
F1 23 Australia Setup: Transmission
Getting the right differential settings is beneficial, both for giving you the best possible traction on the exits of the slower corners in Australia, and also for limiting tyre wear.
I’ve gone back to basics here with a full unlocked setup of 50% for both the on and off throttle settings. This makes it easy to lay down the power in the traction zones. Furthermore, it limits tyre wear, particularly at the rear.
Suspension Geometry
For my Bahrain and Saudi Arabia setups, I deviated from what I would have usually run in F1 22 when it came to the suspension geometry tab. However, in Australia, I found the old ways to be the best.Specifically, I prefer running both camber settings all the way to the right of the scale. By opting for -2.50 at the front and -1.00 at the rear, you will aid your traction and limit tyre wear. However, if you find yourself struggling with understeer, consider moving these values a little to the left.
As for the toe settings, front toe remains a minor factor in your overall setup. I found that 0.02 worked just fine here. On the other hand, the rear toe has a bit more of an impact. For me, 0.30 rear toe lent me a lot of rear-end stability in the traction zones.
Suspension
This tab is perhaps the most complex in the whole setup menu. However, it is also one of the most important.To get the most out of your F1 23 Australia setup, you will need a decently firm front suspension. This makes your car responsive to your inputs, and helps it to change direction sharply. For me, 24-10 for the front and rear respectively gave the best results. However, if you find your car a bit too twitchy, try softening your suspension a little.
For the anti-roll bars, 13-9 seems to be the sweet spot in Australia. Your car will be responsive and will maintain grip all the way through the longer corners, but it won’t stress its tyres too much in doing so.
Then there is the ride height. There are a few significant kerbs in Australia. If you feel comfortable dealing with them, then I would suggest 35-39 here. However, if you find yourself spinning out or losing stability over the kerbs, then raising your car higher of the ground is a good solution.
Brakes
There are several heavy braking zones in Australia in F1 23. As such, it’s of the utmost importance that you have confidence in your braking setup.
I prefer to run 100% brake pressure with 54% brake bias. This gives you the greatest overall stopping power without working either the front or rear brakes too hard. However, particularly at the start of the race, it can be difficult to avoid rear locking. If this is a challenge for you too, raise your brake bias to 56% or even higher. This will put less stress on the struggling rears.
Tyres
Finally we get to the tyre pressures. The most important thing here is to run pressures low enough to prevent your tyres from overheating too easily.
I’ve found that 22.5psi on the fronts and 20.3psi on the rears strikes a perfect balance. If you start to struggle with tyre temperatures, the easiest fix is to lower these values even further.
Did you find our F1 23 Australia setup guide helpful? Tell us on Twitter at @OverTake_gg or in the comments down below!