Built report: Basic rig-upgrade for tactile feedback

I'd like to start a thread showing the components of a tactile upgrade I recently made to my rig. I guess I would have done things in the wrong way and/or not have thought of important stuff at all without all the info shared by the usual suspects in this forum.
The idea of this post(s) is to share my upgrades with others in as much detail as possible. Not because I think the upgrades are the best possible but to make them clearly visible. On the other hand this will take some time so I plan to do this in multiple posts until all aspects are covered.

In general the upgrade is by far not as sophisticated as others have done it - but it can serve as a few ideas how to achieve good results (very good actually:)) from my specific starting points.

DSC_0023.JPG

DSC_0354.JPG

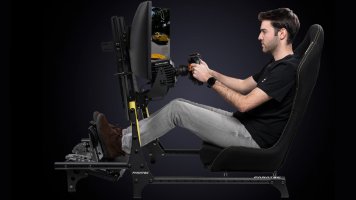
First off, here are before/after photos of the rig. Obvious differences are:
- The rig is now based on a platform
- Pedal area is modified
- There is some strange construction behind the seat:)
I'll get to those three things in the posts to come (hopefully over the next 5-10 days)
The obvious difference of the second monitor is of course not related to tactile feedback and has been added between original design an the recent upgrade.

I hope the series of posts will serve their purpose - if you have any questions, please ask.
 
Part 1: Original rig, upgrade parts and basic thoughts

Obviously this is a 8020 frame (40mm). It is as well obvious that it is my first rig: On one hand it is very narrow (500mm inner width which raised some problems especially in the pedal area when upgrading). On the other hand it's over-engineered especially in the seat area. You must think that I am at least 250kg:)

The wheel/pedal is a Logitech G29. Will upgrade to DD like (when thinking of the time it takes to get those parts) one billion of you guys do, too. Will also upgrade to HE Sprints. I mention this as I already try to fit the tactile solution to separate pedals (instead of a single pedal unit). In fact this was one of several reasons to decide for the sprints instead the Fanatec V3s. Will get back to this when describing the upgrade to the pedal section.

A word about software: I'm driving exclusively PCars 2 at the moment. I'm not done with the game and will move on to iRacing I guess in a few months. I think this is important to mention as every game/sim is said to provide output differently and what works with one my not work exactly the same in another. At least that's what I hear but so far no practical proof.
I'm using SimHub to send game signals to the soundcard. Impressive versatile software. If you use the free version, go buy a license to support this guy.

I had zero practical experience with bassshakers. It's just that a friend who was playing on the rig mentioned them. As it now turns out he also never used any of those for anything and that his idea of adding them was more or less not a serious one. Anyway, that's what I ordered after of course planning, re-reading here, planning different stuff etc. etc. (excluding stuff I found out I'll need afterwards):
- Some more aluminium profile, connectors, brackets...
- 4 pieces of 5mm aluminium sheet
- 4 pcs. of DaytonAudio 50Watt Shakers BST-1. I guess "BST" is stort for "beast" that's why I call them by this name.
- 1 pc. of 4-channel-amp. Thomann t-amp E4-130. As this thing has XLR-inputs and Speaker Twist (AKA Neutrik) outputs, I also got some phone-to-XLR cables as well as some Neutrik plugs.
- Cables between amp and shakers are 0,75mm standard speaker wires
- No additional soundcard. I'm using on-board-sound for output to the amp and transferred game sound to HDMI. Not to save money. Believe it or not: The Soundcard would have taken the longest to arrive. Strange times.
- Rubber isolators for small industry applications. Type C, 55 Shore, 8mm threads on both ends. 30mm in diameter, 40mm high. Got 30 of them but as plans changed during the project, not all are needed. If I would do this again, I'd try to source softer ones (no idea from where) as they are supposed to keep the shaking where it belongs and the ones I got transmit SOME of it to the remaining rig.

DSC_0364.JPG


The basic thoughts that led me to my solution (and the parts listed) are
- Wanted something that helps immersion. At no time I had the goal to feel everything so detailed that my driving would improve (if I had, I guess I would be unnecessarily disappointed). I really had no idea what to expect, it was just an experiment.
- Wanted a good experience but wanted to limit the time of testing 1001 configurations. So I was planning ahead only to find out, some of those plans didn't work out. In any case, I didn't want to walk the scientific path.
- Wanted to keep the shakers separated so to not feel each one EVERYwhere (thus the rubber dampers). Didn't expect the problem to be far greater as in my case the whole rig needed to be isolated from the ground

The outcome is:
Simply astonishing:) The feedback is a lot better than I would have thought. Both regarding quantity (these things ARE beasts) as well as quality. The various signals from all 4 wheels are a lot more easy to distinguish that expected.

Next part will be about pedal section I guess.
 
Upvote 1
It's always nice to see a documented journey, especially for someone like me who is just about to start a similar project. Looking forward to your future posts and am particularly interested in how you tackled this part...

Didn't expect the problem to be far greater as in my case the whole rig needed to be isolated from the ground
 
Upvote 0
Part 2: Pedal section

When having a look at the before/after images in the first post we see that the pedal base got shorter and wider (I just assembled the same profiles in a different way). This was necessary to be able to mount 2 shakers side by side on a aluminium sheet each and being sure they won't interfere with each other.
That's how it looks from below:

DSC_0361.JPG


The sheets of aluminium are 190mm long and 150mm wide. Please note that they are not mounted on the profiles perfectly centered. That's not because I'm unable to measure (only sometimes, we will get to that when having a look at the platform:)) - it's already in preparation to the next upgrade: Heusinkveld Sprints. Now the one-piece-pedal unit of the G29 is mounted onto the 2 profiles. After the upgrade I plan to mount the pedals on 2 profiles each. The pedals's mounting points are 60mm wide which moves the 40mm-profiles 20mm from each other. So in total the construction for each pedal will be 100mm wide. The mounting holes for the shakers to the sheet are also roughly 100mm apart.
I could try to counter-sink the screws that fix the shakers so they don't interfere with the profiles but I'm not a real DIY-guy so the plan is to re-use the mounting holes sheet/profile on one profile and mount the sheet to the second profile using 2 of the 4mm screws that fix the shaker to the profile. This in turn means the whole thing will be off-center and to make up for this, I already now drilled the holes off-center.

Now for the interesting part: We need to isolate the shaking of the pedals from the remaining rig to make sure
- we can feel the shaking where it should be and
- not in the remaining rig
My solution was to mount the pedals to the two profiles and those profiles are in turn mounted through the rubber isolators (3 pcs. per side, 6 per profile - 4 on the "front", 2 in the back). As the isolators are the same height as the profile and the brackets used are 5mm thick, the construction now "floats" 5mm above the rig resting on rubber. Some photos:

DSC_0360.JPG


This also shows well that with this construction the pedal secition was raised considerably. I made up for it by lowering the pedal's base frame (difference can be seen in the photos of the first post).

DSC_0362.JPG


Additional detail: The brackets can be fixed to the profile with countersunk screws or normal ones using a washer. Had to get very short M8 countersunk screws to not interfere with the rubber parts. I mention it because those screws seem to be special enough to not being available at least in my area. Had to order them over the internet. Crazy world.

Obviously the shakers are not allowed to touch the ground:) There is a gap of around 15mm.
I didn't expect to be able to feel left/right very well before upgrading to separated pedals but was wrong. Actually it works quite well already most likely because the G29-pedal-base is plastic and does not transfer the shaking well from side to side.
As mentioned in the first post I decided for the HE Sprints instead of Fanatec's V3 also (but of course mainly for various other reasons) for the next upgrade because the V3's base is again one-piece but sturdier than the G29 so for tactile it won't be the best solution (provided I don't want to use additional software to power the rumble motors on them).

Next post will be about the maybe a little strange thing I had to come up with for the seat.
 
Upvote 0
Nope - I actually thought the same as
- those dampers are not designed for sideways-forces and
- maybe they would compress more than 5mm

Both does not happen - maybe the positive effect of the rubbers being quite hard:)
I'm not an expert of those Shore-Values. The rubbers have 55 +/-5. I'm quite sure those values can be transformed to the answer to the question of how many kg of force you have to apply to compress (6 of) them by 5mm.

Edit: Regarding "any" movement: Hard to say. At least it's not so much that it would be distracting. I guess that's what counts in the end. Will focus on this a little bit next time I get to drive (tomorrow) and report back then again.
 
Upvote 0
Part 3: Seat section AKA Exoskeleton / The Cage / Exhaust Pipes
First off a photo:

DSC_0356_crop.JPG


Original scenario: When I built the original rig I didn't get a proper racing seat so I decided for a "Sport Seat" not licensed for traffic. I wanted fabric instead of leather and I wanted an adjustable backrest.
For the tactile project I had to deal with the fact that the seat has absolutely no usefull hard parts to mount the shakers to. The logical place for them would have been under the seat. So I had the following options:
- Replace the seat with a hard-shell one
- take the seat apart and mount a sheet of wood inside of it, then close the thing again
- the final exoskeleton
Out of laziness and curiosity I decided for the latter.

DSC_0359.JPG


The bass shakers are again mounted on 5mm aluminium sheet 190x150mm in size. Rubbers are mounted on all 4 corners and brackets on top of them. On each of the shorter sides, those brackets are mounted to a 150mm profile which are mounted "OUTWARDS". Obvious reason: The shakers are more than 60mm in height, the rubber is only 40mm, the prodiles would not fit mounted differently. The two short profiles in turn are connected by a longer one vertically. Result: The beasts are in a cage:)
The whole assembly is mounted to an adjustable hinge that is sitting on top of another profile (had to plan ahead and have someone drill a thread into it) which in turn is mounted onto what I call "exhaust pipes": Horizontal profiles mounted onto the 80x80mm profiles where the seat is mounted to. BTW: The seat rests ALMOST 40mm above the fat profiles but I removed it and had to actually use additional washers to create more space for the "exhaust pipes". I admit the difference is hard to see:)
The idea was to mount the whole thing(s) [as this construction is of course there twice L/R] as close to the seat's backrest as possible to really apply pressure to it. This way the hinge would stay in place. So much for theory. In the real world the cage construction is WAY to heavy so the hinge can't hold the weight. That's where the additional bracket that's squeezed in between the horizontal profiles come into the equation. I know it looks Ghetto but this applies rock-solid pressure to the backrest.

DSC_0358.JPG

The outcome is again surprisingly good. The backrest might take some of the shaking but the pressure (one side my back, other side said construction) is big enough to feel the shakers. In fact the effect is a lot clearer than on the pedal section.

I know the construction is quite unusual and that others deal with this kind of seat completely differently - but in the end that's the idea of playing around with things: To see what's possible:)
The very obvious drawback of the solution is that it's some work to change the seat position and backrest angle. But as this applies only in case of a "guest-driver" showing up (which is the case only every few weeks - and most of them have been infected and building their own rigs anyway:)) I can live with it.

Next post will be about the platform that turned out to be absolutely needed.
 
Upvote 0
Thank you for sharing details of your rig.
Do you have any movement of the pedals with those isolating rubbers when pressing the brake really hard?

Ok, have now tried and I don't feel any movement even if focusing on it (but then again I don't need to apply too much pressure on the G29 pedals;-)). As described the pedal unit is mounted now using 12 rubbers - that's a lot of resistance...
 
Upvote 0
Ok, have now tried and I don't feel any movement even if focusing on it (but then again I don't need to apply too much pressure on the G29 pedals;-)). As described the pedal unit is mounted now using 12 rubbers - that's a lot of resistance...
Thanks for the feedback. As you say 12 rubbers will provide quite a lot of resistance. I have a 100kg load cell brake so may have more movement.
 
Upvote 0
Which brake pedal?
As mentioned I plan the HE Sprint Upgrade ("only" 65kg). I have no idea what to expect:)
I am making my own pedals. There is a thread I started about 2 weeks ago covering the build.
I am going to isolate my pedals hence the interest in your rig. I am thinking of putting my isolators horizontal as that will be the direction on the greatest load but I need to put some more thought in.
 
Upvote 0
Yes, the force vector is definitely more horizontal than vertical (even with the G29 pedals). I just hope that the rubber (6 of them) is sturdy enough to not give too much way even at the force needed for the Sprints.
Hope you share your solution once you get there:)
 
Upvote 0
I'm using sprints and recently installed 4 of those rubber mounts (30mm wide x 20mm high) between my pedal deck and main frame. I cannot see, perceive or feel any noticeable flex and they feel exactly the same as when they were hard mounted.
 
Upvote 0
Part 4: The Podium (or platform)

As I got all the shakers/cables and amp before getting the aluminium parts, I wanted to try if everything works. So I put the shakers on the aluminium sheets and mounted them just somewhere on the rig. The result was devastating in that the effect was not to be felt where it belongs but throughout the whole rig but also in that the whole house was shaking. At least my wife (who is unbelievable understanding otherwise) told me.
Putting some more effort in it by using the rubber mountings didn't help a bit in this regard (but the shaking "inside" the rig as expected was confined to where it belongs).
I let my wife drive a few laps and fortunately she doesn't know any track layout so we had lots of worst-case shaking over cubs, grass and gravel. The house was built in the 50s, thick brick walls. Simrig is placed on the upper floor near one corner of a room. Don't know about the floor core construction. There's wood tiles on top of it but whatever the core is, I'm sure there's zero dampening material. Can't describe the effect - it's like a constant humming, like the whole house is vibrating. Action had to be taken. First and foremost I appointed my wife Chief Sensor to find out the effects of various changes I tried. After playing around with some more carpet, less effects in Software and having zero enhancement unless I turned down the effect to where I could not feel anything anymore, I decided to find a solution that worked for others already and to not toy around anymore.
I discovered https://www.vdrums.com/forum/general/products/40599-tennis-ball-impact-noise-isolating-platform which turned out to be the one standard way of isolation electronic drumsets which seem to generate a similar problem. You can find lots of this stuff on YT and anywhere else on the net.
I didn't change a lot of the idea - just using more tennis balls as the rig is a lot heavier than an e-drumset (which is around 25 to 30kg). I also didn't use the lower sheet of wood people seem to put there (don't know the reason, maybe for transport).
So the platform consists of (down to up):
- 23 tennis balls I had laying around
- 19mm MDF (150 x 80cm)
- 3 sheets of 20mm composite foam (90kg/m^3); something like this stuff: https://www.greiner-gfi.com/en/composite-foam/
- heavy door-entry mat (those big ones knows from offices); has lots of rubber under it

Cut-out holes 38mm diameter and hot-glued tennis balls into them:
DSC_0344.JPG


The foam comes in 2x1m-sheets/rolls. Perfect for 1,5x0,8m with lots of stuff remaining. Hot-Glued the rest on top of the first sheet where it matters most (well, that's what I thought...):
DSC_0351.JPG


Sometimes I'm an incredible idiot. Placed (and glued!!) the remaining parts in the wrong place. Had to go get an additional sheet. Cut the remaining parts to fit the "holes" of the now middle layer and the full sheet on top of it. Now 3 layers total:
DSC_0366.JPG


Some more photo with the upper "door mat". I know brown/gray don't match. In this situation I didn't care too much, believe me:)
DSC_0365.JPG


One more photo showing the tennis balls. They are quite squashed so if I would do this again, I would calculate more than 19 tennis balls/m^2.
DSC_0367.JPG


The results are amazing. As mentioned before it was unbearable. Afterwards not noticeable anymore. Maybe the platform is overengineered but somewhere between the tennis ball construction and one to three layers of foam the rattling is COMPLETELY absorbed. As the rig isn't too light, I hope you understand that I didn't test each "stage" individually.
I slowly started to turn up the amp until the tactile feedback was more than enough for me. Every minute expecting my wife to mention that the platform's capabilities are reached. Nothing.

That's it, guys. As mentioned in the beginning of the thread, it's a quite simple solution that provides tactile feedback. On one hand it's by far not as sophisticated as some of you guys have invented solutions for advanced results. On the other hand it shows solutions for the bare minimum: Isolation of those parts that should shake from the remaining rig. In addition if somebody experiences angry neighbors, the platform could be an inspiration that should really work.
 
Upvote 0
It's nice to someone being creative and physically testing methods, not just running with the approach that lots of people;e do in using 3D pre-planned design and settle with what looks good onscreen or in theory.

What I find when getting stuck into constructing something, that often new creative ideas can come to light to consider trying that you would never have considered from doing 3D plans. Ive seen me have an idea, it may not work out as expected or I don't quite like it but from that, having some study to then adapt the idea with alternative options or solutions.

Is your seat on isolators to decouple it from the main support frame?

Points Id note on your journey with this and for others, a tactile unit does not necessarily have to be installed at the position of desired felt impact. It can be installed in close proximity like under the seat and then still channel its vibrational energy by a controlled path with 8020 (in my case steel tubing) to the desired locations.

Note that I said "locations"
It is possible to have units positionally placed under the seat and their energy be used to flow into the user from multiple body regions. This by having the units installed to a channeled track/tubing. You can then utilize this to have contact points from under the knees to beneath the buttocks then up the spine and to the shoulder region. Ive yet to see an 8020 owner do this but I know its benefits having done the same with my own tests using steel tubing.

Consider this, compared to just installing a tactile unit direct to the seat as while that works it creates a hotspot at the point of installation and a single/primary pathway for that energy to flow into the seat and user. Multi-path solutions bring contact points to help spread the energy more specifically into body regions like the knees, thighs, buttocks, spine and general torso. The energy will still of course travel over the whole seat region but the goal here is to use more than one application of flow.

Professional based vibrational materials (which there are plenty) seem to have different operational roles. Mainly for vibration dampening/absorbition control and acoustic soundproofing. So reducing low-frequency hum and then also for mid-higher frequencies to subdue harmonics and actual noise. Multilayer solutions are usually the most effective.

Rather than tennis balls, these also apparently work well and can be inset into MDF cut boards/platforms.
Although the alternative is to place the rig onto quality rubber castors and use some dampening/soundproofing under rubber tiles.
I've swayed this direction as the benefits of the castors are not just in making the rig easily movable but this then reduces all the vibes from the rig to only 4 tiny contact points with the floor and ceiling beneath meaning much less surface contact area from the rig than the platform-floor approach.

Enjoy your entry into tactile and lets hope this build helps inspire some creativity in others.
 
Last edited:
Upvote 0
The seat itself is not isolated. The original plan was to put the adjustment sliders under the seat on isolators (4 on each corner, so the seat would have been on 16 isolators:)) and mount the aluminium sheet between adjustment sliders and the seat. The idea failed as the seat simply is not at all flat on the bottom so the aluminium sheet (and shakers) wouldn't have made enough contact.

Thanks for sharing the idea of "energy channels". I guess it needs quite some more experience with those units and experiments to find out.

I also have to add that I really hope this inspires others to try tactile feedback. The effect is really a difference in immersion.
 
Upvote 0
@Squared Circle Thank you very much for explaining each step you took with such detail. I appreciate you taking what must have been a lot of your time to document the journey and it's been fascinating for me to study the small details in the pictures and observing how you've gotten around each issue you faced using some really creative thinking :thumbsup:
 
Upvote 1

Latest News

What's needed for simracing in 2024?

  • More games, period

  • Better graphics/visuals

  • Advanced physics and handling

  • More cars and tracks

  • AI improvements

  • AI engineering

  • Cross-platform play

  • New game Modes

  • Other, post your idea


Results are only viewable after voting.
Back
Top