Screenshots in BeamNG.drive can be confusing. Using the tips and tools listed below will get you more confidence behind the lens of BeamNG's awesome photo mode. Not only that, but it might even teach you some things about how to take real-life photos.


I used the grid lines to align the rear bumper of the car to the left corner of the screen. The two vertical grid lines are going through the middle of the rear wheel as well as the middle of the front wheel. It isn't going to win me any awards, but the screenshot is geometrically correct.
Your screenshot will have to either be edited after you have taken it within BeamNG or you will have to utilize a physical Fibonacci Spiral on your monitor screen which is a major downside to this method.

Accuracy is a lot harder to achieve with the Fibonacci Spiral compared to the grid method. It still stands as a practised and respected form of composition creation in photography. Your time may be better spent getting to grips with the in-built grid filter in BeamNG's photo mode.


The definition of FOV within games is the extent of the observable game world that is seen on the display at any given moment. There are two ways to adjust the FOV for your screenshots in BeamNG. You can alter it using the Photo Debug option, or simply use the slider in the Photomode options.

Creating an atmosphere with a matching and complimenting colour palette is an overlooked aspect of screenshot composition and planning. Creating a plan for the vehicles and their colours before you load up photo mode is essential to a well-executed screenshot.


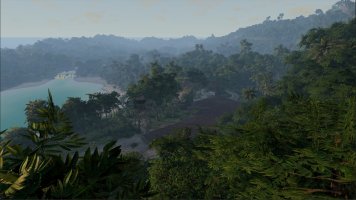
These screenshots were systematically planned and set up using the world editor, which you can learn about here, as well as several in-game tools. Check out M D Gourley's profile and make sure to comment on his work to say thank you for his generosity.
Make sure to share your BeamNG screenshots with us over on Twitter at @OverTake_gg or in the comments down below!
Screenshot Composition
The word 'Composition' is simply a fancy way of saying how things are laid out in your frame. For example, where the vehicle is placed and what is in the background and foreground. Imagine taking screenshots within BeamNG as painting a portrait or a landscape. Creating the perfect environment for your subject is crucial.Grid Method
The most common and practised composition creation method in digital photography is the grid method (Thirds Method). The focal point should always be on at least one of the 2 vertical lines. This helps significantly with composition because it means you don't end up with the vehicle in the centre of your screenshot without any purpose. I used the grid lines to align the rear bumper of the car to the left corner of the screen. The two vertical grid lines are going through the middle of the rear wheel as well as the middle of the front wheel. It isn't going to win me any awards, but the screenshot is geometrically correct.
Fibonacci Spiral
A much less common tool compared to the Grid method; the Fibonacci Spiral is centred around the subject of the image, in this case, a vehicle. A Fibonacci spiral can be rotated at any right angle or even flipped.Your screenshot will have to either be edited after you have taken it within BeamNG or you will have to utilize a physical Fibonacci Spiral on your monitor screen which is a major downside to this method.
Accuracy is a lot harder to achieve with the Fibonacci Spiral compared to the grid method. It still stands as a practised and respected form of composition creation in photography. Your time may be better spent getting to grips with the in-built grid filter in BeamNG's photo mode.
Field Of View (FOV)
Field Of View is one of the most useful and versatile tools on offer within BeamNG's photo editor. Nailing the FOV of your screenshots will separate a normal photo from a desktop wallpaper-worthy shot. The correct FOV can also allow you to negate any blur in your image. You're not just zooming in you're changing what the camera lens can see.The definition of FOV within games is the extent of the observable game world that is seen on the display at any given moment. There are two ways to adjust the FOV for your screenshots in BeamNG. You can alter it using the Photo Debug option, or simply use the slider in the Photomode options.
Colour Palette
Making sure your colour palette choices are appropriate can make or break your screenshot. If you have a group of murdered-out saloon cars approaching your frame from a menacing angle, a bright yellow Ibishu Pigeon just off to the left will ruin the vibe of your image. Example A...Creating an atmosphere with a matching and complimenting colour palette is an overlooked aspect of screenshot composition and planning. Creating a plan for the vehicles and their colours before you load up photo mode is essential to a well-executed screenshot.
Aspect Ratio
Aspect Ratio is often determined by the format that your screenshot will be uploaded to. If you are creating a YouTube banner, then an elongated landscape aspect ratio. Whereas if TikTok is your chosen platform, then a portrait ratio would be appropriate. If you intend to just upload the screenshot to Reddit or onto the forums then the standard ratio would be perfect.Cinematic Screenshots
Taking planned and intricately executed cinematic screenshots is truly a form of art. I am delighted to introduce you to RaceDepartment veteran M D Gourley. He has very kindly let us use his screenshots to display just what can be possible within BeamNG when you know what you're doing and you have experience with the necessary tools.These screenshots were systematically planned and set up using the world editor, which you can learn about here, as well as several in-game tools. Check out M D Gourley's profile and make sure to comment on his work to say thank you for his generosity.
Make sure to share your BeamNG screenshots with us over on Twitter at @OverTake_gg or in the comments down below!