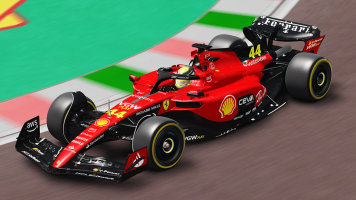
On board with Kamui Kobayashi:
Steve Stoop's Career Video:
Setup:
Aerodynamics
Front Wing Angle: 4
Rear Wing Angle: 2
Braking
Balance: F 49% - R 51%
Pressure: High
Brake Size: Standard
Balance
Ballast Distribution: F 60% - R 40%
Front Anti-roll Bar: 9
Rear Anti-roll Bar: 11
Suspension
Front Ride Height: 1
Rear Ride Height: 1
Front Spring Stiffness: 7
Rear Spring Stiffness: 10
Gearbox
Gear 1: 150 kph / xxx mph
Gear 2: 184 kph / xxx mph
Gear 3: 218 kph / xxx mph
Gear 4: 252 kph / xxx mph
Gear 5: 288 kph / xxx mph
Gear 6: 326 kph / xxx mph
Gear 7: 365 kph / xxx mph
Engine
Throttle map: Fast
Fuel: Fixed
Alignment
Camber front: -1.10
Camber rear: -3.00
Toe front: 0.09
Toe rear: 0.35
At Shanghai my time was 1:37.670 (Sebastian is better in 1, 7 and 14)
Martin explains things very well, but here is my write up anyway.
Sector 1
Turn 1: Stay left and turn in at the 50m marker braking just after. You wont need to brake too hard to get into 4th gear though. Coast or use a tiny bit of throttle as you make your way round and round. After the thinkpad sign on the right you should be down to 3rd then 2nd then 1st. Don't touch the curb until the corner finishes, you will not need to turn sharply just gradually move towards the curb at the end.
Turn 2: Give it a bit of gas as you exit from 1. Wait until 2 is finished before you ease onto the gas on the way out. Keep the wheel as straight as you can to avoid spinning and maximize the acceleration.
Turn 3: Keep the wheel as straight as you can to avoid spinning and maximize the acceleration.
Turn 4: Keep the wheel as straight as you can to avoid spinning and maximize the acceleration.
Turn 5: Flatout kink before 6. Get over to the left.
Sector 2
Turn 6: Brake as hard and as late as you can just before the 100m marker (from 6th down to 1st). Pray that the car slows down enough and turn sharply just before the curb on your left ends. Don't go wide here it is painful.
Turn 7: Sticking to the right from 6 start turning about 25m before the curb on the right ends. Try to be as flat out as possible but the goal here is stay left to enter 8 so come off the gas a bit if you need to. Take the turn in 5th gear. (I don't know how Sebastian does this one)
Turn 8: After 7's apex come down a gear to 4th and coast through trying to stick to the right. Come down to 3rd if you need to lose a bit more speed.
Turn 9: With about 50m to go brake down to 2nd and turn hard but not so that you apex early. Try to take off enough speed to prevent an understeer. Coast through the apex and shift up to 3rd as you accelerate off the exit. Getting over to the right for 10 shouldn't be an issue.
Turn 10: Careful with the throttle as you go through in 4th. You should be able to angle the car through the apex easily after exiting 9, but don't turn too sharp or you will spin. Just after exiting you should be able to get into 5th for the straight.
Sector 3
Turn 11: Assuming 10 went well you'll be in 6th well before the 100m braking point. Like 6 you need to stomp on the brakes and get down to 1st. If you didn't brake enough you can make it but will have a bad line for 12.
Turn 12: Use a bit of gas to get to the turn and come out a bit wide initially. Turn the car back to the right and accelerate gently into 13.
Turn 13: Bouncing around you will need to resist the urge to lock the steering to the right. Accelerate as much as you can and use as much steering as possible to keep the car on the road. It is very important to push the car to the limit here since we are headed onto F1's longest straight.
Turn 14: Sebastian brakes at 100m but we need to be closer to 175m. There are a bunch of Screens on your right and you want to brake hard between the 3rd and 2nd one from turn 14. Once the car has slowed down enough turn sharply ~25m before the curb on your left ends. Don't grab too much of the curb as you go through the corner.
Turn 15: Martin says this turn is just the end of 14, I agree.
Turn 16: Brake as the DHL sign passes overhead down to 3rd gear. Turn in after you're in 3rd and take as much curb as you need to prevent going wide on the exit. Get on the gas as early as possible for a good run to the finish.
Notes: 1/2/3 need a lot of practice to get right. 7/8/9 are tricky and 12/13 are tough. The hairpin is easy once you find the braking point.


