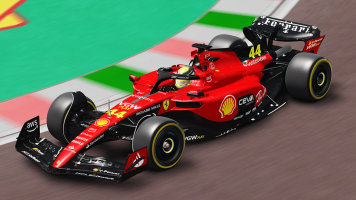
On board with Sebastian Vettel:
Steve Stoop's Career Video:
Setup:
Aerodynamics
Front Wing Angle: 3
Rear Wing Angle: 2
Braking
Balance: F 50% - R 50%
Pressure: High
Brake Size: Standard
Balance
Ballast Distribution: F 80% - R 20%
Front Anti-roll Bar: 1
Rear Anti-roll Bar: 8
Suspension
Front Ride Height: 2
Rear Ride Height: 2
Front Spring Stiffness: 4
Rear Spring Stiffness: 5
Gearbox
Gear 1: 123 kph / xxx mph
Gear 2: 153 kph / xxx mph
Gear 3: 182 kph / xxx mph
Gear 4: 213 kph / xxx mph
Gear 5: 251 kph / xxx mph
Gear 6: 284 kph / xxx mph
Gear 7: 318 kph / xxx mph
Engine
Throttle map: Fast
Fuel: Fixed
Alignment
Camber front: -1.10
Camber rear: -3.00
Toe front: 0.09
Toe rear: 0.35
At Melbourne my time was 1:30.539 on Primes
Sector 1
Turn 1: Keep your eyes peeled for the 100m marker (2nd one) on your left and stomp on the brakes. Just point the car right as you begin braking and turn in at the 50m marker (if you can see it). You want to nick the curb with your right tyre but be careful as it is very easy to cut this corner. Enter the corner in 3rd gear and make sure you wont go into the grass before accelerating out.
Turn 2: Straighten out the wheel to ride close to the curb on the exit and Hold on as you go left round turn 2. It's fine if you hit the curb on the exit of 2, you should be in 6th as you head down the next straight.
Turn 3: Brake hard (but not like turn 1) at the 100m marker, this one is very hard to make out on your left as it's colored red like the shell ads behind it! You are about 40m behind the V-power sign overhead. Keep braking in a straight line and start turning right after you are in 2nd gear. Stay off the curb to avoid a spin and feather the gas very lightly until you are all the way round. Watch the acceleration on the exit.
Turn 4: Get over to the right of the track after exiting 3 and start turning left almost immediately after you get there. There are 2 bridgestone ads in front of you on the right as you enter. Use about half a turn left and be gentle with the throttle as you go through in 3rd gear. Stay on the road as you exit and wait until you're past the curb on the right before you floor it.
Turn 5: Flat out right.
Sector 2
Turn 6/7: After 5 make your way over to the left of th track, keep an eye out for the 100m marker. Brake hard staying left and come down to 3rd. Then turn in (after 50m) and clip the curb as much as you can. You should turn right and then immediately turn slightly left as you exit shifting into 4th on the way.
Turn 8: Easy-peasy flat out right.
Turn 9/10: keep left look for the 100m marker. Stomp on the brakes coming down to 2nd as you enter the turn. Begin turning after the 50m mark again you want clip the curb as much as you can for a good exit. Make sure you wont go over the curb on the exit before hitting the throttle for the next straight.
Sector 3
Turn 11: Towards the end of the straight get over to the right. Watch for the 50m marker and brake slightly to come down to 5th. Begin turning left just as you start braking. You want to brake just enough so that you don't end up wide. Clip the curb as much as you can and try to stay in the middle as you exit.
Turn 12: Floor it briefly as you make your way to turn 12, but come off as you enter. Use the curb on your right as much as you can and you should be able to get back on the throttle pretty quick. Shift to 6th as you go through onto the last straight.
Turn 13: Coming down the left start braking inbetween the 100 and 50m markers ~75-60m. You want to brake fairly hard in a straight line down to 3rd. Turn in (but not too hard) as the road curves right. Don't be early with the turn or you'll have to wait to put on the gas after exiting. Use barely any throttle to get through the turn as it is easy to think you've got it and go wide. Stay left on the exit.
Turn 14: After the 50m marker (when the flag board passes overhead) come off the gas and downshift to 4th but don't brake for this turn. Start turning right and use the curb, about halfway down the curb you can hop back on the gas and exit in 5th. Use the full width of the exit to accelerate as much as you can. Then head immediately right for the hairpin.
Turn 15: At about 80-75m brake hard but be careful not to lock the wheels. Turn in at about 25m after coming down to 2nd for this left hand hairpin. Just touch the curb but be VERY gentle with the throttle to avoid a spin. Accelerate gently on the exit.
Turn 16: Get over to the left but not too far and keep it in 4th (you will spin on full throttle) until you're halfway through the turn. Then floor it to the finish.
Notes: It is easy to cut almost every corner on this circuit. I really hate the markers on Turn 3 so I needed lots of practice to get that one right. The 100m almost disappears in dull or rainy weather.
If any of you have missed me and my guides I recently made some serious upgrades to my rig and as such I have been busy racing :wink:. I am now playing with a Fanatec GT2 and Clubsport pedals mounted to an Obutto cockpit with triple monitors. So I have been glued to it without much time left to eat sleep work, much less write guides here.


