How to create unbelievably realistic fire effects in Photoshop. :flame:

I could try to pretend this fire effect was all my own doing, but unfortunately I am not (yet?) that talented with Photoshop, its just a straight copy and paste :shocked: ... credit where credit is due and all that, so here is a link to the author's site:
Fire - ©photoshopTechniques.com
But now you too can become a fire god and flame anything and everything ... enjoy! :thumb:
1.
In this first step we will start by creating the fire text as white, rotated 90 degrees counter clockwise, on a black background.
Go to File, New and set the document size to 1117 pixels by 790 pixels, Mode RGB color, Under Contents click White.
To make the Background black, press Command-I for Mac or Control-I for PC. This inverts the white background to black.
Over a black background layer create the white type layer FIRE with the type tool and hit Enter. See Image Specs: above for type size and font. Position the type with the Move tool (V) so that it is centered in the lower half of the document like in step 2 below.
Note: If you don't have the font listed above, select another font and set it to the same point size.
Now make a new layer above them by clicking on the create new layer icon or Cmd + Option + Shift + N for Mac or Ctrl + Alt + Shift + N for PC to create Layer 1.
Merge all viewed layers to Layer 1 with Cmd + Option + Shift + E for Mac or Ctrl + Alt + Shift + E for PC.
Transform Layer 1 90 degrees counter clockwise with Edit, Transform, Rotate 90 CCW.
Figure1ashows the document view of the layer stack in Figure1b.

1a

1b
 2.
2.
In this step we run four wind filtrations on the merged layer then rotate it back.
With Layer 1 active go to Filter, Stylize, Wind. Leave the dialog set to defaults and click OK. Repeat the filtration three more times. Use Cmd + F or Ctrl + F to repeat the last filtration.
Now rotate Layer 1 90 degrees clockwise with Edit, Transform, Rotate 90 CW.
Figure2ashows the document view after the filtrations in Figure2b.

2a

2b
3.
Now we will Blur and colorize Layer 1.
With Layer 1 active go to Filter, Blur, Gaussian Blur. In the dialog box set the Radius to 7.5 pixels and click OK.
Now go to Image, Adjust, Hue/Saturation or Cmd + U or Ctrl + U. In the Hue dialog box click the Colorize button, set the Hue to 40, the Saturation to 100 and click OK.
Figure3bshows the layer stack after the colorize and blur. Figure3ashows the result document view.

3a

3b
4.
Duplicate Layer 1 and make it red.
Duplicate Layer 1 by dragging it to the create new layer icon or with Cmd + J or Ctrl + J to create Layer 1 copy.
With Layer 1 copy active, go to Image, Adjust, Hue/Saturation or Cmd + U or Ctrl + U. Set the Hue to -40 and click OK.
Note: The shortcut names layers differently as in Layer 2 instead of Layer 1 copy. The resulting layer should look like Figure 4b and the document like Figure 4a.

4a

4b
5.
Set Layer 1 copy to Color Dodge mode and merge down.
With Layer 1 copy active, go to the Mode drop down menu at the top of the Layers palette and click-drag it from Normal to Color Dodge or Option + Shift + D or Alt + Shift + D.
Now merge Layer 1 copy down onto Layer 1, with Layer, Merge Down or Command/Ctrl + E.
Note: The shortcut changes the mode based on the active tool. For Layers select the Move tool (V).
Figure 5b shows Layer 1 copy set to Color Dodge. Figure 5a shows the result.

5a

5b
6.a
Distort the image into flames with the Warp tool in the Liquify dialog.
With Layer 1 active, go to Image, Liquify or Cmd + Shift + X or Ctrl + Shift + X.
The Warp tool is selected by default. In the dialog box set the Brush Size to 50 and the Brush Pressure to 40. Now click-drag the initial flame shapes up from the edges of the white text areas. Wiggle the mouse as you drag up. This first run creates the major flame shapes.
For the second run, create smaller flames by reducing the Brush Size to 30 and the Brush Pressure to 35.
If you want to start over you can Reset back to the undistorted version by holding down Option for Mac or Alt for PC and clicking the Reset button that appears to replace the Cancel button. You can also use the Reconstruct tool (E) to remove or rework your distortions until you are pretty happy with your flames but don't click Okay just yet.

6a

6b
6.b
(Optional) Evaluate the distortions and re-edit if necessary using Shift to save and load the distortion mesh.
When you are pretty happy with your flame shapes, press the Shift key and click Okay.
The Shift key is a modifier to Liquify that saves the distortion mesh you created for later use. If you want to rework the distortion, you can now Edit, Undo or Cmd + Z or Ctrl + Z to revert the image back to a pre-Liquified state. Now if you reopen Liquify with Cmd + Shift + X or Ctrl + Shift + X. The dialog will open with your previous distortion mesh applied. The advantage is that this allows you to use your previous distortion mesh as a starting point but now you can Reconstruct all the way back to the undistorted version.
Figure 6c shows the image after Liquify distortions, Figure 6d shows the layer stack.

6c

6d
7.
Duplicate the FIRE text layer, rotate it back, fill it with black and then move FIRE copy above Layer 1.
Duplicate the FIRE layer by dragging it to the make layer icon or Cmd + J or Ctrl + J to create the layer FIRE copy.
Drag FIRE copy above Layer 1 in the layer stack.
Fill the text shape with black by pressing the D key for default colors then Option + Delete or Alt + Backspace to fill with foreground color.
Note: The shortcut names layers differently as in FIRE 2 instead of FIRE copy.
Figure 7a shows the new, black, text over the fire. Figure 7b shows the layer stack.

7a

7b
8.
Duplicate the liquified flame layer, move the copy above the black text, then mask and Screen.
Duplicate Layer 1 with Cmd + J or Ctrl + J to create Layer 2.
Drag Layer 2 above the layer FIRE copy in the layer stack. Set the mode for Layer 2 to Screen with Option + Shift + S. Then add a layer mask by clicking on the Add Layer Mask icon at the bottom of the Layers palette.
With the linear Gradient tool run a white to black, linear gradient from the top of the text area to the bottom.
Then use the Smudge tool (R) or Shift-(R) to toggle, with a 65 pixel, soft edged brush at 70%, on the layer mask, dragging up and down to reveal or hide Layer 2 flames.
Figure 8a shows the document view of the layer stack in Figure 8b.

8a

8b
9.
Merge all the layers to a new layer at the top of the stack, then blur and Screen to create a glow.
Create a new layer at the top of the stack by activating Layer 2 then clicking on the create layer icon or Cmd+ Option + Shift + N or Ctrl + Alt + Shift + N to create Layer 3.
Turn the view on for all layers and merge to Layer 3 with Cmd + Option + Shift + E or Ctrl + Alt + Shift + E.
Set the mode for Layer 3 to Screen with (V) then Option + Shift + S or Alt + Shift + S.
Set the opacity of Layer 3 to 50% with (V) and then (5).
Then go to Filter, Blur, Gaussian Blur or Cmd + Option + F or Ctrl + Alt + F to open the last filter dialog, set the Radius to 50 pixels and click OK.
Figure 9a shows the image with the glow applied. Figure 9b show the layer stack.

9a

9b
10.
Merge all layers to a new layer at the top of the stack, then transform the resulting image down under.
Click on the Create Layer icon at the bottom of the Layers palette or Cmd + Option + Shift + N or Ctrl + Alt + Shift + N to create Layer 4.
With Layer 4 active and all views on, merge to Layer 4 with Cmd + Option + Shift + E or Ctrl + Alt + Shift + E. Set the mode for Layer 4 to Screen and set the opacity to 60% with (V) and then (6).
Now zoom back so you have some gray non-document space around your image (make sure Resize Windows To Fit is off in your Zoom tool options bar). Go to Edit, Free Transform or Cmd + T or Ctrl + T. Click-drag the top center handle down beyond the bottom of the transform bounding box, then drag the bottom center handle up to create the inverted reflection. Apply the transform (Enter) and position with the Move tool (V) if needed.
Figure 10a shows the final layer stack and Figure 10b shows the completed image.
10b

10a
Key Techniques
Merge to target (Cmd + Option + Shift + E or Ctrl + Alt + Shift + E) is a great way to create a composite of a number of layers quickly. It simplifies the build process by bringing together a number of layers into a single layer and when applied to a new layer, it does no damage to the component layers.
To envelope an image element in an effect, sandwich it between two layers holding the effect. This makes the enveloped element appear to be inside the overall effect. Here we used this to enclose the text in fire.
Duplicate a bright layer, blur it and set it to Screen mode to create a glow. This can offer a much more sophisticated, image-based glow than a Layer Style glow can offer.
To save and load a Liquify distortion mesh use Shift when applying and entering Liquify . This gives you the ability to Undo and re-work your distortions with much more control over the result.
Enhancements
To make the fire appear to have more depth run another liquify pass on either one of the flame layers, Layer 1 and Layer 2 above. This will increase the separation of the flames in the foreground and background.
To make the surface of the floor a bit more realistic. Run a Filter, Stylize, Wind on the reflection to roughen up the texture of the floor.
To place the fire over other backgrounds, merge your fire with black background onto one layer. Then put your background image on a layer underneath. Finally, target the fire layer and set the mode from Normal to Screen. Screen stacks the light stuff from the fire layer onto the background image but ignores the dark stuff. To keep the text black I would predict that I would need the black text as a separate layer. So I would merge the fire in front of the text into one layer, merge the fire in back of the text onto one layer, set both fire layers to Screen and replace the background. If you are looking for more fire intensity against a light background try the Lighten mode instead. It will hold more "fire" against lightness but the edges will carry some unwanted density sometimes. If you have this edge problem try going to Blending options for the fire layer by double-clicking it and then splitting the black "This Layer" slider by pressing the option/alt key and dragging it right. This will fade the edge transition. You may need to drag the right slider "ear" all the way over to 255. Also try duplicating the layer when it is set to Screen to intensify the effect.
I could try to pretend this fire effect was all my own doing, but unfortunately I am not (yet?) that talented with Photoshop, its just a straight copy and paste :shocked: ... credit where credit is due and all that, so here is a link to the author's site:
Fire - ©photoshopTechniques.com
But now you too can become a fire god and flame anything and everything ... enjoy! :thumb:
1.
In this first step we will start by creating the fire text as white, rotated 90 degrees counter clockwise, on a black background.
Go to File, New and set the document size to 1117 pixels by 790 pixels, Mode RGB color, Under Contents click White.
To make the Background black, press Command-I for Mac or Control-I for PC. This inverts the white background to black.
Over a black background layer create the white type layer FIRE with the type tool and hit Enter. See Image Specs: above for type size and font. Position the type with the Move tool (V) so that it is centered in the lower half of the document like in step 2 below.
Note: If you don't have the font listed above, select another font and set it to the same point size.
Now make a new layer above them by clicking on the create new layer icon or Cmd + Option + Shift + N for Mac or Ctrl + Alt + Shift + N for PC to create Layer 1.
Merge all viewed layers to Layer 1 with Cmd + Option + Shift + E for Mac or Ctrl + Alt + Shift + E for PC.
Transform Layer 1 90 degrees counter clockwise with Edit, Transform, Rotate 90 CCW.
Figure1ashows the document view of the layer stack in Figure1b.
1a
1b
In this step we run four wind filtrations on the merged layer then rotate it back.
With Layer 1 active go to Filter, Stylize, Wind. Leave the dialog set to defaults and click OK. Repeat the filtration three more times. Use Cmd + F or Ctrl + F to repeat the last filtration.
Now rotate Layer 1 90 degrees clockwise with Edit, Transform, Rotate 90 CW.
Figure2ashows the document view after the filtrations in Figure2b.
2a
2b
Now we will Blur and colorize Layer 1.
With Layer 1 active go to Filter, Blur, Gaussian Blur. In the dialog box set the Radius to 7.5 pixels and click OK.
Now go to Image, Adjust, Hue/Saturation or Cmd + U or Ctrl + U. In the Hue dialog box click the Colorize button, set the Hue to 40, the Saturation to 100 and click OK.
Figure3bshows the layer stack after the colorize and blur. Figure3ashows the result document view.
3a
3b
Duplicate Layer 1 and make it red.
Duplicate Layer 1 by dragging it to the create new layer icon or with Cmd + J or Ctrl + J to create Layer 1 copy.
With Layer 1 copy active, go to Image, Adjust, Hue/Saturation or Cmd + U or Ctrl + U. Set the Hue to -40 and click OK.
Note: The shortcut names layers differently as in Layer 2 instead of Layer 1 copy. The resulting layer should look like Figure 4b and the document like Figure 4a.
4a
4b
Set Layer 1 copy to Color Dodge mode and merge down.
With Layer 1 copy active, go to the Mode drop down menu at the top of the Layers palette and click-drag it from Normal to Color Dodge or Option + Shift + D or Alt + Shift + D.
Now merge Layer 1 copy down onto Layer 1, with Layer, Merge Down or Command/Ctrl + E.
Note: The shortcut changes the mode based on the active tool. For Layers select the Move tool (V).
Figure 5b shows Layer 1 copy set to Color Dodge. Figure 5a shows the result.
5a
5b
Distort the image into flames with the Warp tool in the Liquify dialog.
With Layer 1 active, go to Image, Liquify or Cmd + Shift + X or Ctrl + Shift + X.
The Warp tool is selected by default. In the dialog box set the Brush Size to 50 and the Brush Pressure to 40. Now click-drag the initial flame shapes up from the edges of the white text areas. Wiggle the mouse as you drag up. This first run creates the major flame shapes.
For the second run, create smaller flames by reducing the Brush Size to 30 and the Brush Pressure to 35.
If you want to start over you can Reset back to the undistorted version by holding down Option for Mac or Alt for PC and clicking the Reset button that appears to replace the Cancel button. You can also use the Reconstruct tool (E) to remove or rework your distortions until you are pretty happy with your flames but don't click Okay just yet.
6a
6b
6.b
(Optional) Evaluate the distortions and re-edit if necessary using Shift to save and load the distortion mesh.
When you are pretty happy with your flame shapes, press the Shift key and click Okay.
The Shift key is a modifier to Liquify that saves the distortion mesh you created for later use. If you want to rework the distortion, you can now Edit, Undo or Cmd + Z or Ctrl + Z to revert the image back to a pre-Liquified state. Now if you reopen Liquify with Cmd + Shift + X or Ctrl + Shift + X. The dialog will open with your previous distortion mesh applied. The advantage is that this allows you to use your previous distortion mesh as a starting point but now you can Reconstruct all the way back to the undistorted version.
Figure 6c shows the image after Liquify distortions, Figure 6d shows the layer stack.
6c
6d
Duplicate the FIRE text layer, rotate it back, fill it with black and then move FIRE copy above Layer 1.
Duplicate the FIRE layer by dragging it to the make layer icon or Cmd + J or Ctrl + J to create the layer FIRE copy.
Drag FIRE copy above Layer 1 in the layer stack.
Fill the text shape with black by pressing the D key for default colors then Option + Delete or Alt + Backspace to fill with foreground color.
Note: The shortcut names layers differently as in FIRE 2 instead of FIRE copy.
Figure 7a shows the new, black, text over the fire. Figure 7b shows the layer stack.
7a
7b
Duplicate the liquified flame layer, move the copy above the black text, then mask and Screen.
Duplicate Layer 1 with Cmd + J or Ctrl + J to create Layer 2.
Drag Layer 2 above the layer FIRE copy in the layer stack. Set the mode for Layer 2 to Screen with Option + Shift + S. Then add a layer mask by clicking on the Add Layer Mask icon at the bottom of the Layers palette.
With the linear Gradient tool run a white to black, linear gradient from the top of the text area to the bottom.
Then use the Smudge tool (R) or Shift-(R) to toggle, with a 65 pixel, soft edged brush at 70%, on the layer mask, dragging up and down to reveal or hide Layer 2 flames.
Figure 8a shows the document view of the layer stack in Figure 8b.
8a
8b
Merge all the layers to a new layer at the top of the stack, then blur and Screen to create a glow.
Create a new layer at the top of the stack by activating Layer 2 then clicking on the create layer icon or Cmd+ Option + Shift + N or Ctrl + Alt + Shift + N to create Layer 3.
Turn the view on for all layers and merge to Layer 3 with Cmd + Option + Shift + E or Ctrl + Alt + Shift + E.
Set the mode for Layer 3 to Screen with (V) then Option + Shift + S or Alt + Shift + S.
Set the opacity of Layer 3 to 50% with (V) and then (5).
Then go to Filter, Blur, Gaussian Blur or Cmd + Option + F or Ctrl + Alt + F to open the last filter dialog, set the Radius to 50 pixels and click OK.
Figure 9a shows the image with the glow applied. Figure 9b show the layer stack.
9a
9b
Merge all layers to a new layer at the top of the stack, then transform the resulting image down under.
Click on the Create Layer icon at the bottom of the Layers palette or Cmd + Option + Shift + N or Ctrl + Alt + Shift + N to create Layer 4.
With Layer 4 active and all views on, merge to Layer 4 with Cmd + Option + Shift + E or Ctrl + Alt + Shift + E. Set the mode for Layer 4 to Screen and set the opacity to 60% with (V) and then (6).
Now zoom back so you have some gray non-document space around your image (make sure Resize Windows To Fit is off in your Zoom tool options bar). Go to Edit, Free Transform or Cmd + T or Ctrl + T. Click-drag the top center handle down beyond the bottom of the transform bounding box, then drag the bottom center handle up to create the inverted reflection. Apply the transform (Enter) and position with the Move tool (V) if needed.
Figure 10a shows the final layer stack and Figure 10b shows the completed image.
10b
10a
Merge to target (Cmd + Option + Shift + E or Ctrl + Alt + Shift + E) is a great way to create a composite of a number of layers quickly. It simplifies the build process by bringing together a number of layers into a single layer and when applied to a new layer, it does no damage to the component layers.
To envelope an image element in an effect, sandwich it between two layers holding the effect. This makes the enveloped element appear to be inside the overall effect. Here we used this to enclose the text in fire.
Duplicate a bright layer, blur it and set it to Screen mode to create a glow. This can offer a much more sophisticated, image-based glow than a Layer Style glow can offer.
To save and load a Liquify distortion mesh use Shift when applying and entering Liquify . This gives you the ability to Undo and re-work your distortions with much more control over the result.
Enhancements
To make the fire appear to have more depth run another liquify pass on either one of the flame layers, Layer 1 and Layer 2 above. This will increase the separation of the flames in the foreground and background.
To make the surface of the floor a bit more realistic. Run a Filter, Stylize, Wind on the reflection to roughen up the texture of the floor.
To place the fire over other backgrounds, merge your fire with black background onto one layer. Then put your background image on a layer underneath. Finally, target the fire layer and set the mode from Normal to Screen. Screen stacks the light stuff from the fire layer onto the background image but ignores the dark stuff. To keep the text black I would predict that I would need the black text as a separate layer. So I would merge the fire in front of the text into one layer, merge the fire in back of the text onto one layer, set both fire layers to Screen and replace the background. If you are looking for more fire intensity against a light background try the Lighten mode instead. It will hold more "fire" against lightness but the edges will carry some unwanted density sometimes. If you have this edge problem try going to Blending options for the fire layer by double-clicking it and then splitting the black "This Layer" slider by pressing the option/alt key and dragging it right. This will fade the edge transition. You may need to drag the right slider "ear" all the way over to 255. Also try duplicating the layer when it is set to Screen to intensify the effect.
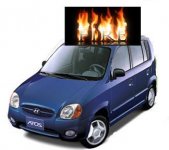
 I mean on a car