New 80/20 rig design

Been using a GT Omega rig for the last few years which I've had to modify in order to cope with the stresses of OSW and load-cell pedals. Despite (or possibly because of) this it's still rather creaky so I've decided to build myself a new 80/20 rig.

Motion's out due to the fact that I'm limited for space and it needs to be relatively easily moved. I currently have all the parts for this in my basket at Motedis...

80-20_Rig_v002.jpg


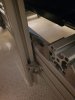
The pedal box is on sliders for the sake of adjustability and the fact that it needs as small a footprint as possible when I'm not using it. Because that's not rigidly connected I wanted to make sure the rest of it was solid. Am hoping it's suitably over-engineered and that I've not over looked something really stupid in the design.

80-20_Rig_v001.jpg


80-20_Rig_v003.jpg
 
Thanks! More details, as promised...

Am really pleased so far. Usually when I attempt something like this I manage a massive oversight, or something doesn't work as expected. This time round it's been pretty much flawless.

Sliding pedal box seems perfect, which is a great relief. Main concern was that I'd misinterpreted the drawings for the sliders and didn't get the gap right. However, it's absolutely spot-on. Moves freely enough but should be solid when locked. Unfortunately it hasn't been locked yet because the locking sliders weren't supplied with the hardware to fit them in this situation. Needs screws with low profile heads so I've had to order some. Until then I'll be able to use some angle brackets to do the job.

Haven't quite figured out how I'm mounting the pedals yet. They need to be removable with minimal hassle for when swapping into aircraft mode. From the looks of the photos above I reckon they might need raising a bit as well, especially since I've tilted the seat back a bit more than it was on my previous rig.
 
Upvote 0
This looks really good and also wit a good WAF. Can you share the part list / drawing with us?
Will definitely share the parts list and more info on how to put it together. As mentioned previously, just bear with me while I make sure it's all working as intended. Already noticed one thing I'd change.

@Daniel oliver It's exactly 1m when collapsed. You could probably shorten that if necessary, but the rigidity of the pedal box will depend on how much overlap there is between it and the rest of the rig.
 
Upvote 0
In case anyone's really keen and fancies a head start, here's the meat of it:

40x120 I-type Slot 8 - 1000mm - x2 - Main chassis sides
40x120 I-type Slot 8 - 410mm - x1 - Main chassis rear*
40x120 I-type Slot 8 - 570mm - x2 - Main chassis uprights
40x80 I-type Slot 8 - 410mm - x1 - Main chassis front*
40x80 I-type Slot 8 - 630mm - x2 - Pedal box sides*
40x80 I-type Slot 8 - 322mm - x2 - Pedal box ends
40x40 I-type Slot 8 - 490mm - x2 - Wheel mounts*
40x40 I-type Slot 8 - 480mm - x2 - Seat mounts*

Bracket 40 I-Type slot 8 - x26
Bracket 80 I-type slot 8 - x2
Bracket 40x80 I-type slot 8 - x10

L connector plate 116x116x5 - x 4

Slider I-Type slot 8 - x 4
Slider with clamp lever I-Type slot 8 - x 2


Some notes on the above:

That only accounts for the main frame and pedal box. Doesn't include the shifter mount as seen in the initial renders.

I used the 2x Bracket 80s on the rear of the pedal box, and 4x Bracket 40x80s on the front. Reason being is it would allow the upper pair of the front ones to be installed facing the other way up, allowing the pedals to be mounted slightly lower if necessary.

The renders included plates on the ends of the main chassis and pedal box (T connector plate 116x116x5 and Square connector plate 76x76x5 respectively). I ordered these but haven't bothered using them, they don't seem necessary.

*If wanting to adjust the width, add or subtract the same amount to these sections. I needed to make sure it was wide enough for my rudder pedals (MFG crosswind), so it could be narrower.
 
Upvote 0
So far it looks very clean.

An area of concern for me with a rig for both driving and flight is that the seat position and seat to pedal geometry are very different for each. Ideally there seems to be a consensus that the seat back should be about 40 degrees and the pedal deck should put your heels at the same height as the seat of your pants for driving. However for flight the seat is more upright and the flight pedals are lower.

Your seat currently looks upright for flight, but the flight pedals would be a little high. For driving you may want more of an incline for the seat.

I think you could solve this by using your seat's side bolt mount and adjustable seat brackets on the sides. You could mount the bottom of the side mounts to your slider and then adjust the angle of your seat for flight and driving. The bracket would also raise your seat for a better flight geometry.

I'm getting ready to try using 8mm lever bolts with side mount seat brackets to adjust the shell seat I have ordered. My seat hasn't arrived yet, but I'm hoping that this will work well. I believe the holes below will work for driving and then I'll level it out completely for flight. Hopefully I'll have an idea how well this works later on this week.
seatbrackets_4406.jpg


There is a simple solution to raise and lower your pedal deck. You could add a couple pieces of 40x80 on top of the front of your frame and join them with a couple "40 Series 8 Hole Rectangle Flat Plate". Then you could move your pedal deck up 3" for driving and then back down for flight. I only added a single 40mm width for mine, but my pedal deck has sits on top of this and can not submerge like yours can. Obviously these plates are mounted inside on my rig and would be outside on your rig.
splice.jpg
 
Last edited:
Upvote 0
How have you found the rigidity of the pedal box being on a slider? Personally I think this looks very nice. Also would you be able to provide updated product list including the side mount for shifter.

Thanks!
 
Upvote 0
Pedal box is absolutely solid in terms of rigidty. Locks perfectly with the two clamps.

For the shifter mount I just used some spare bits I had lying around, which were...

30x60 B-type Slot 8 - 500mm (way longer than necessary. See first photo in my post above, you can see the end through the hole in the seat)
30x30 B-type Slot 8 - 250mm
Bracket 30 B-type Slot 8 - x6 (4 for the rig and 2 to attach the shifter)

The 30mm section works fine for the shifters, but is a little award because you need to use washers here and there (see photo) to accomodate for the difference between it and the rest of the rig. I'd suggest going for 40mm just to make life easier, even though it's overkill for the shifter. In that case you could just go with 40x40 for the horizontal piece, I'm sure it'll be fine.
 

Attachments

  • 2020-04-03 23.10.17.jpg
    2020-04-03 23.10.17.jpg
    180.7 KB · Views: 454
Upvote 0
How have you found the rigidity of the pedal box being on a slider? Personally I think this looks very nice. Also would you be able to provide updated product list including the side mount for shifter.

Thanks!

It's very solid. I have a whole build thread that has links and descriptions of almost every part of my build.
 
Upvote 0
Awesome thanks will look into this!

There are a lot of permutations of my rig over the last year. It started out as a full Fanatec rig with a seat out of a wrecked car and then eventually all the controls were replaced, a shell style seat was added, the pedals were inverted along with piles of other changes as I tweaked my design. It started with a Sim-Lab P1 chassis and then evolved from there.

 
Upvote 0

Latest News

How long have you been simracing

  • < 1 year

    Votes: 344 15.6%
  • < 2 years

    Votes: 232 10.5%
  • < 3 years

    Votes: 231 10.5%
  • < 4 years

    Votes: 175 8.0%
  • < 5 years

    Votes: 293 13.3%
  • < 10 years

    Votes: 256 11.6%
  • < 15 years

    Votes: 163 7.4%
  • < 20 years

    Votes: 124 5.6%
  • < 25 years

    Votes: 99 4.5%
  • Ok, I am a dinosaur

    Votes: 284 12.9%
Back
Top