Gents,

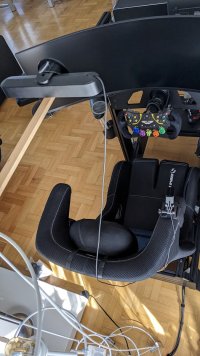
after playing on a wheelstand setup for quite some years, I decided to upgrade to a proper rig. I was always hesitant to litter the living room witha full blown rig, so made do with a GT Omega "Classic".

The whole journey started for me with a PS3, GranTurismo 5, a 100" front projection home theater setup and a Thrustmaster T500RS with TH8A. Later I switched to a PC with R3E and AC, modified the pedals with stiffer Mardo Media springs, upgraded to a TM Sparco 383mod, added a Nextion display and braced the wheelstand including Sofa hook-up.

Now playing mostly ACC and got a taste of what it is like with a proper rig and DD wheel which left me wanting.
I guess it is time for a radical change....and even got permission from the missus. :D:thumbsup:

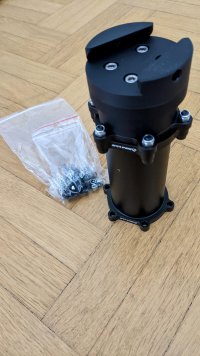
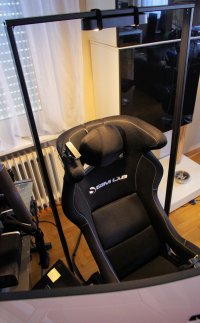
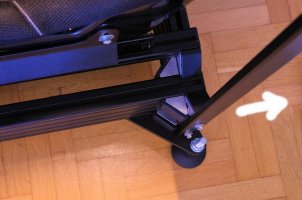
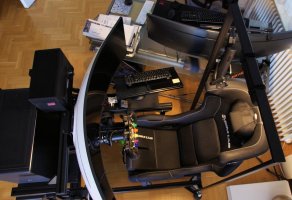
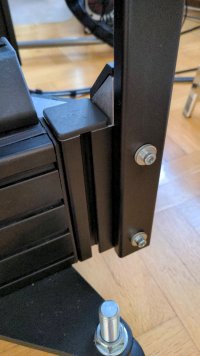
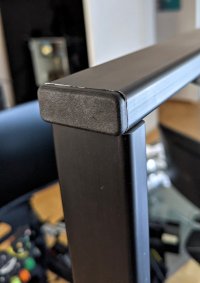
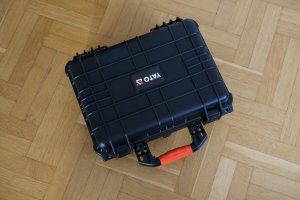
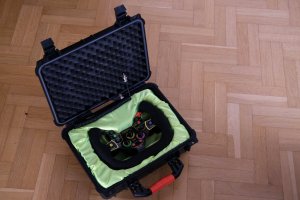
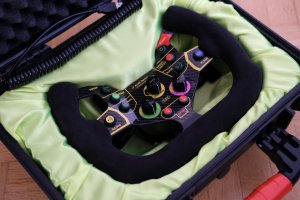
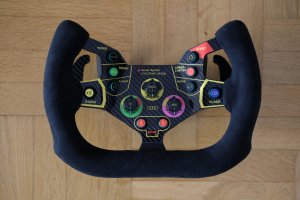
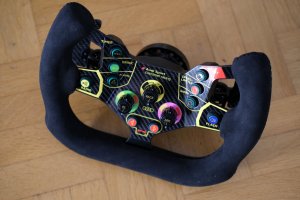
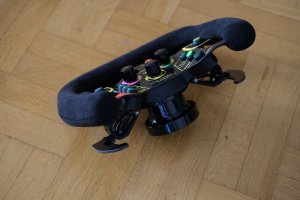
IMGP6817_.jpg IMGP8998_.jpg IMGP8700_.jpg IMGP8704_.jpg
 
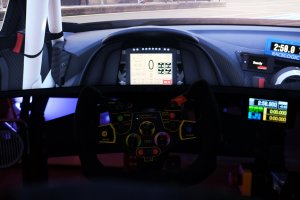
For some time I was mulling over on how to do some cockpit night light as you see in endurance events like 24h races. Did some purchases so far, but all of them fell through in terms of practicability.

I wanted the light to be as bright as needed to create the feeling, but the installation should be as elegant and invisible/hidden as possible. Just very minimalistic with a small power source and a switch. The LED would have to be able to have an unobstructed view on the steering wheel. So I gathered the seat head side bolsters should be a good location to mount a single blue or purple LED to illuminate the steering wheel.

And today I found the parts I needed! Heureka.
A plug and play solution, just as the doctor ordered!

Did a first mock-up just now. Here is the result. The brightness relations between the blue LED and the room light is very much like the picture. Brilliant! I love it.
IMGP2684.JPG


Now I have to fabricate a small mount and a small shield to shade off the light towards the monitor.
Should be doable, but have to think about how to mount it to the seat without damaging it too much. The LED has to be off any non-flammable material as it will not stay cool. Thinking aluminium sheet metal. But surprised how cool it stays seeing the brightness of the thing.

IMGP2686.JPG


So the parts I got off of Amazon are:
1x marine side light 12v, 3W, 120 lumen, 3.1 x 1.8 cm
1x 12v plug-in power supply 0.5A with cable switch
1x DC socket with screw connection (I am lazy)


To be continued ...
 
Last edited:
Upvote 0
Well done! Pretty sure you can't wait! :)
I would be interested to read your feedback and impressions!

hi rob

my first take after a few days.
The screen is impressive
The resolution jump standing so close is really noticeable.
All in All picture is glorious.
Had a problem when putting off/on sleep mode, screen and pc where not synchronised but seems ok now.

I Racing and r factor 2 are beautiful and sofluid.

Dont know why i cant make acc fluid like the other 2 games, fps are good but the picture is not fluid at all, very choppyThat s to the point where i can’t play it and that s where i spend most of Time, i have tried tweaking every settings i thinked of.
Firmware have been updated.

for the rest screen is impressive need to fix acc
but nice piece of hardware
 
Upvote 0
hi rob

my first take after a few days.
The screen is impressive
The resolution jump standing so close is really noticeable.
All in All picture is glorious.
Had a problem when putting off/on sleep mode, screen and pc where not synchronised but seems ok now.

I Racing and r factor 2 are beautiful and sofluid.

Dont know why i cant make acc fluid like the other 2 games, fps are good but the picture is not fluid at all, very choppyThat s to the point where i can’t play it and that s where i spend most of Time, i have tried tweaking every settings i thinked of.
Firmware have been updated.

for the rest screen is impressive need to fix acc
but nice piece of hardware
Just got a G9 myself and only play ACC, totally know what you mean regarding choppiness..
 
Upvote 0
hi rob

my first take after a few days.
The screen is impressive
The resolution jump standing so close is really noticeable.
All in All picture is glorious.
Had a problem when putting off/on sleep mode, screen and pc where not synchronised but seems ok now.

I Racing and r factor 2 are beautiful and sofluid.

Dont know why i cant make acc fluid like the other 2 games, fps are good but the picture is not fluid at all, very choppyThat s to the point where i can’t play it and that s where i spend most of Time, i have tried tweaking every settings i thinked of.
Firmware have been updated.

for the rest screen is impressive need to fix acc
but nice piece of hardware
Glad you like the display!

I noticed choppiness in ACC despite G-sync working correctly only in MP sessions, but this was also valid with my old HG90. I do not mean the join/leave lags, but a general choppiness during some of my MP races. Sometimes it is worse, sometimes it is better. Mostly it is fine for me, maybe I adapted already.
Currently I believe it is due to the game itself, maybe UE4 engine. netcode or other non-optimizations. Not sure. Maybe other simultaneously running programs play a role, too.
Singleplayer is absolutely fine.

Not sure if some Nvidia drivers work better than others.

So, unfortunately I have no solution for you. If you find one, I'd be happy to hear it of course. ;)
 
Upvote 0
it works flawlessly now in ACC. something have been messed up with window mode, can't put a finger on it but pretty sure the problem i have was linked to that.

Now acc is absolutely gorgeous, night racing was my "wow" moment.
This screen is really something . I,m getting great fps with ultra, never under 55 ish in almost any conditions, 75/95 in pack middle of race with a groupe of 6/7 cars.
the 3080 delivers more than i was expected.
 
Last edited:
Upvote 0
Was scavenging for some parts I had lying around to fabricate the night light. I found a 23mmx23mm aluminium profile, which suited me just fine. I used a dremel to cut a small window into one side of the profile, drilled a hole for the LED and folded the remains into the profile. Cut the overall piece to a length of 70mm and cut a small shield at the front.

IMGP2691_.JPGIMGP2694_.JPGIMGP2695_.JPG

Not exactly clean, but will do the trick. I will paint the profile matte black to make it more stealthy on top of the head rest side bolster.

I am thinking of using GoPro mount parts to attach it to the seat fabric with rubber band or velcro. Not sure yet.

IMGP2690__.JPG
 
Last edited:
Upvote 0
I finished my work on my night light. Not sure the mounting solution is the final one, but for now it does the job.
Maybe I will hard mount it to the seat some day....

What I did was purchase a wrist GoPro mount and attached that to the side bolster. The aluminium profile was painted, a GoPro mount attached (small aluminium one I had left over) and a plastic cap to close the light off towards the rear.

IMGP2700_.JPG
IMGP2701_.JPG
IMGP2703_.JPG
 
Last edited:
Upvote 0
It's been some time since I updated anything on my rig. In the meantime I enjoyed myself with online sim racing. Still I am super-happy with the setup and the respective settings.

There is one thing I changed, however. I decided to change the ACC video settings towards a resolution scale of 120% and tuning down a few settings from epic to high to counterbalance. In the long run I could see some resolution deficiencies due to the high projection correction of 1.0.
So I have to revise my earlier statement. You can see the stretching effect and you can counter this with higher resolution scale.

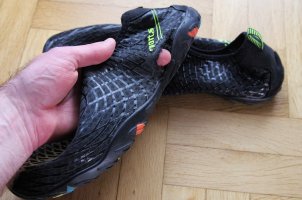
Then I am always happy to improve things on immersion and ergonomics. The most basic thing was, that my aqua shoes I used for racing were failing after countless hours of abuse. I really disliked the wear on the rubber sole (and the remains of that on the pedals) and the feel of the soles back on my heel in the long run. Plus they have no side to side support, which can be unnerving under hard braking.
I have a pair of Karting shoes, which I always liked in terms of feel through the thin sole, but the stability of them and side support they offer. Not so keen on wearing leather boots in the sim rig however.

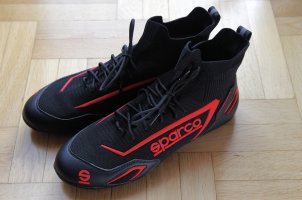
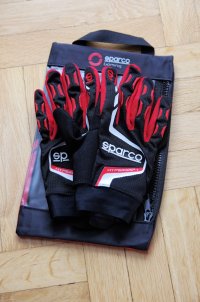
I now discovered a new shoe from Sparco, the "Hyperdrive", and took the plunge. It is basically a Karting shoe, but with breathable mesh and lots of side support. As I was at it I also ordered the new "Hypergrip+" gloves.
IMGP2787_.JPGIMGP2791_.JPGIMGP2792_.JPG

I already have the predecessor, the "Hypergrip" with the velcro fasteners, but they kind of degrade quickly if you wash them often (by hand). I kind of liked their tight fit and very thin, touch sensitive fabric on the fingers while protecting the palm with small cushions at the same time. My other Sparco Mecca 3 are quite comfy, but I am too clumsy to operate my keypad during hectic pit stops for example.

First you have to know, when buying Italian products: The are always tighter than you think. Be prepared to go up in one size if you don't want them to act as a second skin.
That said I ordered the shoes according to their centimeter table and the gloves in the same size as my previous Hypergrips.
Both the Hypergrip+ and the Hyperdrive fit perfectly. The real problem is to put them on!
Very very tight on the sleeves. It is almost painful them get into them to be honest.
Maybe ordering them one size larger would alleviate this.
BTW the laces on the Hyperdrive are for show only. They do nothing when I wear the shoes. You can probably imagine what a tight fit these shoes are.
As for the Hypergrip+....if you do not loathe velcro fasteners on your gloves, I would recommend to go for the older Hypergrip. They feel the same as the Hypergrip+ but are much easier to fit. And they are discounted on some websites.

The other thing I'd like to share was something that was so obvious but never occured as an option to me. My Brother really enjoys his ambient lighting using Philips Hue light bulbs and LED strips. You can configure them and operate them with your smartphone via app and there is even a sync app for windows to sync the lights with your videos for example.
I never thought about using that to sync to a racing game like ACC! But others did and I recently discovered their videos on that. The first video I saw was from Will Ford from Boosted Media, but he referenced a much lesser known channel from Biro, called SimGP. His video had all the info including placement, settings and advice. Really great stuff!

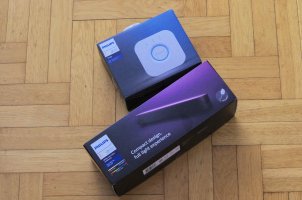
So I ordered a basic set to experiment myself! What I needed was a Philips Hue Bridge and I opted for one Hue Play lamp, which is about 100€ in total. But I can connect up to 49 more hue lights to the Bridge in the future....
IMGP2781_.JPG

So currently I am experimenting with placement and settings, but the first results are really encouraging. Even with only one light this gives you a really nice effect.
I will show some results later, when I am happy with my setup and the settings. Some things like HDR and actual placement get in the way a bit, but I will find a way to optimise ...

If you're into immersive sim racing and augmented reality, you should give this a shot!
 
Last edited:
Upvote 0
After having seen the same video and the one by Boosted Media, I attached a Hue Play light to my rig too.
It really adds to the immersion when set up right, especially in a darkened room.
PXL_20210505_133626415 - Copy.jpg


I used two pieces of profile that I attached to the quad monitor add-on I have on my rig. I ordered three different length pieces so I would be able to position the light in the right place. Don't forget to have your supplier tap the ends for M8 bolts. I ended up using one piece of 150 mm profile and one piece of 250 mm profile. The light is attached to the profile by drilling a 8 mm hole through the mounting bracket that comes with the Hue Play light. The light is just out of my peripheral vision in thsi location.
PXL_20210505_133610287 - Copy.jpg

Due to there not being enough space to fit the two corner brackets and the 40 mm profile between the nuts of the VESA mount, I had the saw in the corner brackets a small amount.
PXL_20210505_133551180 - Copy.jpg
 
Last edited:
Upvote 0
@PolyGone Thank you very much for sharing your setup! I always like to see other peoples ideas. Looks neat and tidy, mate! :thumbsup:

This is indeed one of the options I thought about as well. But I would not want to set it that high above the rig though, as the rig is sitting in the living room. And I feared it would interfere with getting into the rig if I set it lower plus it would shine right in my face, which would be kind of distracting.
I thought about strapping a hue strip to the ceiling as well, like Will Ford did, but wasn't keen to do that in the end (rented apartment). Different story if I would renovate my own apartment / house (so maybe in the future?)

The other one, the one I currently favor is farther back, behind the drivers head and just above the upper monitor line to avoid any reflections / glare in the (thankfully matte finished glass) monitor. Still testing though.
To this end I used a floor lamp that is positioned behind the rig anyhow and attached the Hue Play there. It also has the proper height, too!
The plan would be to fabricate some kind of slick aluminium / steel sheet extension specifically for the light later on. Still mulling over the details as I would want it to be as thin and non-intrusive as possible, but still with some rigidity to not flap around.

I also experimented with the Hue strip that I lent from my brother (he had one surplus). The nice thing is, that it just tightly tucks away in any of the slot8 aluminium profiles of the P1-X! Just like it was made to go there. I also thought about adding an opaque slot cover to have a more ambient light feeling, since the Philips light strip is quite bright and the leds are not really close to another. Therefore it felt like several bright spotlights in a line really (not sure that makes sense to you).

(Un)fortunately this setup didn't really add anything to the already very good setup with the one Hue Play. So, no second light and / or strip on my setup as they don't come cheap for no additional benefit....
 
Upvote 0
Ok, after some trials and mock-up mounting solutions I came up with the idea to construct a gantry of sorts at the back of the P1-X main frame. The aim is to place the Hue Play right above my head slightly above the monitor to prevent reflections as much as possible.
I just made an order for the respective aluminium profile parts, brackets, bolts, etc.. Unfortunately I misplaced my spare parts from the P1-X and had to order everything down to the bolts. :cry:
To make the construct as less imposing as possible I opted for a rather slim solution. I hope this works out as intended.... and will not be too flimsy. :geek:
Fingers crossed. Order will be delayed. ETA 2 weeks.
PXL_20210530_084916465.jpg

And I've purchased something else. You probably know what this means...the brilliant AMR GTE wheel will get a sibling. Something I wanted for a long time and finally pulled the trigger on.
Also here some wait time until I receive the missing part. Most likely even a longer wait time than for the aluminium profile. :cry:
PXL_20210528_074404836.jpg
 
Last edited:
Upvote 0
Why do you want that light over your head? I don't understand.
What is the point? What are you lighting?
Seems indirect light bouncing off the ceiling and/or walls would yield a more pleasing lighting environment.
Please explain............
 
Upvote 0
Why do you want that light over your head? I don't understand.
What is the point? What are you lighting?
Seems indirect light bouncing off the ceiling and/or walls would yield a more pleasing lighting environment.
Please explain............
Fair question. First of all I do not want to illuminate the room. I want to recreate the light that is bouncing off and illuminates the cockpit. Will Ford from Boosted Media explained it quite well, that you kind of want to extend the lighting from your monitor to your steering wheel, forearms, etc. It is a kind of augmented reality (if you do not use a VR headset for example).

Second thing is that I would need a lot of lights to illuminate more than just the sim cockpit with an adequate brightness. And I do not want to see the room in the first place (immersion breaker), but just what is happening inside the sim cockpit.
The light will be above my head so that I do not see the light source itself, but only the light it casts on me and the cockpit.
Maybe the video links I posted above will explain it better than I ever could with words.
 
Upvote 0
Some days ago I built the Rev.0 of my "Light Portal" for the Hue Play. I wanted it to be sturdy to maybe accept netting in the future (not decided yet). The design might not be to everyone's taste I can imagine...

In general the aim was a lamp placement above my head above the monitor line, as laid out before. The setup is still it is a bit rough around the edges, but It will get there eventually.

I realised pretty quickly that I need to place the lamp a bit further back to ease getting into and out of the rig at the cost of the lamp being a bit farther behind the head. Materials already ordered.

IMGP2819_.JPGIMGP2820_.JPGIMGP2822_.JPG
 
Upvote 0
A more roll cage form factor with netting would hide the lighting better ;)
jeeplights.jpg


Personally as a VR guy, I wouldn't consider netting because it would interfere with tracking and it seems like it would forever be in my way. It also wouldn't work for flight mode.
 
Upvote 0
I've modified the Hue light portal as I mentioned earlier. Much better now.
IMG-20210717-WA0001.jpegPXL_20210717_152909618.jpg

I've tried to capture the effect on video, but it really doesn't come across as I perceive it while driving. Anyway, sorry for the grainy video....my best attempt.
 
Upvote 0
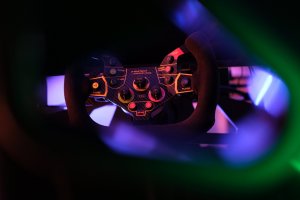
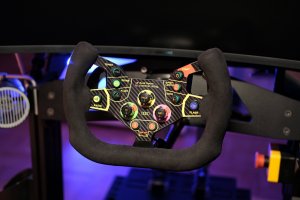
Finally I received my new wheel! Chuffed to bits!
Due to the pandemic some materials and products were hard to come by, but Jakub at Rosso Sim Racing managed to get the build done. So far really impressed by the product! I will do some more testing and give further thoughts on the wheel in due time. Stay tuned!

DSCF3793.JPGDSCF3794.JPGDSCF3795.JPGDSCF3797.JPGDSCF3799.JPGDSCF3801.JPGDSCF3805.JPGDSCF3806.JPGDSCF3815.JPG
 
Upvote 0

Latest News

Are you buying car setups?

  • Yes

  • No


Results are only viewable after voting.
Back
Top