3D MAX & You

Jarrod Crossley

Rubbin Racer!
So your looking at producing your own renders, You've got one of the many version of 3d max and your wondering whats next.

Well here is some of the ins and outs :

First off you'll need Spluterfish's Brazil you can download the demo vresion known as Rio from there site here:- SplutterFish, LLC: Home

Next you'll need the 3D max car scenes for Race07 and those are availble via:- Portal - raceskinning you'll have to register there.

So now you have evrything you need to get started. All you need to do now is load up a scene and go right?

Wrong due to the fact these scenes where made with a differant version of MAX and a full version of Brazil, Youlll have to make some alterations to get it to look the way you want.


So you load your scene and it looks like this:

Terrible isn't it well first off we need to set up are renderer so on the top menu bar find "Rendering" and from the drop down find "Render Setup" click on that and you'll get a menu:

Now due to the fact we are using Rio we are restricted to image size (1024x511 max) so for now select 640x480. Now on the same menu scroll down tp were it says "Assign Renderer" This is where we are going to be telling it to use Brazil Rio. So click on the three little dots:

and from the drop down menu select Brazil:
 
I didn't do all that procedure from the first page. I downloaded your scene from the RD downloads area. Just opened the scene on max and rendered, just to see it working.
I'm gonna post a picture later so you can see what I mean.
BTW, I'm using 3ds max 2009 and Brazil Rio v2...
Thanks a lot!!!!

EDIT:
Jarrod, here is the picture:
minitesteww8.jpg
 
I see what your after, thats easily changed and seeing as your using 2009 even easier:

Load up your scene do all the alterationsyou want to do and once your happy Click the Render to frame window:

Frame_Window.jpg


Once Frame window has shown tick the following:

tick.jpg


and then just hit render:

render.jpg


The reason I dont save the scenes at this level is becuase its quicker as is to do a quick render the above settings are more for a final render.
 
Hello :wave:
I wonder if anyone can help me with this rendering problem?

Basically the problem seems to be that the chassis is split into four or more parts, chassis, splitter, bumper and hood. How exactly does one go about mapping the usual dds or tga to these individual parts? Any help gratefully received.
Thanx in advance. :)
 
It seeems you got your models from a differant source and therefore how they jave listed the materials and linked the materials is diffeant to the ones I use.


You have two choices-

A: muddle through till you can link the correct material and texture to the correct body part

B: Download the ones HERE

C: seeing your using an older version of 3Dmax vist Raceskinning register and download the scenes from there.
 
Thanks Jarrod, I could have sworn I downloaded ones that you linked to. But I will try the ones you've linked to above, :)

Edit:
I had downloaded from the scenes from http://www.raceskinning.de/ as linked on page one and they are the problematic ones. I tried to download the ones you uploaded here but strangely I keep getting a message that I have exceeded my download limit for the day. Which is strange since I haven't downloaded anything!!! Any how no matter since I found some scenes at http://www.archeoskins.com/ and they are fully functional. :) So I am up and running and very grateful to you for your excellent tutorial and all your efforts.
:bananalama:
 
Jarrod,

need a help here again, please... I'd like to alter the "walls" in the render, like putting a blue sky or samething. I read what Matt explained to Sandis on page 3, but if I do that, I change the floor, not the "walls" if you know what I mean. How can I change the walls?

Another thing, is there a scene only for the helmet? How do you render the helmet and the car together, how do you put the helmet into the car scene?

And the last thing, if I want to paint a helmet, the only way to do it is to paint in those .tga files? Isn't there some psd files with layers and all?

Thanks a lot in advance, man.
 
The "Wall" as you call them are actually the light source and in the material editor should be the big white sphere so if your wanting to add colour to it to it from that material sphere.

The helmet:

No there is no spasific scene for just the helmet its part of the driver scene and you would improt the driver but hide the drivers body but leave the helmet on display.

As for painting it Yes the is indeed a template and its part of the Race07 template pack.

If you still get stuck drop a message here or drop me a PM either way it will get seen.
 
Car and Helmet

Sample.jpg


I have been asked a few time how I do the above and really its quite simple. But you need to make a few alterations to 3Dmax 2009.

Open 3D max or a scene as normal and on the tope menu go to "customize" and from that menu select "customize user menu":

Step1.jpg


A menu popup will appear and from there select the "Menu" tab and ecpand "Edit":

Step1.jpg


Scroll Dow the left hand menu till you find "Hide By Name" and it just a case of drag and drop to your edit list on the right:

Step3.jpg

Step4.jpg


Once you have doen that its a case of again scroll down the left hand menu till you find "Unhide by name" and again a case of drag and drop:

Step5.jpg


Now if you click "Save" and allow it to overwrite the "MaxStartUi" these options will always be available to you everytime you start 3Dmax:

Step6.jpg


Now we have the boring stuff out of the way we can get on and have some fun.

Importing another model:
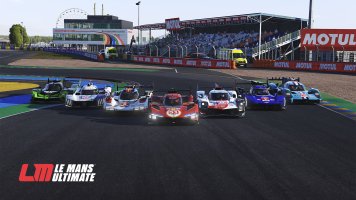
Start of by going to "File" and from the drop down select "Merge":

Step7.jpg


From the popup navigate your way to the scene you wish to merge with your current scene. Select it and hit "open".

A little warning screen will appear hit "Ok" and you'll be presented with a list of part that are all the parts to that scene.

Now this is the tricky part depending on if you have played with the scene you are merging depends on what you want from the list but ill show you an example any how. Seeing as all I want is the Helmet and funatly I grouped the helmet in the origianl scene I can just select the Helm Group:

Step8.jpg


When it merges the object at first it will be hard to see so its best to grab the old move toll and move it in to view:

Step9.jpg


Now its just a case of moving the Helmet into place with the move tool, Just in case your wondering on how I got the wire frame to show I press "F3" on the selected window:

Step10.jpg


Samples:

sample2.jpg

Sample_3.jpg


*Hard facts -

One or two things you need to be aware of :-

1. On some ocations the texture maps don't cross over so you will have to created new texture spheres

2. I alter my texture for the helmet so that the face area becomes invisable within Max

Helmet alterations:

Fisrt load a standard Helmet texture into PS and you'll notice it has a padlock on the layer:

Hel_Step1.jpg


Double left click the layer and a popup box will apear on the box select "OK" this will back the background transparant (needed for later on):
Hel_Step2.jpg


Select the "Polygon Laso" tool and draw around the face:

Hel_Step3.jpg


Now fill that area with Black:

Hel_Step4.jpg


Whilst the area is still selected go to channels and again fill the area with black:

Hel_Step5.jpg


You can now save this as any type of image you like but don't closse it. Now you have saved the main texture for 3DMax its time to make the alpha for 3DMax.

Go to the channels and hide all layers bar the Alpha channel and hit "CTRL+A" this will select the whole alpah channel image. Whilst the layer is selected go to "edit" and select "Copy". Now go back to the Layers tab and make a new layer and again goto "edit" and select "paste" and hide the lower layer:

Hel_Step6.jpg


Now you can save this as any file type you wish but rember its the alpha for the helmet texture to which we made before.

Now it just a case of putting it all together as a material sphere for the helmet so that it has no face.
 
Jarrod,

just tried to merge two cars and a car and a helmet, but everytime I try to do it, the thing Im merging come all in blank. What is it? A material problem? Its like this below:

3ds1qs8.jpg


When I try to merge 2 cars, some conflicts appear, like this:

3ds2zx8.jpg


BTW, Im using your scenes uploaded here in RD. Everytime I merge aomething Im gonna have to do the first procedure?

Thanks a lot in advance.
 
OK first things girst when your merging a car scene you need to take a big long look at the merge list. You don't need the following :- Light boxes,Floor.

Second as I mentioned above some times when you merge the materials get lost in the cross over. The basis of rematerialing the objest is pritty stright forward.

Also in a bit Ill upload a higher detailed tut.
 
Jarrod,

thanks a lot one more time, specially for your patience, superb.

Sorry about all this dumb questions I made, but I really like this rendering thing, but I dont how to do it very well.

And how about that team truck? :)

Thanks.
 
Jarrod,

you seem to know a lot about 3ds max. Where did you learn all of this? I would really like to know more about it... Its like a hobby painting cars and racing with them, so I would really consider some kind of course about 3ds, rendering, modeling, etc. Nothing deep, of course, but the basics...

Do you know about something?

Thanks for the 20th time.
 
Hi again, Jarrod!!!

I had to do a skin for a friend, the GT Pro Viper GTSR, and when I opened the scene in 3ds I got that black car from the beggining of the tutorial and I downloaded it from here. It's the only one so far that I had problems and I skinned like 6 different model.

Well, since I'm not lazy (lol), I tried to follow your tut, but got no luck. First of all, in the scene I downloaded from your pack, there isn't a chassis sphere, but I think I founded it looking after the missing materials. I know that it is the chassis because when I put the first raytrace in, the car turn gray like your picture. Btw, there's 2 chassis spheres, one for the back of the car and another one for the front. So I go through the tutorial and when I hit "Show Standard Map in Viewpoint", the car only becomes more white and shinny, the skin does not show, like it should.

What could it be?

Thanks in advance.

3dsviperhelp1xj9.jpg
 

Latest News

Are you buying car setups?

  • Yes

  • No


Results are only viewable after voting.
Back
Top