For the first 20 years of my sim racing career, I drove the way a lot of people drive: with a consumer-grade wheel clamped to the same desk I work at, sitting in a rolling desk chair. It was less than ideal, sure, but I was quick enough to win some races, and it was a cheap way to get on the virtual track.
But as I got more serious about league racing—and as I got older and had a bit more money to spend—I started to wonder if a proper rig would give me better consistency and comfort, if not more speed. In the end, as a pandemic gift to myself, I picked up a cockpit, the midrange Sim-Lab GT1-EVO. But it was a difficult choice: Sim-Lab and other brands like TrakRacer make a wide variety of aluminum chassis that cover a huge range of prices and use cases. I could have gone higher-end and picked up something like the P1-X, or saved a bit of money and looked for a solid wheelstand.
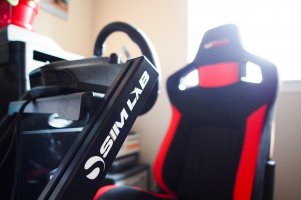
Wheelstands, of course, are simple platforms for a wheel and pedals. In general, they tend to be flimsier than proper cockpits, since they're lighter and not connected to your chair. But a new product from Sim-Lab, the WS-Pro Wheel Stand, looks to bridge the gap between traditional wheel stands and full-on cockpits. Unlike most wheelstands, it's made of heavy-duty 8020 aluminum (the same stuff Sim-Lab's larger cockpits are made of), and it has another neat trick up its sleeve. It's compatible with a matched seat support that essentially turns the humble wheelstand into a full-on budget cockpit.
I went hands-on to see how this lower-priced alternative compares to a higher-end option like the GT1-EVO... and a wheel clamped to my desk.

While the stand comes with all the necessary nuts and bolts, it does not come with the Allen keys you need to tighten them. If you've built much IKEA furniture you've probably got a lifetime supply of those laying around already, but just so you're aware, you'll need 5mm and 6mm keys to make sure everything is properly tightened. Other tools you'll want to have at the ready include a tape measure and a spirit level.
Bear in mind, I'd already built a GT1-EVO previously, so I was somewhat familiar with working with 8020 aluminum. If you've never built an 8020 rig before, you may be even more frustrated.

Working with 8020 is a bit like building an erector set: The aluminum pieces have slots running the length of their sides, and you slide slot nuts into these, insert bolts, and tighten. Triangular corner pieces join rails at perpendicular angles, and you can create 45-degree and other kinds of angles with brackets that use the same nuts and bolts. In theory, it's an incredibly easy (if not particularly beautiful) way to build a modular, supremely sturdy rig.
But why is it so frustrating? Well, for one thing Sim-Lab's instructions are entirely pictographic. The diagrams are generally clear enough (with an exception I'll note below), but some simple text instructions would go a long way toward making the process easier for beginners. You know, simple stuff like describing the proper way to insert a slot nut, or how to adjust the pedal plate's depth and angle. Sim-Lab seems aware of this shortcoming, but instead of creating its own instructional videos or updating the installation schematics, it simply embeds Sim Racing Garage walkthrough videos on its product pages. (I get it, I'm a huge fan of Barry's work, but it seems like a less-than-ideal solution.)

The schematics also leave out some crucial details that may leave you disassembling portions of the rig you've already built and pounding the floor in frustration. While slot nuts are indicated via their part numbers (B8 and B9), they're not visually represented on the diagrams like the bolts, brackets, and rails are. More than once—even as someone who's built a Sim-Lab rig before—I found myself unscrewing pieces I'd already connected because I'd forgotten to slide the necessary slot nuts in before bolting things together.
Making sure everything is square can also be a challenge. A simple bubble level helps, but you may still find it takes a surprisingly long time—and a lot of tightening, loosening, and re-tightening bolts—to get rid of misalignment in the stand and seat support. If you have a large, flat workbench to work on, that'll help. I'd also recommend leaving all of your bolts just a little loose until you've got everything more or less in place. It's much easier to finalize the alignment of all parts at once. This is something the schematics provide no advice about; you just have to do it yourself and learn along the way.

Instead, I hooked up my trusty old Logitech G27 and did a couple days of running in Assetto Corsa, testing out everything from the Mazda MX-5 Cup at Bikernieki (if you haven't tried this combo, what are you waiting for?) to the VRC Formula NA 2021 mod at Road America. Regardless of whether I was driving a car with light or heavy steering, blasting around a smooth track or a bumpy one, the WS-Pro felt rock solid.
Once everything was tightened down properly, there was zero flex in the wheel stand or seat support, even under hard braking and high-G cornering. The G27—admittedly not a very powerful wheel—didn't produce any vibration that I could feel through the seat, and it didn't shake my monitor because there's no way to directly mount a monitor to the WS-Pro (more on that below). And while this is just speculation since I didn't test it directly, based on my experience with the GT1-EVO I feel confident that this rig could also stand up to just about any DD wheel. It's an incredibly solid piece of equipment.

I'm a tall guy (6' 1", or 185cm), and generally speaking, I prefer having the wheel pretty close to my chest—in my GT1-EVO, there's a gap of about 8 inches (20cm) between me and the wheel. Naturally, this means the pedals need to be extended as far away from me as possible, to accommodate my long legs. I'm happy to report that the WS-Pro provides enough adjustability that I was able to bring the seat close to the wheel and still had room to push the pedals back without cramping my thighs, though I did have to max out the pedal deck depth. If you prefer being a bit further from the wheel, you should have no problem finding a comfortable position, even if you're a bit taller than I am.
The primary purpose of a sim racing cockpit is to improve your seating position and ensure that you have the same feeling every time you get in "the car." For this reason, the WS-Pro is at its best with the seat support (and a seat, obviously). While the wheel stand portion is impressively heavy and sturdy, without an attached seat your ergonomics are still going to change every time you roll or plop your chair in front of it. With the seat support, you get the full cockpit experience, and at a significant discount compared to other heavy-duty options on the market.
That said, if you only have the budget for the wheel stand portion, it's worth considering. It would be difficult to find an alternative that will stand up to heavy use as well as the WS-Pro. Other stands, like the $256 Next Level Racing Wheel Stand DD, may have extras like casters and gear shifter mounts, but they don't have the WS-Pro's weight or ruggedness.

If you asked me whether I'd trade my GT1-EVO for the WS-Pro, well, that's a tougher question. There's no denying that the WS-Pro + seat support is the most cost-effective way to get a full 8020 rig, but it does have some shortcomings compared to the more advanced cockpits from Sim-Lab and others.
The inability to mount a monitor directly on the rig is a huge downside for me, though it might not be for others—especially VR players. (And monitor users can always pick up a separate monitor stand.) The included wheel plate is also (for the moment) the only option for bolting on a wheel base. While it works with DD wheels, you'll have to mount them from the bottom. More expensive cockpits also allow for side-mounting, which some drivers may prefer for ergonomic reasons.
The WS-Pro's narrower aluminum profiles, which are a square 40x40mm, are lighter but perhaps a bit less rugged than the higher-end rigs' 80x40mm profiles. They also have just three faces with one slot each (one face is smooth, with engraved Sim-Lab branding). In comparison, the WS-Pro uses aluminum pieces with a total of six slots on four faces (two on each 80mm side). This means that the WS-Pro has fewer mounting points for accessories like mouse and keyboard trays, shifter and handbrake mounts, button boxes, or cup holders.

Some of Sim-Lab's own accessories require two slots on a single face to mount correctly, which means they're not compatible with the WS-Pro at all; others are meant to be mounted to vertical or horizontal aluminum profile and won't work correctly on the WS-Pro's angled legs, even if you rotate the profile so that the slots are on the faces where you want them. DIYers can probably engineer solutions using common 8020 pieces, but the average buyer may not be interested in doing this. Finally, because of the way it's designed, with angled feet, the WS-Pro can't easily be put on casters for quicker movement. Again, DIYing may be possible.
In the end, if you think you'll want to add onto your rig in the long run, it might be wise to save for a higher-end aluminum profile cockpit like the Sim-Lab GT1-EVO or P1-X, or other options from Trak Racer, JCL, or SRF.
Nevertheless, at €259 with the seat support, the WS-Pro is €120 cheaper than the base-model GT1-EVO, and €300 less expensive than my configuration with the integrated monitor mount. If you can live with its shortcomings, that's €300 that could go toward a lot of other tasty sim gear.
I will be keeping this cockpit for testing seats, wheel bases, and pedals in the future, so you can expect long-term testing notes (hopefully with DD wheels) sometime in the future.
But as I got more serious about league racing—and as I got older and had a bit more money to spend—I started to wonder if a proper rig would give me better consistency and comfort, if not more speed. In the end, as a pandemic gift to myself, I picked up a cockpit, the midrange Sim-Lab GT1-EVO. But it was a difficult choice: Sim-Lab and other brands like TrakRacer make a wide variety of aluminum chassis that cover a huge range of prices and use cases. I could have gone higher-end and picked up something like the P1-X, or saved a bit of money and looked for a solid wheelstand.
Wheelstands, of course, are simple platforms for a wheel and pedals. In general, they tend to be flimsier than proper cockpits, since they're lighter and not connected to your chair. But a new product from Sim-Lab, the WS-Pro Wheel Stand, looks to bridge the gap between traditional wheel stands and full-on cockpits. Unlike most wheelstands, it's made of heavy-duty 8020 aluminum (the same stuff Sim-Lab's larger cockpits are made of), and it has another neat trick up its sleeve. It's compatible with a matched seat support that essentially turns the humble wheelstand into a full-on budget cockpit.
I went hands-on to see how this lower-priced alternative compares to a higher-end option like the GT1-EVO... and a wheel clamped to my desk.
- Supports Logitech and Thrustmaster wheels plus Fanatec and AccuForce direct drive
- Steel pedal plate fits Fanatec, Heusinkveld (Sprint and Pro), Logitech, and Thrustmaster pedals
- Less flex than other wheelstands due to heavy-duty 8020 aluminum + steel construction
- Optional seat support
Unboxing
Like all Sim-Lab products, the WS-Pro Wheel Stand shipped quickly from the company's HQ in the Netherlands, arriving to me on the west coast of the US in just a few days. The stand and seat support arrived in a total of three boxes, with a total weight of around 27kg / 60 lbs. All of the 8020 aluminum and steel parts were packaged carefully, wrapped in plastic wrap and foam to protect the black powder coat finish. Rather than an installation manual, the package contained a flyer with a QR code that links to the online schematic PDF.Get ready to spend a lot of time with these.
While the stand comes with all the necessary nuts and bolts, it does not come with the Allen keys you need to tighten them. If you've built much IKEA furniture you've probably got a lifetime supply of those laying around already, but just so you're aware, you'll need 5mm and 6mm keys to make sure everything is properly tightened. Other tools you'll want to have at the ready include a tape measure and a spirit level.
Assembly
They're undeniably high-quality, but if you're not technically-minded, building Sim-Lab cockpits can be an exercise in frustration. The schematics suggest that building the WS-Pro will take you about 2-3 hours; it took me nearly 10 hours across two days to build it. Then, while doing more testing for this review, I had to remove the seat and adjust the crossbars again to perfect the seating position—another 45 minutes of tinkering.Bear in mind, I'd already built a GT1-EVO previously, so I was somewhat familiar with working with 8020 aluminum. If you've never built an 8020 rig before, you may be even more frustrated.
I'd recommend printing out Sim-Lab's schematics, reading them through, and taking note of where to add slot nuts before getting started with assembly.
Working with 8020 is a bit like building an erector set: The aluminum pieces have slots running the length of their sides, and you slide slot nuts into these, insert bolts, and tighten. Triangular corner pieces join rails at perpendicular angles, and you can create 45-degree and other kinds of angles with brackets that use the same nuts and bolts. In theory, it's an incredibly easy (if not particularly beautiful) way to build a modular, supremely sturdy rig.
But why is it so frustrating? Well, for one thing Sim-Lab's instructions are entirely pictographic. The diagrams are generally clear enough (with an exception I'll note below), but some simple text instructions would go a long way toward making the process easier for beginners. You know, simple stuff like describing the proper way to insert a slot nut, or how to adjust the pedal plate's depth and angle. Sim-Lab seems aware of this shortcoming, but instead of creating its own instructional videos or updating the installation schematics, it simply embeds Sim Racing Garage walkthrough videos on its product pages. (I get it, I'm a huge fan of Barry's work, but it seems like a less-than-ideal solution.)
Make sure you insert slot nuts before bolting together crossbars, or you might end up having to disassemble your rig to slide them in later.
The schematics also leave out some crucial details that may leave you disassembling portions of the rig you've already built and pounding the floor in frustration. While slot nuts are indicated via their part numbers (B8 and B9), they're not visually represented on the diagrams like the bolts, brackets, and rails are. More than once—even as someone who's built a Sim-Lab rig before—I found myself unscrewing pieces I'd already connected because I'd forgotten to slide the necessary slot nuts in before bolting things together.
Making sure everything is square can also be a challenge. A simple bubble level helps, but you may still find it takes a surprisingly long time—and a lot of tightening, loosening, and re-tightening bolts—to get rid of misalignment in the stand and seat support. If you have a large, flat workbench to work on, that'll help. I'd also recommend leaving all of your bolts just a little loose until you've got everything more or less in place. It's much easier to finalize the alignment of all parts at once. This is something the schematics provide no advice about; you just have to do it yourself and learn along the way.
What's it like on-track?
I'll be honest: I didn't test the WS-Pro with my Fanatec DD1. Not because I didn't want to try it, and not because I didn't think it could take the forces a DD wheel can generate. It was because I didn't want to completely disassemble my GT1-EVO in order to get the DD1 out (especially during a league season). If you read my thoughts on working with 8020 above, you probably get why. It's a pain in the butt.Consumer-grade wheels like the Logitech G27 (and others from Logitech, Thrustmaster, and Fanatec) won't come close to rattling the WS-Pro.
Instead, I hooked up my trusty old Logitech G27 and did a couple days of running in Assetto Corsa, testing out everything from the Mazda MX-5 Cup at Bikernieki (if you haven't tried this combo, what are you waiting for?) to the VRC Formula NA 2021 mod at Road America. Regardless of whether I was driving a car with light or heavy steering, blasting around a smooth track or a bumpy one, the WS-Pro felt rock solid.
Once everything was tightened down properly, there was zero flex in the wheel stand or seat support, even under hard braking and high-G cornering. The G27—admittedly not a very powerful wheel—didn't produce any vibration that I could feel through the seat, and it didn't shake my monitor because there's no way to directly mount a monitor to the WS-Pro (more on that below). And while this is just speculation since I didn't test it directly, based on my experience with the GT1-EVO I feel confident that this rig could also stand up to just about any DD wheel. It's an incredibly solid piece of equipment.
The WS-Pro's pedal deck is mounted as far forward as possible here, and it was just enough to give my long legs room.
I'm a tall guy (6' 1", or 185cm), and generally speaking, I prefer having the wheel pretty close to my chest—in my GT1-EVO, there's a gap of about 8 inches (20cm) between me and the wheel. Naturally, this means the pedals need to be extended as far away from me as possible, to accommodate my long legs. I'm happy to report that the WS-Pro provides enough adjustability that I was able to bring the seat close to the wheel and still had room to push the pedals back without cramping my thighs, though I did have to max out the pedal deck depth. If you prefer being a bit further from the wheel, you should have no problem finding a comfortable position, even if you're a bit taller than I am.
Is it worth it?
At the end of my weekend build project, I'd worked my fingers raw on Allen keys, but I also had a cockpit that cost significantly less than a my GT1-EVO but is quite a bit lighter and nearly as rigid and adjustable. Yep, it's a great value proposition. Especially with the optional seat support.The primary purpose of a sim racing cockpit is to improve your seating position and ensure that you have the same feeling every time you get in "the car." For this reason, the WS-Pro is at its best with the seat support (and a seat, obviously). While the wheel stand portion is impressively heavy and sturdy, without an attached seat your ergonomics are still going to change every time you roll or plop your chair in front of it. With the seat support, you get the full cockpit experience, and at a significant discount compared to other heavy-duty options on the market.
That said, if you only have the budget for the wheel stand portion, it's worth considering. It would be difficult to find an alternative that will stand up to heavy use as well as the WS-Pro. Other stands, like the $256 Next Level Racing Wheel Stand DD, may have extras like casters and gear shifter mounts, but they don't have the WS-Pro's weight or ruggedness.
WS-Pro left, GT1-EVO right.
If you asked me whether I'd trade my GT1-EVO for the WS-Pro, well, that's a tougher question. There's no denying that the WS-Pro + seat support is the most cost-effective way to get a full 8020 rig, but it does have some shortcomings compared to the more advanced cockpits from Sim-Lab and others.
The inability to mount a monitor directly on the rig is a huge downside for me, though it might not be for others—especially VR players. (And monitor users can always pick up a separate monitor stand.) The included wheel plate is also (for the moment) the only option for bolting on a wheel base. While it works with DD wheels, you'll have to mount them from the bottom. More expensive cockpits also allow for side-mounting, which some drivers may prefer for ergonomic reasons.
The WS-Pro's narrower aluminum profiles, which are a square 40x40mm, are lighter but perhaps a bit less rugged than the higher-end rigs' 80x40mm profiles. They also have just three faces with one slot each (one face is smooth, with engraved Sim-Lab branding). In comparison, the WS-Pro uses aluminum pieces with a total of six slots on four faces (two on each 80mm side). This means that the WS-Pro has fewer mounting points for accessories like mouse and keyboard trays, shifter and handbrake mounts, button boxes, or cup holders.
The WS-Pro's narrower 40 x 40mm profile offers fewer mounting points than the GT1-EVO's 80 x 40 profile, and may not hold up as well over time. It's a lot lighter, though.
Some of Sim-Lab's own accessories require two slots on a single face to mount correctly, which means they're not compatible with the WS-Pro at all; others are meant to be mounted to vertical or horizontal aluminum profile and won't work correctly on the WS-Pro's angled legs, even if you rotate the profile so that the slots are on the faces where you want them. DIYers can probably engineer solutions using common 8020 pieces, but the average buyer may not be interested in doing this. Finally, because of the way it's designed, with angled feet, the WS-Pro can't easily be put on casters for quicker movement. Again, DIYing may be possible.
In the end, if you think you'll want to add onto your rig in the long run, it might be wise to save for a higher-end aluminum profile cockpit like the Sim-Lab GT1-EVO or P1-X, or other options from Trak Racer, JCL, or SRF.
Nevertheless, at €259 with the seat support, the WS-Pro is €120 cheaper than the base-model GT1-EVO, and €300 less expensive than my configuration with the integrated monitor mount. If you can live with its shortcomings, that's €300 that could go toward a lot of other tasty sim gear.
Full disclosure
Sim-Lab provided the wheel stand and seat support for us to test, and we purchased a GT Omega RS-6 Simulator Seat to use with the cockpit. We were not paid to write this review. We were not asked to say anything in particular about the products. All the thoughts in this article are my own.I will be keeping this cockpit for testing seats, wheel bases, and pedals in the future, so you can expect long-term testing notes (hopefully with DD wheels) sometime in the future.