Chris
Premium
Qualifying
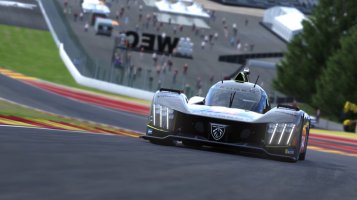
With drivers being limited to a maximum of six laps in a 15 minute qualifying session, the pressure is on to find space and lap cleanly as every lap counts. Erhan Jajovski comfortably put his Talking Door Racing Peugeot on pole position by nearly half a second to teammate Matheus Machado. Michael Stead put in a great lap to hold off Ross McGregor for third, while Davy Vandevenne rounded out the top five for Copenhagen Apex.
Race
As the lights went out, Jajovski and Machado both had good launches and led into the tight bottleneck that is Albert Park turn one, with the Macedonian assuming the - better - racing line and the lead of the race. The first corner was a clean affair for all drivers as only Oli McGown and Kevin Harris made light contact but neither of two suffered from it. Into turn three, Shaun Allan in sixth place broke late and came very close to rear-ending Davy Vandevenne, however good avoiding action from the RaceOnOz driver was taken and the pair narrowly avoided a plane crash. Trident Motorsport's driver Niranjan Kumar took seventh place from Tobias Rohner with a nice 'up-the-inside-of-turn-three jobby'.
Kevin Harris and Oli McGown would again make contact at turn four, only this time with Harris coming off worse for wear as he looped around back on to the racing line briefly before spinning to the outside barriers. Luckily everyone was able to avoid the spinning Harris as he rejoined the race at the back of the field.
Ross McGregor was able to use a superior exit from turn 12 to his advantage, and take third place from Michael Stead, however it all came undone for the Scotsman on the following lap as the first safety car was called out in response to McGregor suffering an all mighty crash when he hit the sausage curb on the inside of the high-speed turn 11, sending him into the air and immediately retiring from the race with terminal damage. The #20 Rondeau car of Sam Smith also suffered terminal damage after he collided heavily into the barriers at turn seven after running wide on the marbles.
Safety Car periods were numerous and would prove critical.
With the safety car coming out so early, it obviously wasn't in anyone's strategic interests to pit, except to repair damage, so the majority of the field stayed out. As the safety car came in, the grid bunched up and were eventually released for green flag racing. Machado looked to have gotten a better jump on the drop of the green flag and fought Jajovski into turn one, the pair went side-by-side, however cool heads prevailed, and Jajovski resumed in the lead with Machado close behind.
The old adage that Safety Cars breed Safety Cars came true, as just one and a half laps later, the race was yellow flagged again, this time for a collision between Sean Rogers and Matthew Wheeler at turn three. Again, this was too early for any sort of strategic advantage to be gained by pitting under a full course yellow.
The safety car would remain out until the start of lap 10. Upon green flag resumption, Jajovski made sure he got the restart right this time as he lead in to the first corner unchallenged. Michael Stead got a better run than Machado in second, however he was not able to get passed. Further back, Shaun Allan was unfortunately clipped by Thomas Hinss and Niranjan Kumar at the apex of turn one, sending Allan into a spin. Thankfully he sustained no serious damage, nor was the Safety Car called out.
A race of attrition. Keeping it clean was vital for a good result.
Lap 11 and the two APIA Racing cars of Jamie Pyatt and Tony Binelli were running close, however in what looked like a coordinated re-shuffle in a bid to maximise their points haul, Pyatt allowed Binelli to overtake him on the run to turn 13. Davy Vandevenne used one of his eight allotments of "Push-to-pass" to get by Michael Stead on the main straight, however he ran wide at turn two and on the slippery marbles he lost grip and spun, leaving Stead with no where to go. The pair collided heavily, forcing Stead to unfortunately retire from the race with terminal suspension damage.
On lap 16 the Safety Car was yet again called out, this time for Jamie Pyatt's stricken APIA Racing machine on the in-field of turn 3 after the Australian got on the accelerator too early, spinning the car and making heavy contact with the barrier, resulting in terminal suspension damage. At this point, pitting under Safety Car conditions was now a viable strategy as it was just a lap or two shy of the predicted pit window. The two front runners were the first to enter the pits, however because of their close proximity, they would have to double stack their stops, meaning they lost important time. The total pit lane loss time was around 52 seconds for a full service, so following them into the pits came nearly half the grid as many saw this as the golden opportunity to lose minimal time as those who remained out would be going significantly slower than race pace.
Michael Nelson made large gains as he elected not to fit fresh tires, meaning his time stopped was significantly less than those around him. Mike Bell was another who benefited as he only fitted the front and rear left side tyres which shortened his stop time too. New race leaders Davy Vandevenne and Chris Stacey remained out, and attempted to gap the field once green flag racing resumed. However, the gaps were not opening up enough, so Stacey elected to pit just a few laps later, with Vandevenne remaining out even longer before pitting: A decision that would prove costly as those who pitted under Safety Car lost substantially less time. Stacey and Vandevenne would rejoin the race in 20th and 18th places respectively.
With Tobias Rohner electing to pit just before the third Safety Car period, he stayed out for the remainder of the race, and by the time the other two Talking Door drivers had filtered their way through the pack, (despite a mistake from Jajovski at turn six, giving Machado the net-lead of the race) the team was running in formation 1-2-3. On older tyres, Rohner would eventually spin at turn four, allowing Machado and Jajovski through. He kept the car running and out of the barriers to hold on to third for the time being.
The drivers would enjoy 16 laps of uninterrupted green flag running, however the final Safety Car came out on the penultimate lap which neutralized the race to the finish. A rather anti-climactic ending to what was a chaotic and highly entertaining race.
Final Result
The final result for the race is somewhat different compared to the order in which the drivers crossed the line as several drivers received post race penalties for indiscretions in qualifying and the race.
Matheus Machado | Talking Door Racing - 1st Place
Q. Congratulations on winning the first race, Matheus! Tell us a little bit about your race, it looked like in the early stages that you and your team mate Erhan Jajovski had things under control at the front, but the Safety cars really shook things up?
A. "Thanks! When qualifying started, we saw all that TDR drivers had a good pace to take the win, so if the race went in without a safety car things would probably have been easier for us. That said, the four safety cars vanished the somewhat considerable lead we had, so it was a matter of fighting back again, especially when we stopped the car, as Erhan overshot his pitbox and delayed both of our stops by about 5-10 seconds, so we had to fight back some positions on track. Fortunately we didn't have to use any of our push-to-pass before, so we just had to be patient and wait for the right moment.
Also, a big part of our win came from Tobias' experience with FCY's in oval races, as he planned out a strategy which put all three TDR cars in a condition to win."
Q. Given that the battle for the lead was relatively close, were there any team orders taking place? Or were you two free to race eachother?
A. "Knowing that we had a pace to run at the front for the whole race, we decided to not attack each other until 15 minutes left to the end to keep a safe gap from everyone else, whoever was doing faster laps would be at front until that point.
"Erhan did a very good first stint, so I just followed him two seconds behind because of a mistake I had until we pitted. Some laps after he overshoot his braking point and lost around 7 seconds there, so just like in the first stint the gap didn't change, to my advantage that time.
The battle with Tobias at the end of the race was also free of team orders, he had worn tires so I could overtake him on pure pace."
Brodie Steen | RaceOnOz Motorsport - 2nd Place
Q. Congratulations on second place Brodie! It looked like you suffered a little bit in the first stint as you were down in 17th place at one point, how did you manage to turn it around so well to take a podium? Was it down to strategy? Or just a matter of keeping things clean?
A. "Thanks! It was a combination of both strategy and keeping out of trouble that got us up here today, plus a bit of luck as the Safety Car came out at just the right time to take a stop. Unfortunately that meant that the double stack would affect Shaun, but it was the only option we could take to minimise the time and position loss.
I actually got quite a good initial launch at the start, but ended up getting boxed in and on the wrong side of the road into turn 2. Really struggled to get into a rhythm in the first few laps, with the constant safety cars and being a bit too cautious in traffic. Once there were a few green flag laps, the nerves settled and I could get some consistent laps together.
After the stop I was making some good progress through the field until I caught up to Mike Bell, ended up getting very familiar with the rear of the Smile Power Racing livery as I could not find a way past... plus we always seemed to use the push to pass boost at the same time.
Quite surprised to end up on the podium here... The last person to get on the podium here on debut after finishing 5th was Mark Webber in 2002!"
Shaun Allan | RaceOnOz Motorsport - 3rd Place
Q. Well Shaun, that was one hell of an eventful race for you. We saw you running last at one point, so for you and your team mate Brodie Steen to have taken 2nd and 3rd in the opening race, you must be wrapped with that result?
A. "I'm extremely wrapped with that result. I was actually happy to get back to 6th just behind Brodie after my misfortunes in the middle of the race. I think I showed that I can race and race cleanly, well except for that little bit over the [finish] line. It was exciting to race back through at the end, but I would much rather be fighting with the first couple of guys."
Championship Standings
So as we say goodbye to Melbourne and it's Grand Prix circuit, the drivers will be taking stock and regrouping for Round 2 in Brazil at the Goiania circuit. A track that is more wide open than the streets of Albert Park so the Safety Car is unlikely to play such a large role, but in the crazy world of SimRacing, anything is possible, and this Championship is wide open!


Stay tuned in two weeks time as we bring you all the wash up and reaction from Round 2 of the Virtual Stock Car Championship!
Last edited:


