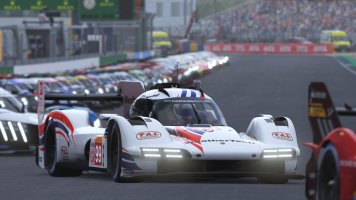
F1 2012 Shanghai - China (Dry)

F1 2012 The Game (Codemasters)
Car
Mclaren
Circuit
Shanghai
Condition
Dry
Distance
-
Aerodynamics
Front Wing Angle: 2
Rear Wing Angle: 1
Braking
Balance: F 49% - R 52%
Pressure: high
Brake Size: standard
Balance
Front Anti-Roll Bar: 1
Rear Anti-Roll Bar: 11
Suspension
Front Ride Height: 6
Rear Ride Height: 6
Front Spring Stiffness: 9
Rear Spring Stiffness: 4
Gearbox
Gear 1: 142 kph
Gear 2: 175 kph
Gear 3: 208 kph
Gear 4: 241 kph
Gear 5: 276 kph
Gear 6: 311 kph
Gear 7: 349 kph
Engine
Fuel Map: Mix3
Alignment
Camber Front: -3.30
Camber Rear: -1.00
Toe Front: 0.14
Toe Rear: 0.26
Tyres
Option
Notes
Time Trial
1.33.819 keyboard but can be improved a lot with proper tools
sector 1 : 24.805
sector 2 : 28.352
sector 3 : 40.662
 
shangai cina
force india

carrer

Condition
Dry

Distance
25%

Aerodynamics
Front Wing Angle:5
Rear Wing Angle:4

Braking
Balance: F 48% - R 52%
Pressure: high
Brake Size:

Balance
Front Anti-Roll Bar: 5
Rear Anti-Roll Bar: 4

Suspension
Front Ride Height: 6
Rear Ride Height: 6
Front Spring Stiffness: 6
Rear Spring Stiffness: 6

Gearbox
Gear 1:138 kph / mph
Gear 2: 170 kph / mph
Gear 3: 201 kph / mph
Gear 4: 234 kph / mph
Gear 5: 267 kph / mph
Gear 6: 304 kph / mph
Gear 7: 347 kph / mph

Engine
Fuel Map: Mix 3

Alignment
Camber Front: -3,20
Camber Rear: -1,10
Toe Front: 0,12
Toe Rear: 0,40

Tyres
option

Notes tcs medium
gears manual
abs off
difficulty legendari
steering racing wheel microsoft
time 1:39:230 q1
 
Recruit, thanks for the setup, helped me a lot.
This setup is based on Recruit`s setup, just some difference to match my driving style.

Car
Williams

Circuit
Shanghai - China

Condition
Dry

Distance
50%

Aerodynamics
Front Wing Angle: 8
Rear Wing Angle: 4

Braking
Balance: F 48% - R 52%
Pressure: High
Brake Size: Standard

Balance
Front Anti-Roll Bar: 3
Rear Anti-Roll Bar: 8

Suspension
Front Ride Height: 3
Rear Ride Height: 3
Front Spring Stiffness: 4
Rear Spring Stiffness: 7

Gearbox
Gear 1: 135 kph / mph
Gear 2: 168 kph / mph
Gear 3: 200 kph / mph
Gear 4: 233 kph / mph
Gear 5: 267 kph / mph
Gear 6: 305 kph / mph
Gear 7: 346 kph / mph

Engine
Fuel Map: Mix 3

Alignment
Camber Front: 3.10
Camber Rear: 1.20
Toe Front: 0.10
Toe Rear: 0.41

Tyres
Primes - Option

Notes
Playing on Legend got 6th on practice with 1.38:207 with prime tyres
Using Option tyres on Q2 got 5th 1.36:902. Q3 started to rain and the AI was using option tyres but my brakes were locking on every corner so i decided to not qualify and got 10th.
By the way Button (AI) was pole on Q2 with 1.35:9xx probably would be even faster on Q3 if it was dry :(

All assists off
Legend
Logitech G27
 
Car
Williams-Renault

Circuit
Shanghai - China

Condition
Dry

Distance
25%

Aerodynamics
Front Wing Angle: 4
Rear Wing Angle: 3

Braking
Balance: F 48% - R 52%
Pressure: Medium
Brake Size: Standard

Balance
Front Anti-Roll Bar: 5
Rear Anti-Roll Bar: 4

Suspension
Front Ride Height: 6
Rear Ride Height: 6
Front Spring Stiffness: 6
Rear Spring Stiffness: 6

Gearbox
Gear 1: 86 mph
Gear 2: 106 mph
Gear 3: 125 mph
Gear 4: 145 mph
Gear 5: 166 mph
Gear 6: 189 mph
Gear 7: 214 mph

Engine
Fuel Map: Mix 2

Alignment
Camber Front: -3.20
Camber Rear: -1.10
Toe Front: 0.12
Toe Rear: 0.41

Tyres
Option

Notes
Practice: 1:39.915 (1st)
Professional Difficulty
Does this also work for Online-Mode, where all cars are the same ?
 
Another nightmare track for slow cars, but we manage or die trying hehe.

Car
Marussia

Circuit
Shanghai - China

Condition
Dry

Distance
Time Trial

Aerodynamics
Front Wing Angle: 2
Rear Wing Angle: 1

Braking
Balance: F 48% - R 52%
Pressure: High
Brake Size: Standard

Balance
Front Anti-Roll Bar: 4
Rear Anti-Roll Bar: 4

Suspension
Front Ride Height: 3
Rear Ride Height: 3
Front Spring Stiffness: 3
Rear Spring Stiffness: 3

Gearbox
Gear 1: 130 km
Gear 2: 168 km
Gear 3: 200 km
Gear 4: 231 km
Gear 5: 265 km
Gear 6: 295 km
Gear 7: 317 km

Engine
Time trial (Rich mix, low fuel weight)

Alignment
Camber Front: -3.50
Camber Rear: -1.50
Toe Front: 0.15
Toe Rear: 0.50

Tyres
Option

Notes
S1: 26.235
S2: 30.675
S3: 43.593
Total: 1:40:503

Notes
-NO DRS
-NO KERS (the car dont have one :p)
-Xbox360 gamepad

ABS and teaction control enabled.

I found suspension height at 3 is the best one. You can do it at 1 or 2 and even go faster but if you exit the track even a little you will not stop the spin.

At 4+ of suspension height i found the gain in safety is very little and still unable to give me enough grip to attack the kerbs. So i went back to 3 that give me a "safety zone".

The stiffness is enough traction to not spin if you have only 1 whell on the kerbs.

Later i will see if i can get 15º on legend AI with this setup... the game is getting crazy with the objectives.
 
Recruit, thanks for the setup, helped me a lot.
This setup is based on Recruit`s setup, just some difference to match my driving style.

Car
Williams

Circuit
Shanghai - China

Condition
Dry

Distance
50%

Aerodynamics
Front Wing Angle: 8
Rear Wing Angle: 4

Braking
Balance: F 48% - R 52%
Pressure: High
Brake Size: Standard

Balance
Front Anti-Roll Bar: 3
Rear Anti-Roll Bar: 8

Suspension
Front Ride Height: 3
Rear Ride Height: 3
Front Spring Stiffness: 4
Rear Spring Stiffness: 7

Gearbox
Gear 1: 135 kph / mph
Gear 2: 168 kph / mph
Gear 3: 200 kph / mph
Gear 4: 233 kph / mph
Gear 5: 267 kph / mph
Gear 6: 305 kph / mph
Gear 7: 346 kph / mph

Engine
Fuel Map: Mix 3

Alignment
Camber Front: 3.10
Camber Rear: 1.20
Toe Front: 0.10
Toe Rear: 0.41

Tyres
Primes - Option

Notes
Playing on Legend got 6th on practice with 1.38:207 with prime tyres
Using Option tyres on Q2 got 5th 1.36:902. Q3 started to rain and the AI was using option tyres but my brakes were locking on every corner so i decided to not qualify and got 10th.
By the way Button (AI) was pole on Q2 with 1.35:9xx probably would be even faster on Q3 if it was dry :(

All assists off
Legend
Logitech G27

Just tried both this setup and Recruit's, my fastest times were 1.37.270 and 1.36.920, respectively. This was done in career practice, 3rd lap of 10, new Primes, no assists, Legend and on a 360 pad.

On the first setup, turns 1, 10 and 13 are a lot easier to do but you lose time on the straights. I haven't tried a full race distance yet, but I'm just guessing that the tire wear might be a little rough. Recruit's setup is certainly faster but you do have to mange the throttle and steering input much more - specifically through T10.

Anyways, those were just my thoughts and thanks for the setups guys!
 
Car
McLaren

Aerodynamics
Front Wing Angle: 11
Rear Wing Angle: 8

Braking
Balance: F 49% - R 51%
Pressure: High
Brake Size: Standard

Balance
Front Anti-Roll Bar: 11
Rear Anti-Roll Bar: 11

Suspension
Front Ride Height: 3
Rear Ride Height: 3
Front Spring Stiffness: 11
Rear Spring Stiffness: 11

Gearbox
Gear 1: 84 mph
Gear 2: 103 mph
Gear 3: 122 mph
Gear 4: 142 mph
Gear 5: 165 mph
Gear 6: 188 mph
Gear 7: 221 mph

Alignment
Camber Front: -3.50
Camber Rear: -1.50
Toe Front: 0.15
Toe Rear: 0.50

Notes
Time Trial only Setup - Time posted: 1:33:440 - 15th on Xbox leaderboard

I always enjoyed this track, and its not so different from previous years. It is slightly harder, specially the first long corner, its not so easy to get that spot on.

I probably lost a couple of tenths round the lap, and a couple more at the hairpin, but its tricky to get every corner 100% perfect, so I am happy with this setup. I hope you do too! Enjoy :geek:
 
Car
Mclaren

Circuit
Shanghai - China

Condition
Dry

Distance
100% Race Career(Season 3)

Aerodynamics
Front Wing Angle:7
Rear Wing Angle:5

Braking
Balance: F 49% - R 51%
Pressure: High
Brake Size: Standard

Balance
Front Anti-Roll Bar: 6
Rear Anti-Roll Bar: 4

Suspension
Front Ride Height: 3
Rear Ride Height: 3
Front Spring Stiffness: 6
Rear Spring Stiffness: 4

Gearbox
Gear 1: 137 kph
Gear 2: 168 kph
Gear 3: 203 kph
Gear 4: 238 kph
Gear 5: 274 kph
Gear 6: 303 kph
Gear 7: 343 kph

Engine
Fuel Map: Mix3
Fuel 4 laps(Q)

Alignment
Camber Front: 3.50
Camber Rear: 1.10
Toe Front: 0.15
Toe Rear: 0.41

Tyres
Options
Notes
1:33.791,(Q3)
Legend Difficulty no aids,driving with G27.
Refined Setup(Updated)
 
Recruit, thanks for the setup, helped me a lot.
This setup is based on Recruit`s setup, just some difference to match my driving style.

Car
Williams

Circuit
Shanghai - China

Condition
Dry

Distance
50%

Aerodynamics
Front Wing Angle: 8
Rear Wing Angle: 4

Braking
Balance: F 48% - R 52%
Pressure: High
Brake Size: Standard

Balance
Front Anti-Roll Bar: 3
Rear Anti-Roll Bar: 8

Suspension
Front Ride Height: 3
Rear Ride Height: 3
Front Spring Stiffness: 4
Rear Spring Stiffness: 7

Gearbox
Gear 1: 135 kph / mph
Gear 2: 168 kph / mph
Gear 3: 200 kph / mph
Gear 4: 233 kph / mph
Gear 5: 267 kph / mph
Gear 6: 305 kph / mph
Gear 7: 346 kph / mph

Engine
Fuel Map: Mix 3

Alignment
Camber Front: 3.10
Camber Rear: 1.20
Toe Front: 0.10
Toe Rear: 0.41

Tyres
Primes - Option

Notes
Playing on Legend got 6th on practice with 1.38:207 with prime tyres
Using Option tyres on Q2 got 5th 1.36:902. Q3 started to rain and the AI was using option tyres but my brakes were locking on every corner so i decided to not qualify and got 10th.
By the way Button (AI) was pole on Q2 with 1.35:9xx probably would be even faster on Q3 if it was dry :(

All assists off
Legend
Logitech G27


very good setup

got to Q3

by the way Roberto, would you mind sharing your advanced wheel settings for the g27

thanks
 
Car
Mclaren
Circuit
Shanghai
Condition
Dry
Distance
-
Aerodynamics
Front Wing Angle: 2
Rear Wing Angle: 1
Braking
Balance: F 49% - R 52%
Pressure: high
Brake Size: standard
Balance
Front Anti-Roll Bar: 1
Rear Anti-Roll Bar: 11
Suspension
Front Ride Height: 6
Rear Ride Height: 6
Front Spring Stiffness: 9
Rear Spring Stiffness: 4
Gearbox
Gear 1: 142 kph
Gear 2: 175 kph
Gear 3: 208 kph
Gear 4: 241 kph
Gear 5: 276 kph
Gear 6: 311 kph
Gear 7: 349 kph
Engine
Fuel Map: Mix3
Alignment
Camber Front: -3.30
Camber Rear: -1.00
Toe Front: 0.14
Toe Rear: 0.26
Tyres
Option
Notes
Time Trial
1.33.819 keyboard but can be improved a lot with proper tools
sector 1 : 24.805
sector 2 : 28.352
sector 3 : 40.662
Is the difference VERY noticeable if i try this setup with a different car?
 
Hi guys. I need help. I can not use the race lane on sector 2. There are a few fast corners and my car does not hold the line. I tried many settings written down here but not get good results. On sector 2, the cars increasing the gap and I can not catch them.

My car is Toro Rosso. And also tried with Ferrari. On the streights, my speed is good but on the fast corners not so good. Please help me:(
 
very good setup

got to Q3

by the way Roberto, would you mind sharing your advanced wheel settings for the g27

thanks
Thanks tragow.

Here's my settings.
Logitech Profiler:
Global Intensity 100%
0%
0%
Activate central force - checked - 0%
Rotation 271º
Allow game to adjust - unchecked

I haven't really found it 100% what i want, on the game i've just change the linearity to 5% dead zone to 1% and saturation 2%. Without using dead zone it looks better but sometimes makes me go left and right when i really want just to keep going straight lol.
 
Career 3rd Race 1st Season

Torro Rosso

XBOX 360 controller

Aerodynamics:
Front Wing Angle:5
Rear Wing Angle: 4

Braking:
Balance: F: 49% - R: 51%
Pressure: Hard
Brake Size: Standard

Balance:
Front Anti-Roll Bar: 6
Rear Anti-Roll Bar: 9

Suspension:
Front Ride Height: 2
Rear Ride Height: 2
Front Spring Stiffness: 6
Read Spring Stiffness: 8

Gearbox:
Gear 1: 138 Kph
Gear 2: 172 Kph
Gear 3: 205 Kph
Gear 4: 240 Kph
Gear 5: 273 Kph
Gear 6: 307 Kph
Gear 7: 351 Kph

Engine:
Fuel Map: Mix 3
Fuel: 3-5 Laps for Q

Alignment:
Camber Front: -3.50
Camber Rear: -1.20
Toe Front: 0.12
Toe Rear: 0.32

Practice- 1:41.966
Q1 - 1:40.241
Q2 - 1:39.943
Q3 - 1:39.426

times with Kers and DNS enabled
 
Car: Mercedes
Condition: Dry

Aerodynamics
Front Wing Angle: 10
Rear Wing Angle: 3
Braking
Balance: F 47% - R 53%
Pressure: High
Brake Size: Small
Balance
Front Anti-roll Bar: 5
Rear Anti-roll Bar: 11
Suspension
Front Ride Height: 1
Rear Ride Height: 1
Front Spring Stiffness: 4
Rear Spring Stiffness: 10
Gearbox
Gear 1: 142 kph / xxx mph
Gear 2: 175 kph / xxx mph
Gear 3: 207 kph / xxx mph
Gear 4: 238 kph / xxx mph
Gear 5: 273 kph / xxx mph
Gear 6: 308 kph / xxx mph
Gear 7: 348 kph / xxx mph
Engine
Throttle map: Fast
Fuel: 4
Alignment
Camber front: -3.50
Camber rear: -1.50
Toe front: 0.12
Toe rear: 0.35

Notes

Quick Race Mod with Tyre and Fuel Simulation

Managed a 1.35.546 but could easily get into 1.34s (TT)
 
Car
McLaren

Aerodynamics
Front Wing Angle: 7
Rear Wing Angle: 5

Braking
Balance: F 49% - R 51%
Pressure: High
Brake Size: Standard

Balance
Front Anti-Roll Bar: 3
Rear Anti-Roll Bar: 11

Suspension
Front Ride Height: 1
Rear Ride Height: 1
Front Spring Stiffness: 9
Rear Spring Stiffness: 9

Gearbox
Gear 1: 142 kph
Gear 2: 173 kph
Gear 3: 207 kph
Gear 4: 238 kph
Gear 5: 279 kph
Gear 6: 311 kph
Gear 7: 346 kph

Alignment
Camber Front: -3.50
Camber Rear: -1.50
Toe Front: 0.05
Toe Rear: 020

Notes.my time is I'm in top 20 1,33.4
 
Car
Caterham

Circuit
Shanghai

Condition
Dry

Distance


Aerodynamics
Front Wing Angle:2
Rear Wing Angle:1

Braking
Balance: F50% - R 50%
Pressure: standard
Brake Size: standard

Balance
Front Anti-Roll Bar: 11
Rear Anti-Roll Bar: 11

Suspension
Front Ride Height: 1
Rear Ride Height: 1
Front Spring Stiffness: 11
Rear Spring Stiffness: 11

Gearbox
Gear 1: 140 kph /
Gear 2: 170 kph /
Gear 3: 201 kph /
Gear 4: 233 kph /
Gear 5: 267 kph /
Gear 6: 304 kph /
Gear 7: 337 kph /

Engine
Fuel Map: Mix 3

Alignment
Camber Front: -3,5
Camber Rear: -1,5
Toe Front: 0,05
Toe Rear: 0,20

Tyres
option

PS3,career,difficulty expert
Q1-1,37,708 13th option tyres
Q2-1,37,104 13th option tyres
 

Latest News

Are you buying car setups?

  • Yes

  • No


Results are only viewable after voting.
Back
Top