#include "../../../renderer/shaders/atmosphere.cg"
#include "../../../renderer/shaders/lighting.cg"
#include "../../../renderer/shaders/shadowmapping.cg"

// Vertex to pixel shader structure
struct v2p
{
  float4 Position      : TEXCOORD4; //POSITION;
  float3 normal        : TEXCOORD5;
  float3 RayleighColor: TEXCOORD2;
  float3 MieColor      : TEXCOORD3;
  float2 tc0            : TEXCOORD0;
  float3 Direction      : TEXCOORD1;
  float  extinction    : TEXCOORD6;
  float2 color        : COLOR;
  //float2 vpos          : VPOS;
};

void main(

  // In
  in v2p IN,

  // Out
  out float4 outColor  : COLOR0,
#ifdef CSM_MRT
  out float4 outShadow  : COLOR1,
#endif

  // Constants
  uniform sampler2D baseMap : TEXUNIT0,
  uniform sampler2D Mapa : TEXUNIT1,
  uniform sampler2D Mapb : TEXUNIT2,
  uniform sampler2D Mapc : TEXUNIT3,
  uniform sampler2D Mapd : TEXUNIT4,
  uniform float3    lightDirection,
  uniform float3    lightColor,
  uniform float3    lightAmbient,
  uniform float3    eyePosW,
  uniform float    atmosRayleigh,
  uniform float    atmosMie,
  uniform float3    Ke,
  uniform float3    Ka,
  uniform float3    Kd,
  uniform float3    Ks,
  uniform float    shininess,
#ifdef CSM
uniform sampler2D    shadowArray  : TEXUNIT7,
  uniform float4x4    smTexMatArray[SM_MAX_SPLITS],
  uniform float smSplits,
#endif
  uniform float    sunny,
  uniform float    exposure,
  uniform floatscale
)
{
  float3 skyColor;

  float4 mixa, mixb;
  float pi=3.141592654;

  float2 RotationMatrix = float2(cos(0.25*pi),-sin(0.25*pi));

#ifdef CSM
  float shadow;
  // Output shadowing and normals
  shadow=GetShadowFactor(IN.Position, IN.normal,shadowArray, smTexMatArray, smSplits, lightDirection)*sunny;
#else
  const float shadow=sunny;
#endif

  // Get sky gradient color
  skyColor.rgb=GetSkyColor(lightDirection,IN.Direction,IN.RayleighColor,IN.MieColor,atmosRayleigh,atmosMie,lightColor,lightAmbient);

  // Get base texture color
  float4 baseCol=tex2D(baseMap,IN.tc0);

  float2 tc=float2(IN.Position.x,IN.Position.z)*scale;

  float4 Cola=tex2D(Mapa,tc.xy);
  float4 Colb=tex2D(Mapb,tc.xy);
  float4 Colc=tex2D(Mapc,tc.xy);

  float4 Colarot=tex2D(Mapa,(tc*RotationMatrix));
  float4 Colbrot=tex2D(Mapb,((tc*RotationMatrix)*RotationMatrix));
  float4 Colcrot=tex2D(Mapc,(((tc*RotationMatrix)*RotationMatrix)*RotationMatrix));
float4 mixmapsa, mixmapsb, mixmapsc;


if (((baseCol.g-1)*2) >0)
mixmapsa=Cola;
else
mixmapsa=Colarot;
if (((baseCol.g-1)*2) >0)
mixmapsb=Colb;
else
mixmapsb=Colbrot;
if (((baseCol.g-1)*2) >0)
mixmapsc=Colc;
else
mixmapsc=Colcrot;


mixa = lerp(mixmapsa, mixmapsb, baseCol.a);
mixb = lerp(mixmapsb, mixmapsc, baseCol.a);
  float4 diffusecol=lerp(mixa, mixb, baseCol.a);

  //float4 baseCol=tex2D(baseMap,IN.tc0*RotationMatrix);

  // Lighting
  float3 ambient,diffuse,specular;
  LightingSun(Ke,Ka,Kd,Ks,shininess,lightDirection,lightColor,lightAmbient,IN.Position.xyz,IN.normal,eyePosW,
    ambient,diffuse,specular);

  // Store shadowed color in COLOR0, lit color additions (spec+diff) in COLOR1
  float3 sdColor=diffusecol*(diffuse*baseCol.r)+specular*diffusecol.a;
  float3 ambientColor=diffusecol*((ambient*baseCol.r)+Ke);

  // HDR toning of sky (for LDR shaders)
  //skyColor.rgb=1.0-exp(-exposure*skyColor.rgb);


#ifdef CSM_MRT
  // Mix sky with texture color based on atmospheric influence
  outColor.rgb=lerp(skyColor,ambientColor,IN.extinction);
  //outShadow.rgb=lerp(skyColor*(IN.extinction),sdColor,IN.extinction);
  outShadow.rgb=sdColor*IN.extinction;
  outShadow.a=shadow;
//outColor.rgb=outShadow.a;
//outShadow.rgba=0;

  // Blending
  outColor.a=1; //baseCol.a;
  //outShadow.a=1; //baseCol.a;
#else


  // Mix sky with texture color based on atmospheric influence
  outColor.rgb=lerp(skyColor,ambientColor+sdColor*shadow,IN.extinction);
  // Blending
  outColor.a=1;
#endif
}


 Sponsored Pimax Crystal Light Giveaway: Win A Freshly-Unveiled High-End VR HeadsetTwo new VR headsets join the Pimax lineup: The Chinese manufacturer revealed both the Crystal...
 Wisniewski Wins Twice at DTM Esports Pro’s Penultimate RoundFive of the six DTM Esports Pro rounds are complete for 2024, with Nikodem Wisniewski winning...
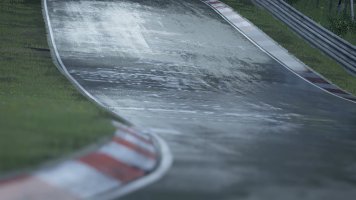
 Luke Whitehead: Meet The 24-Hour Solo Sim Racer Who Finished 3rdTo celebrate the launch of the Nürburgring 24h pack on Assetto Corsa Competizione, publishers...